I built a recording studio!
Around a year ago, Mrs A and I moved into a coastal village to the west of Swansea. We bought our house directly from a builder and in the contract to purchase was a requirement to build a timber frame outbuilding for me to build my own space for recording and mixing.
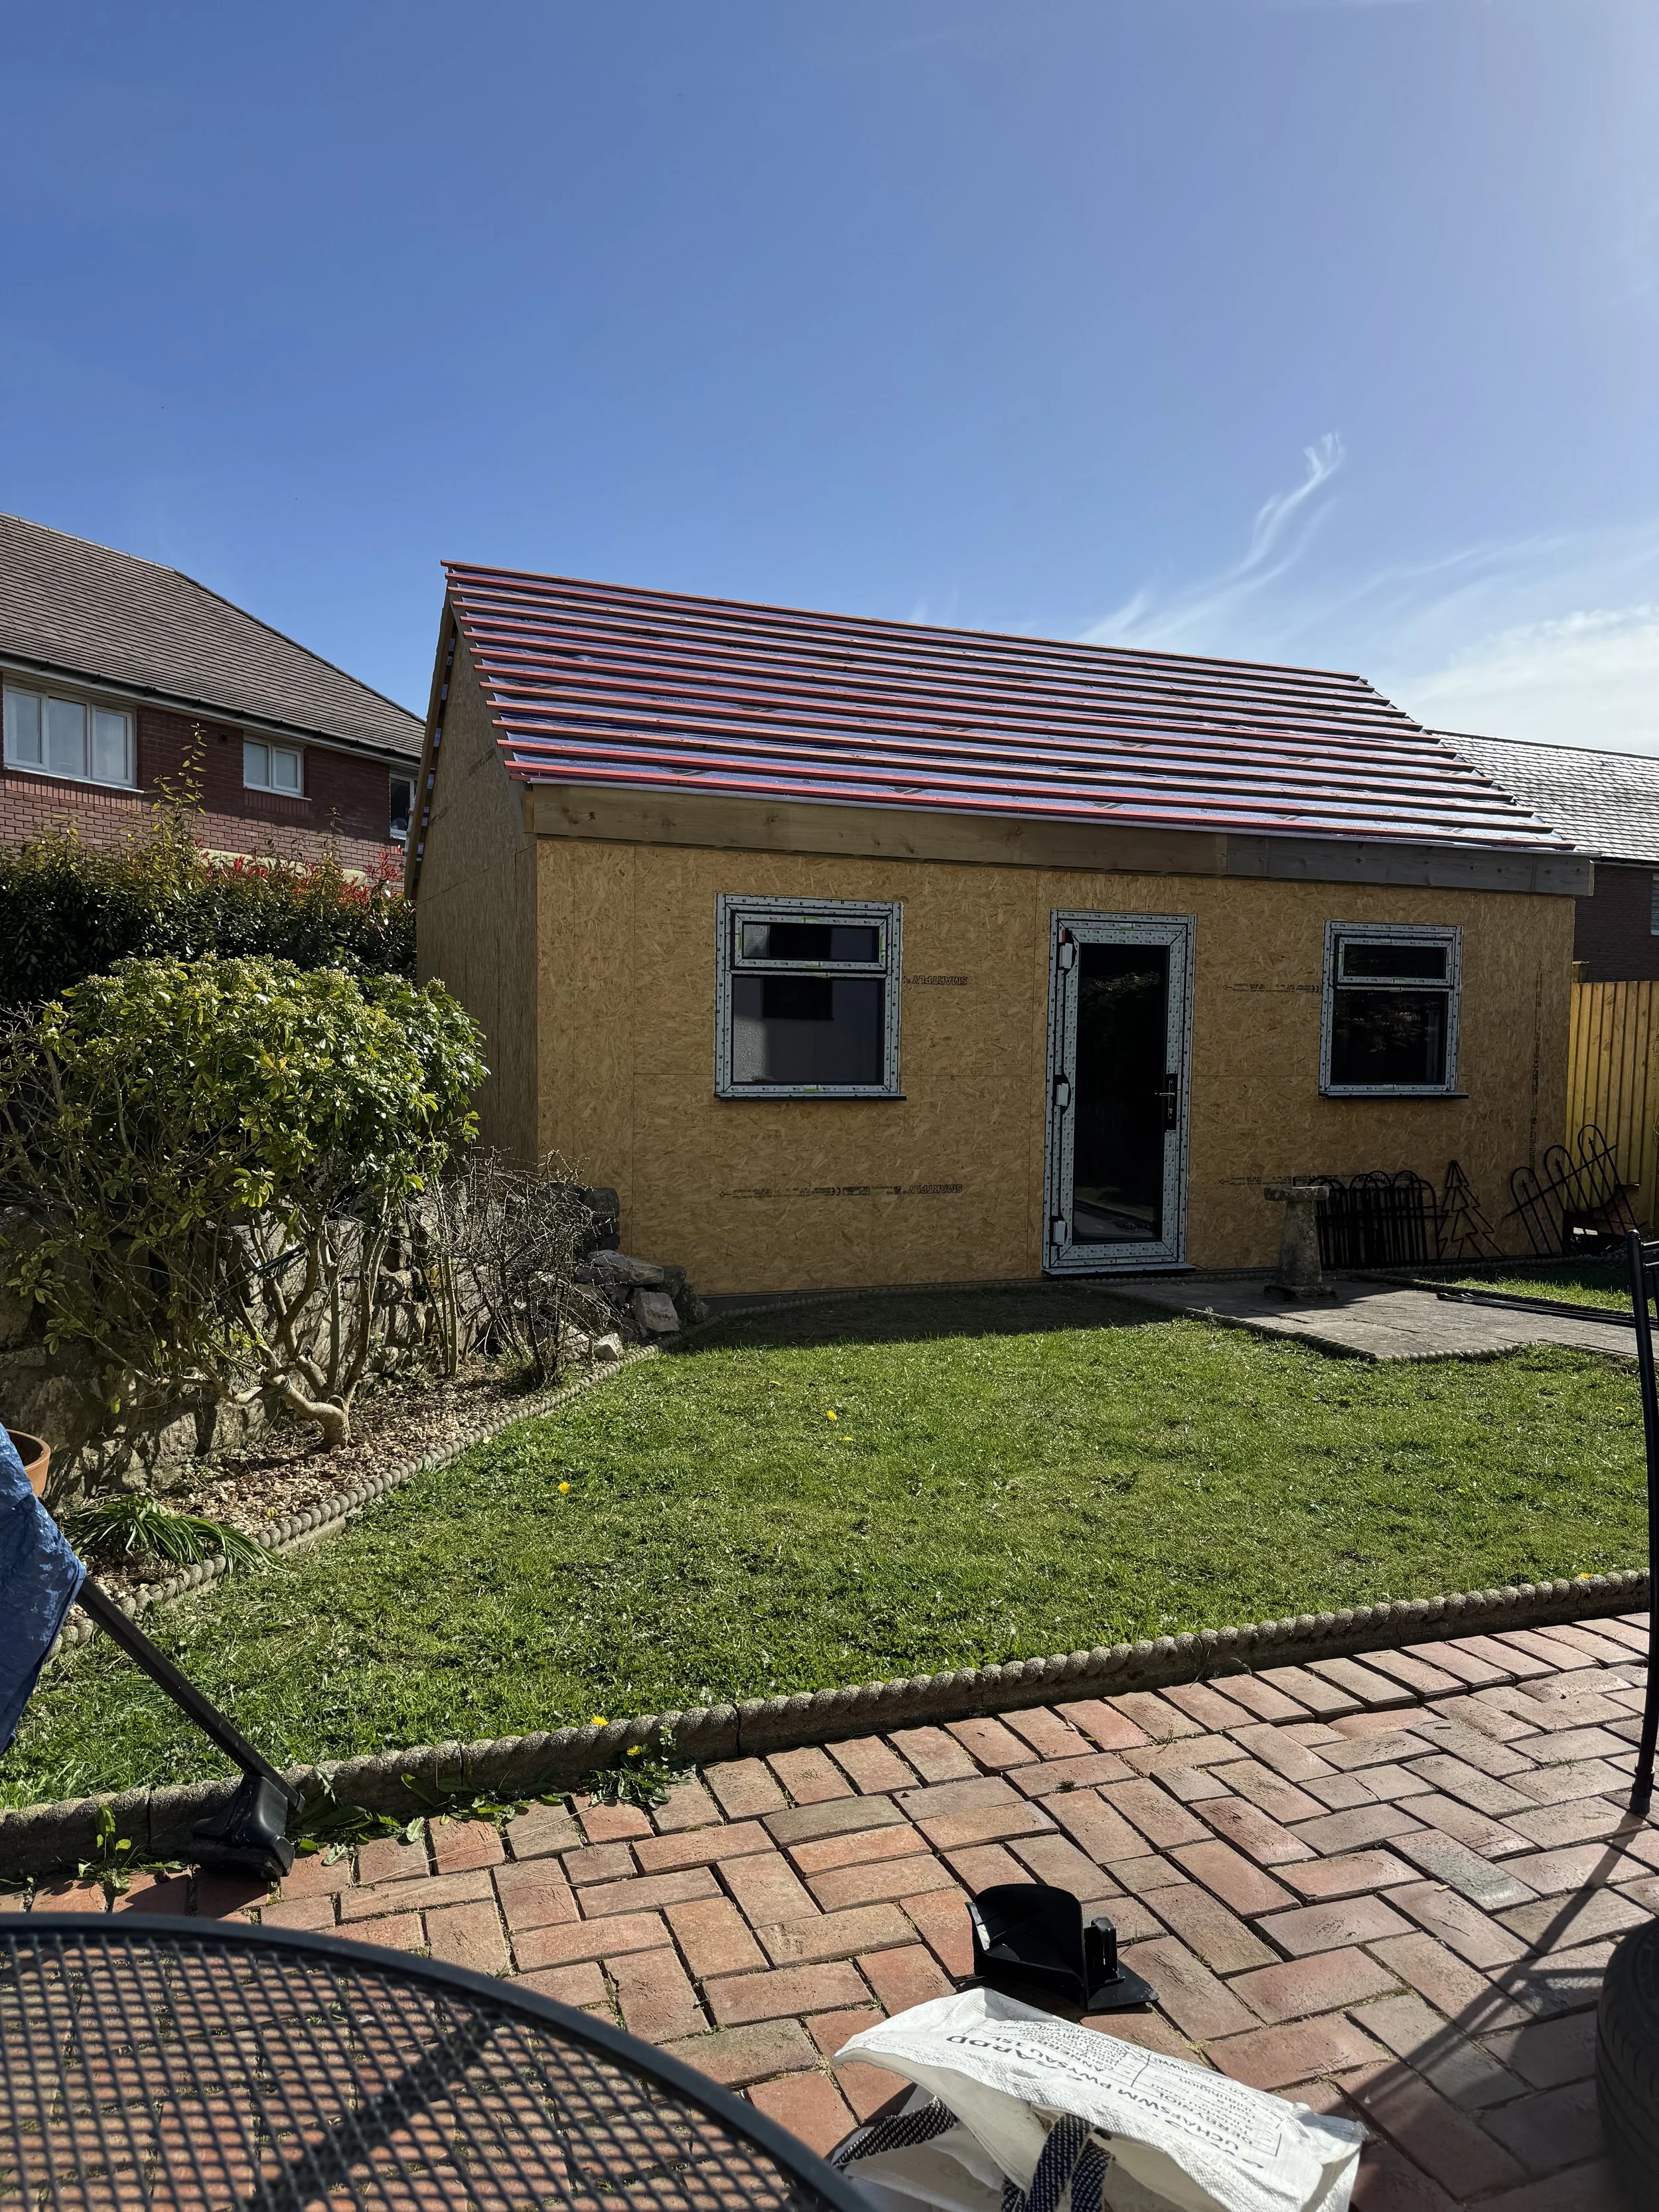
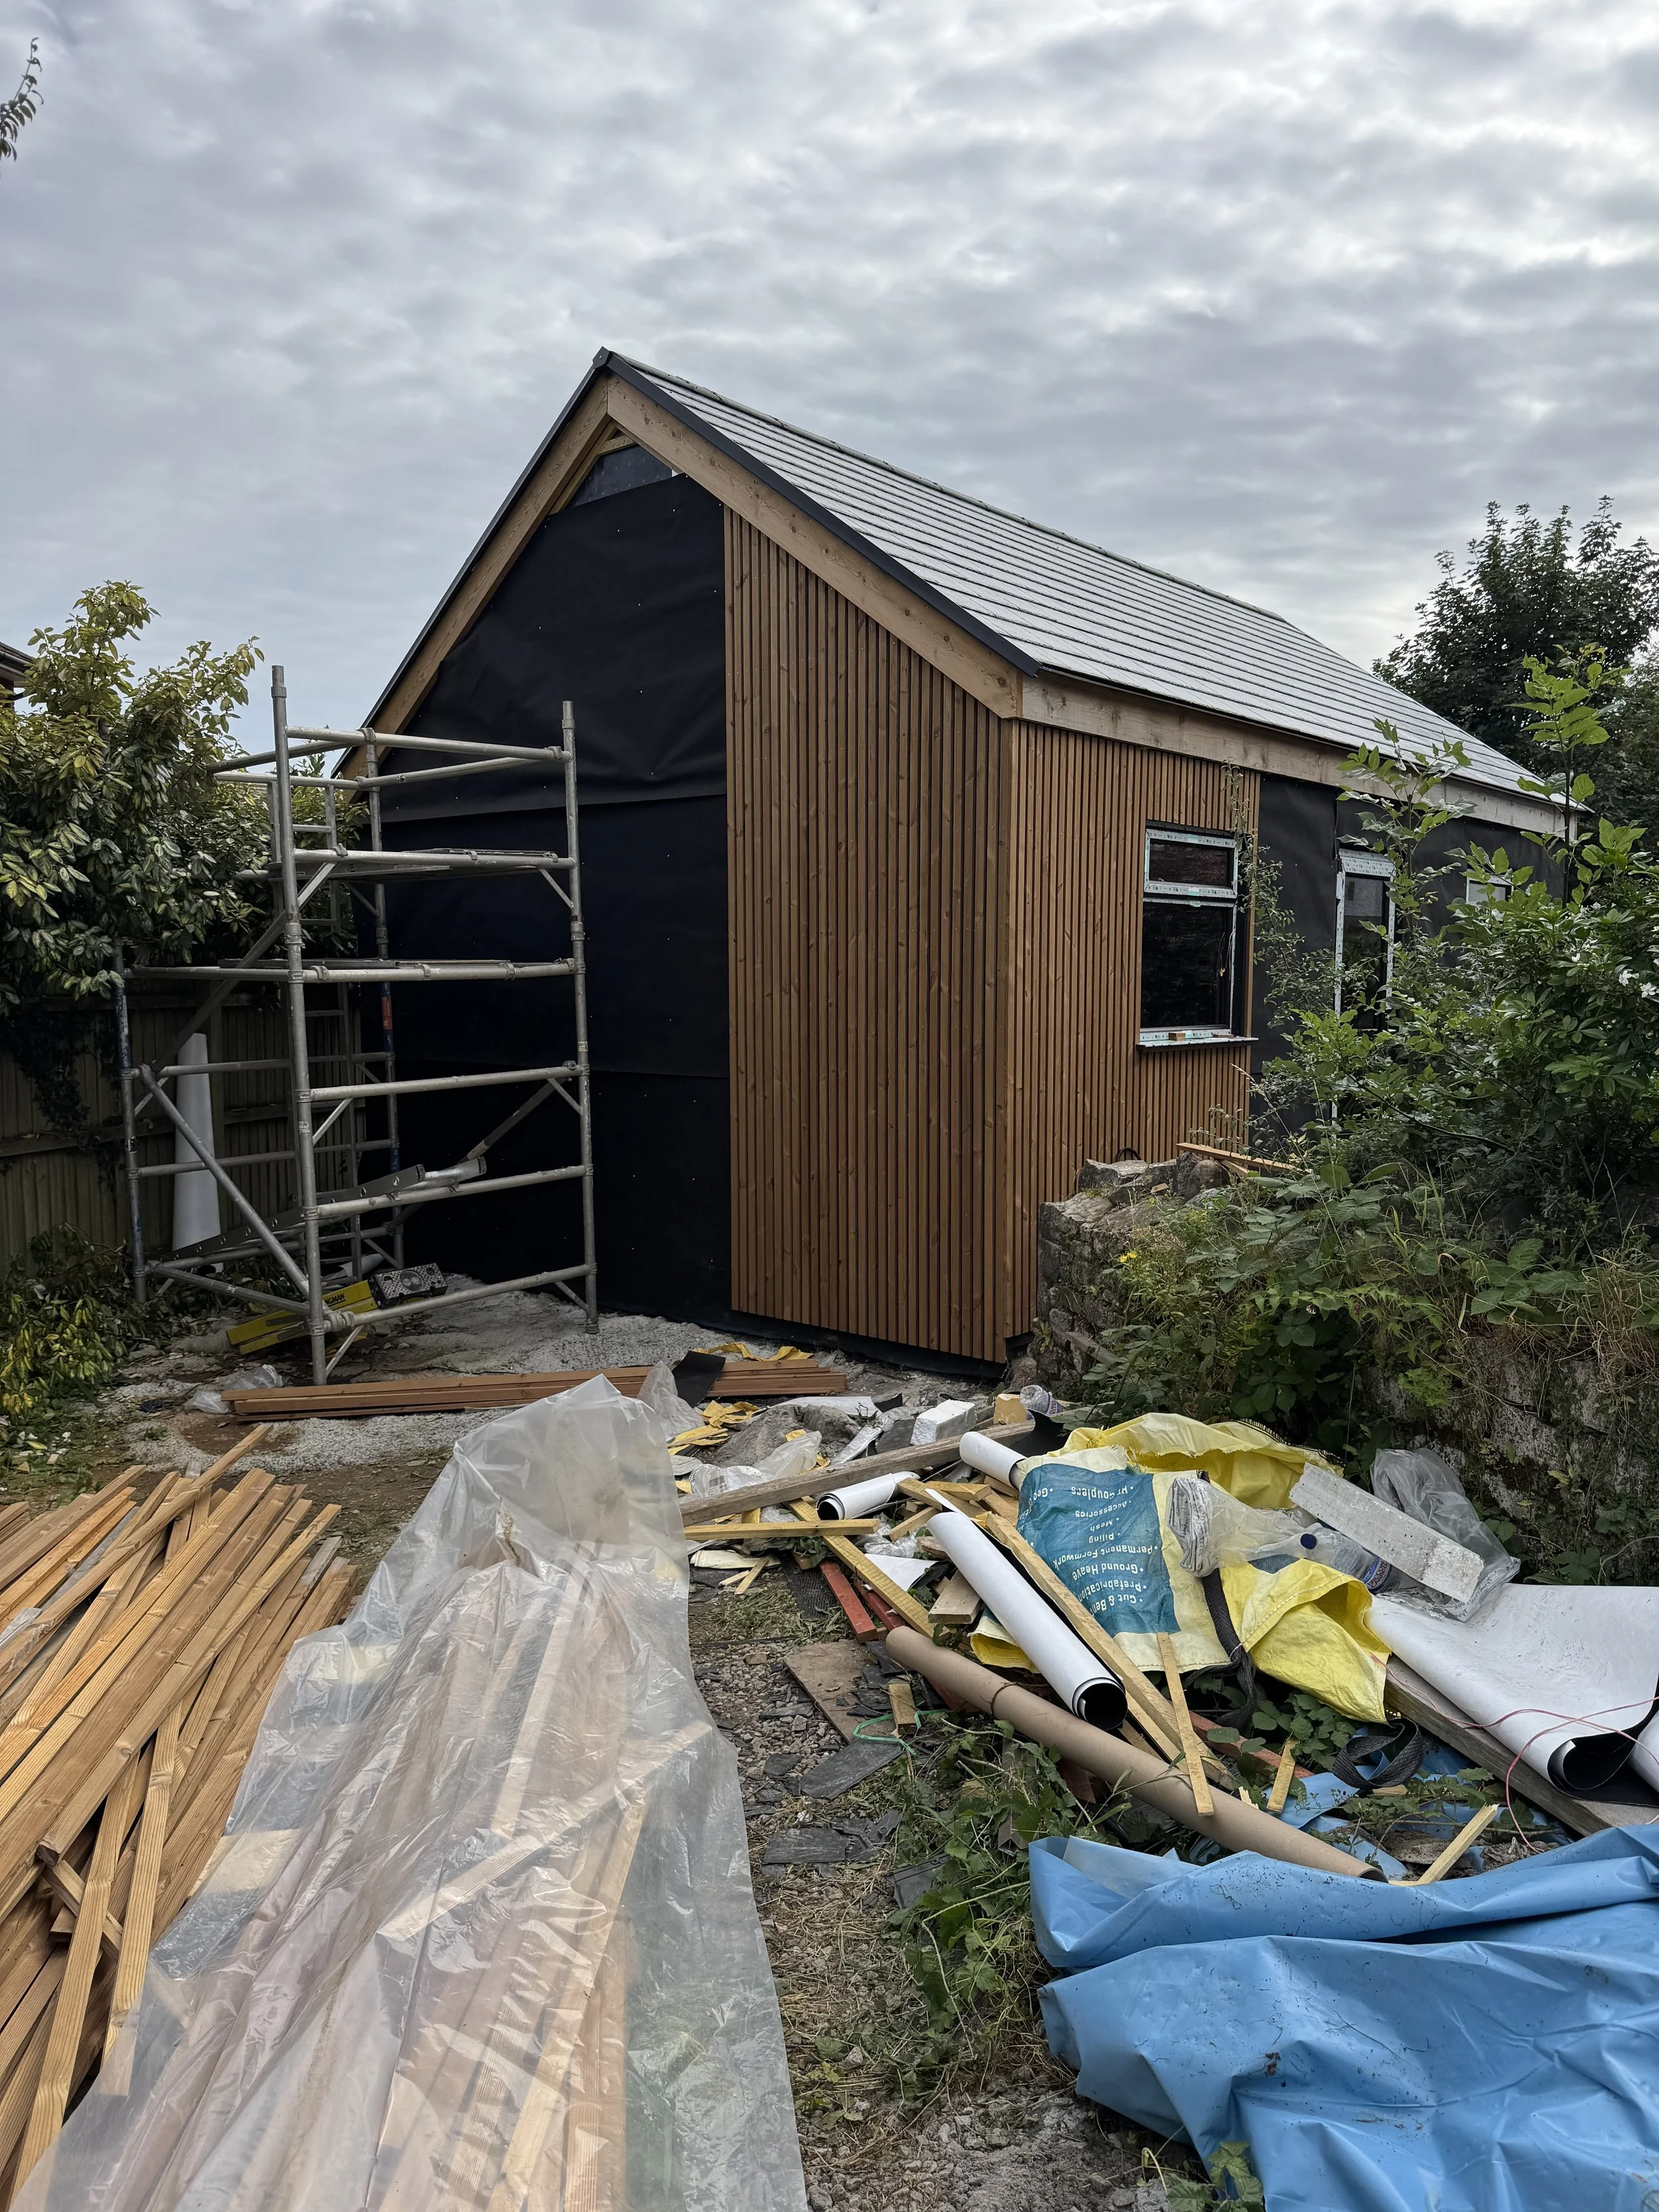
The outbuilding prior to cladding, tiling and drainage being fitted
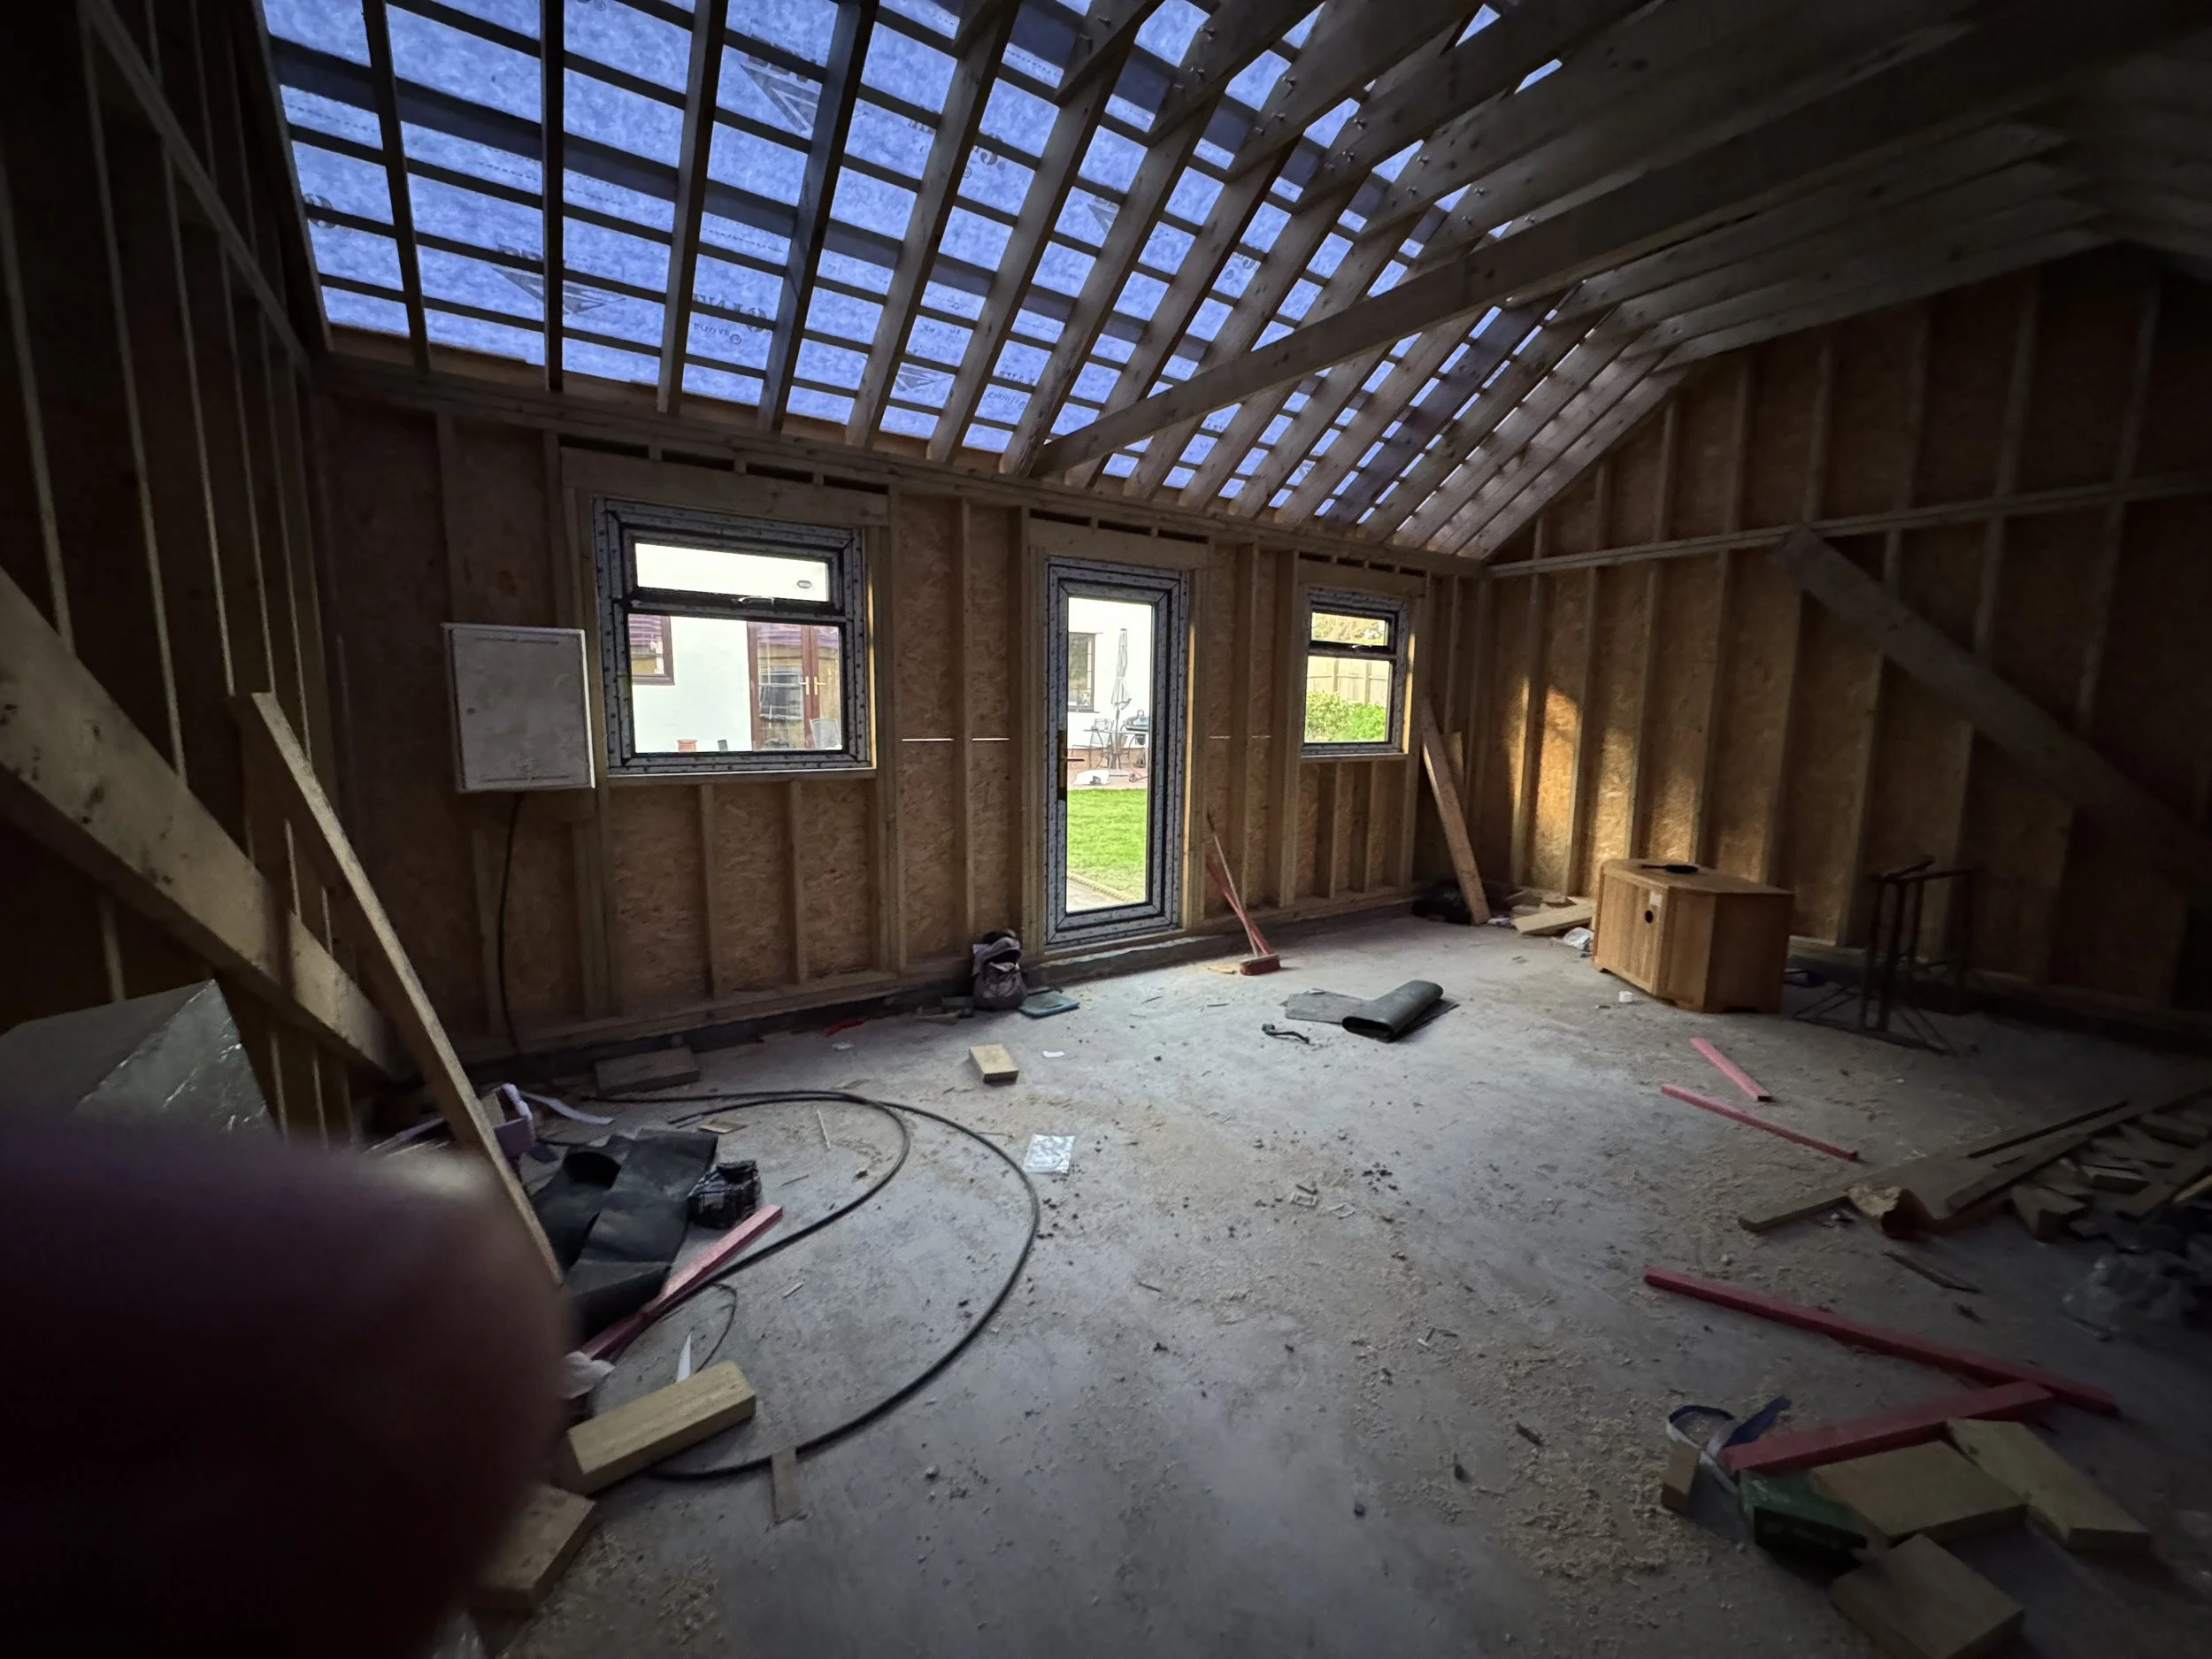
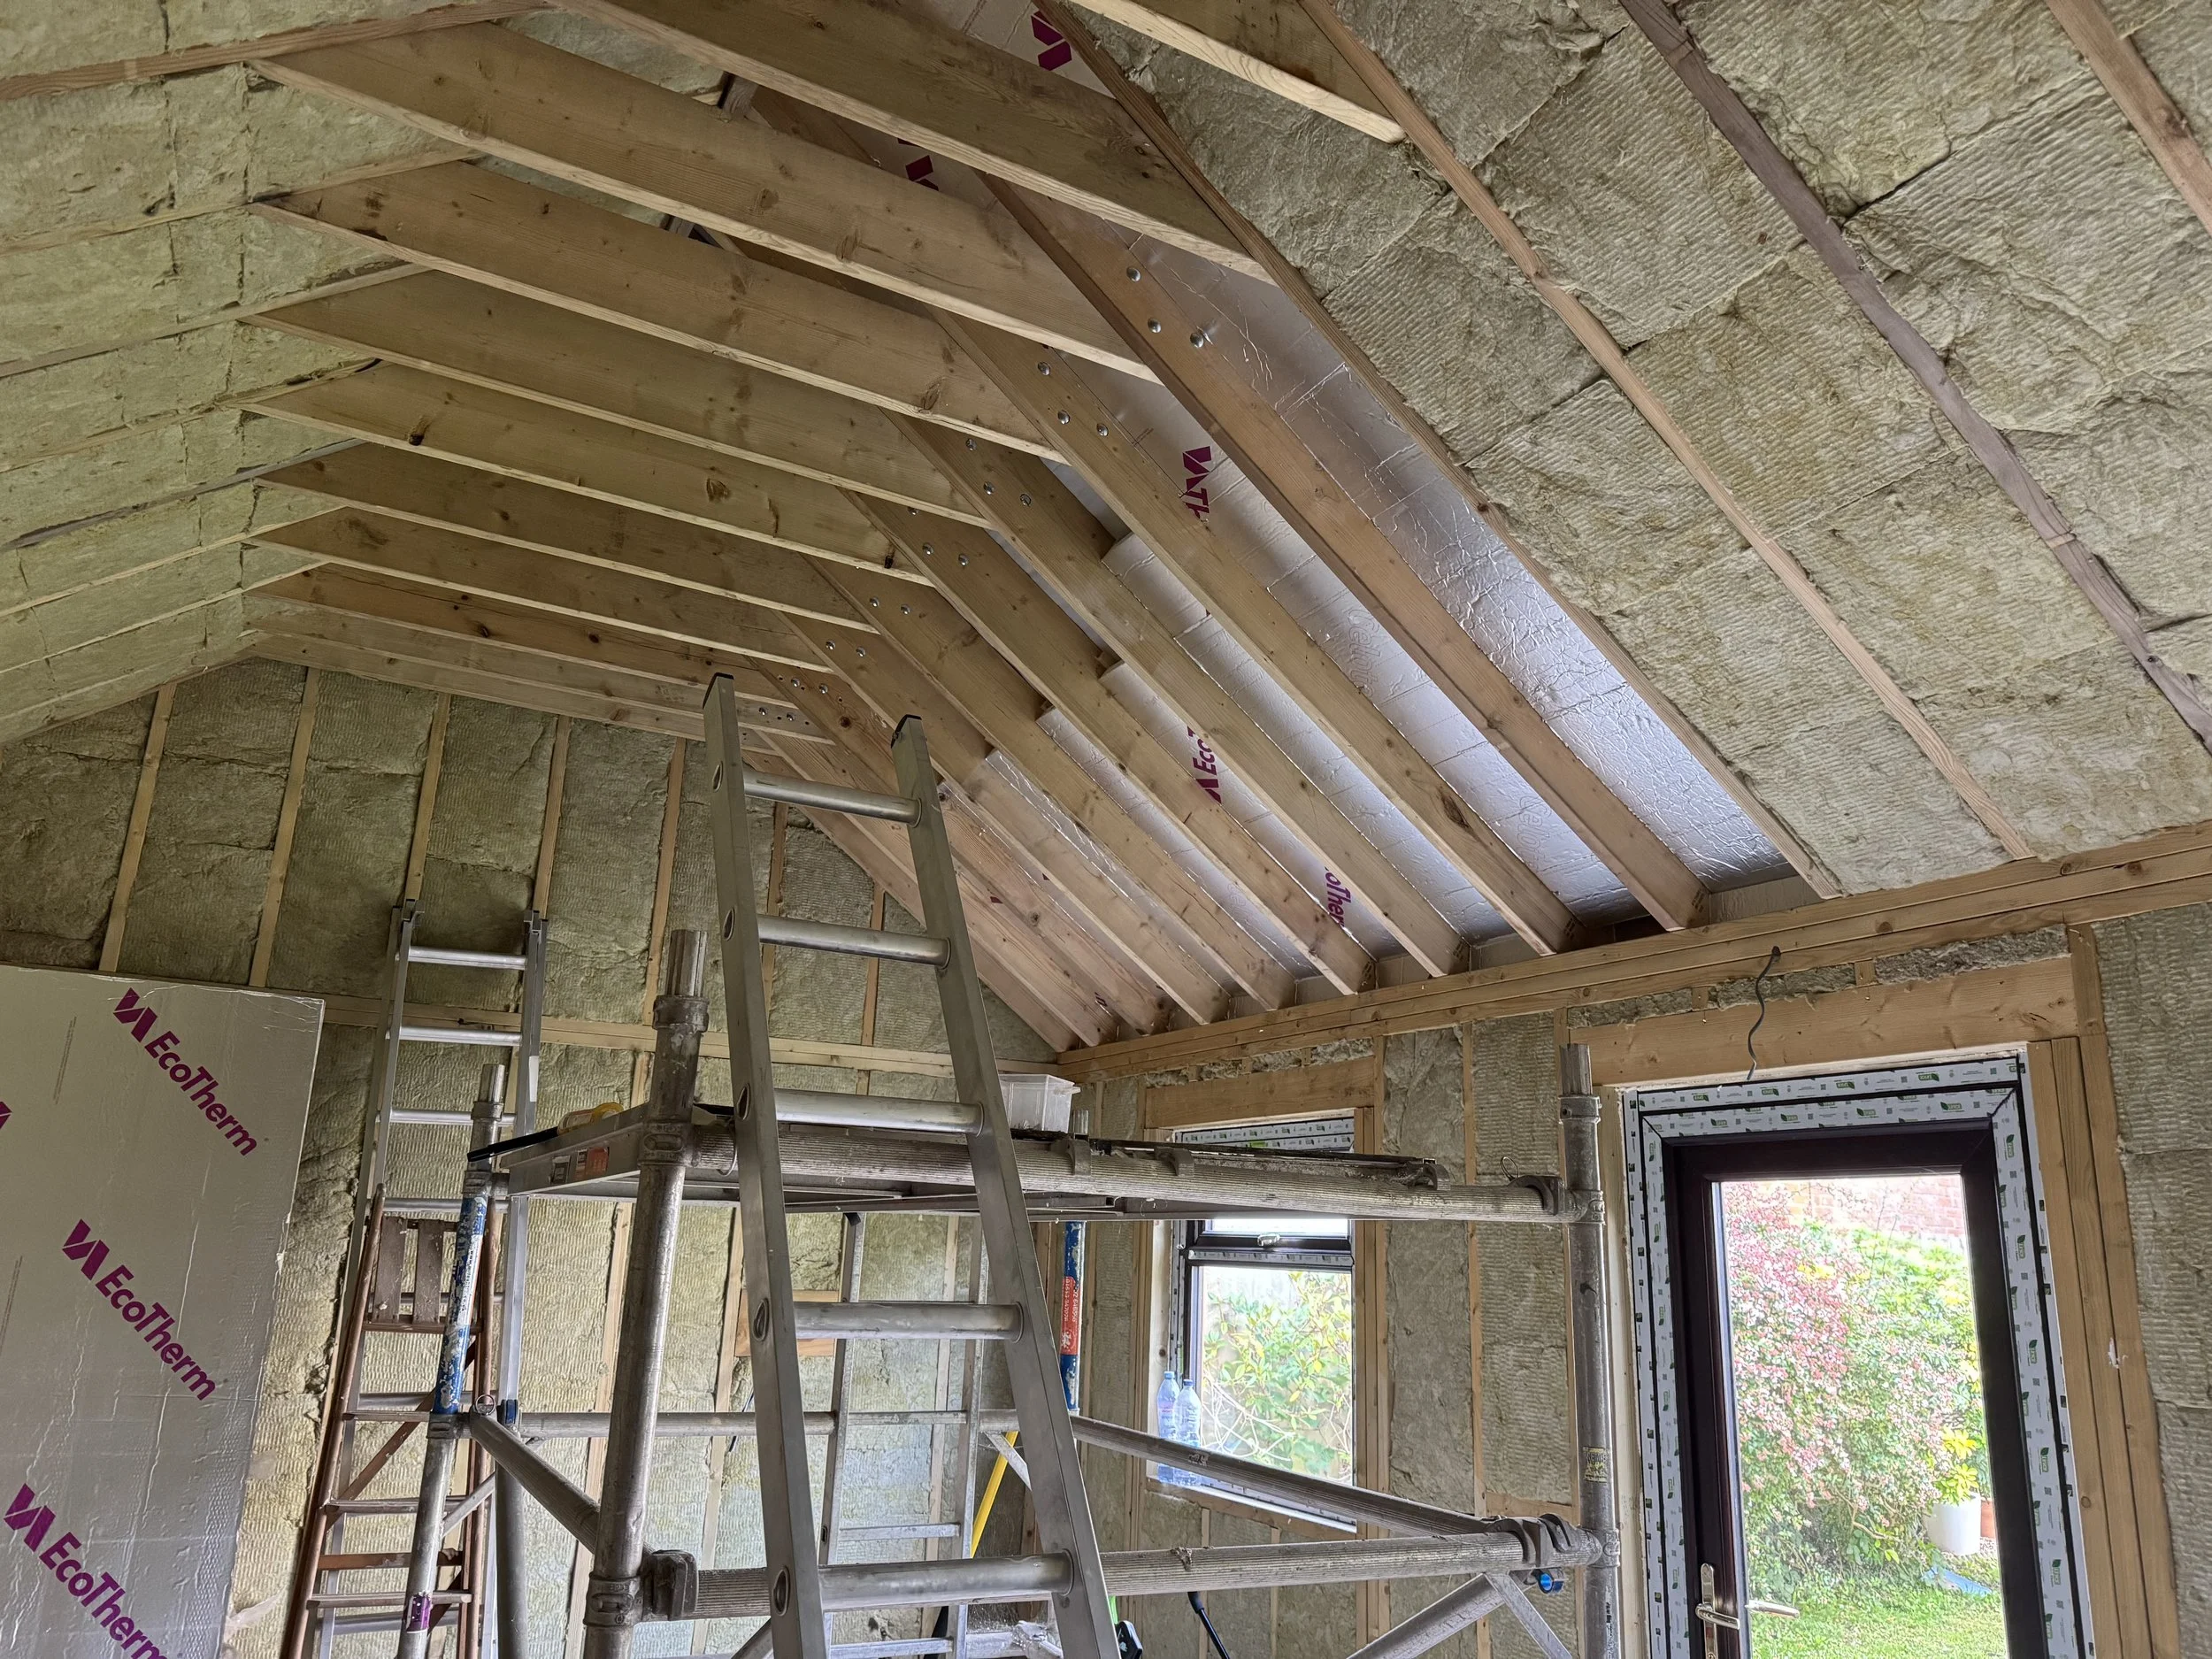
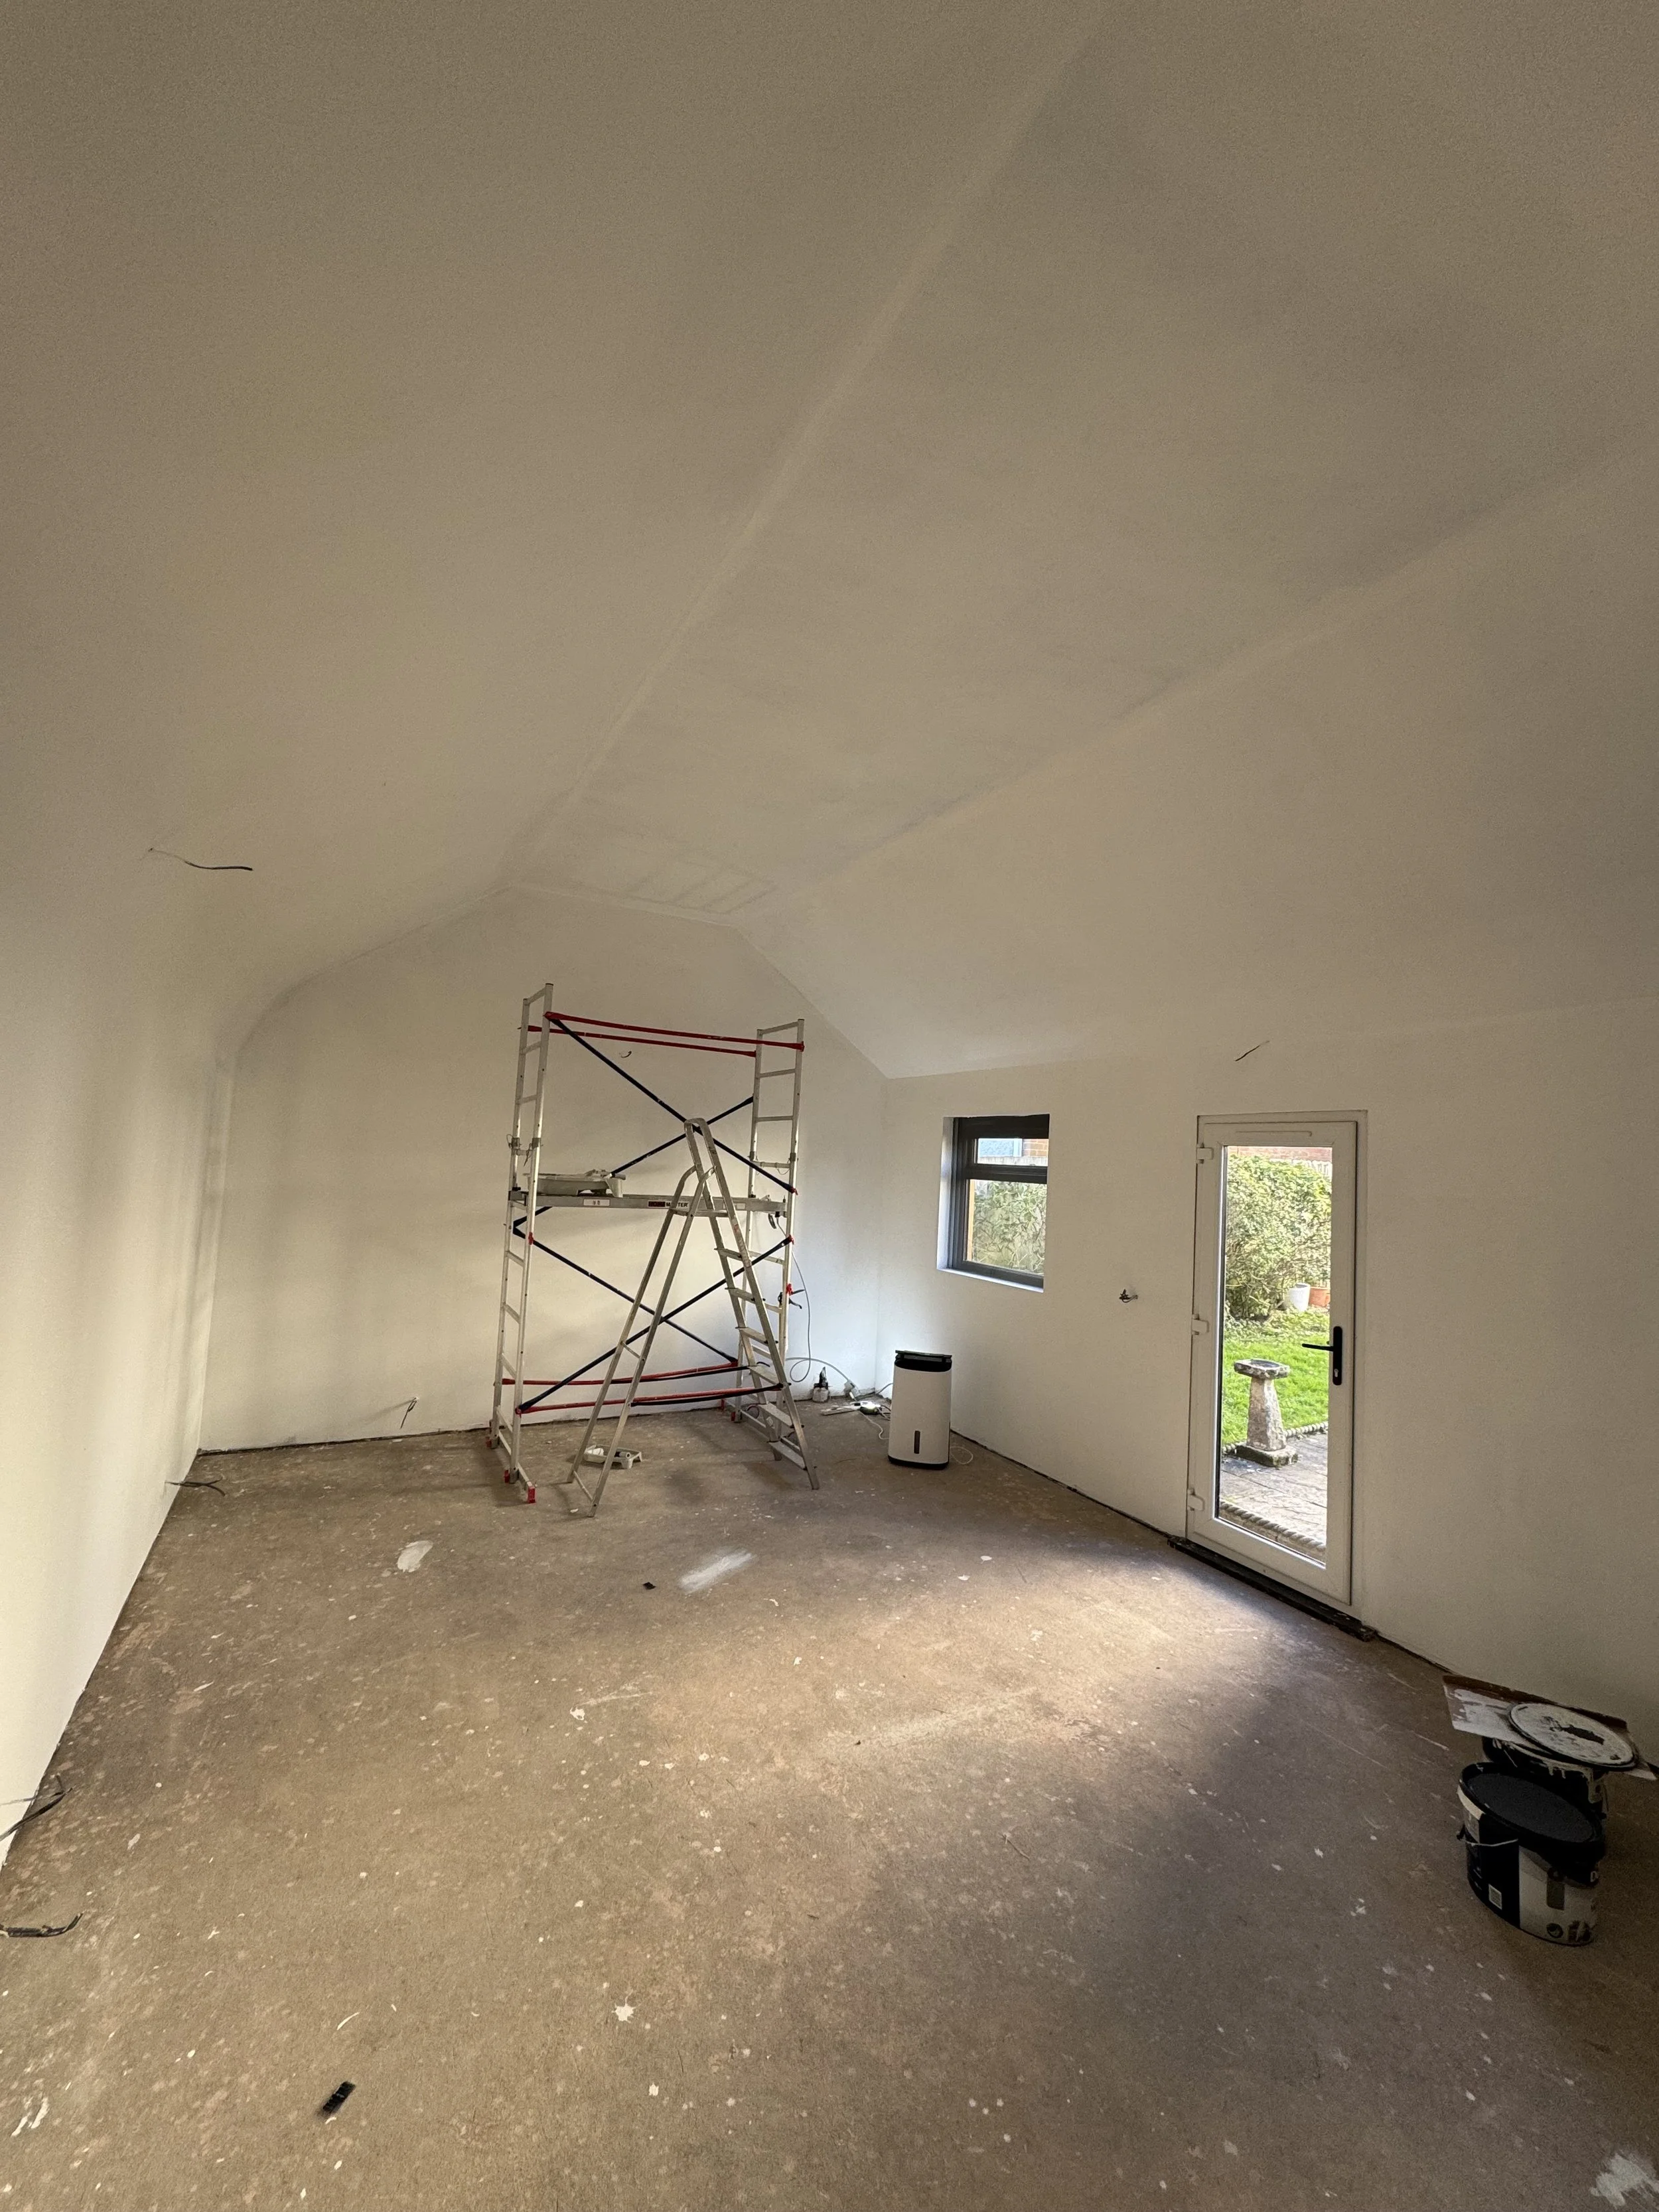
View from the inside March 2025
I chose to do all the internal work myself. This blog post is a journal of how I did it, and what I learnt from the experience.
I had been dreaming of creating my own creative space separate to our home for many years and as Sarah will testify, producing music inside the family home throws up many problems: Stolen bedrooms or dining rooms, late night mixing on headphones and never having enough room to record things properly, to name a few.
A separate creative space has very few drawbacks. The only obstacles being planning laws and being able to afford it. After a decade of saving I finally took the plunge.
To begin with, I had to ‘insulate’ the building not just for the obvious need to save on energy, but also to ensure that any noise made inside the studio was not going to be a nuisance for my neighbours. It would also help isolate the inside of the studio from external noise as well.
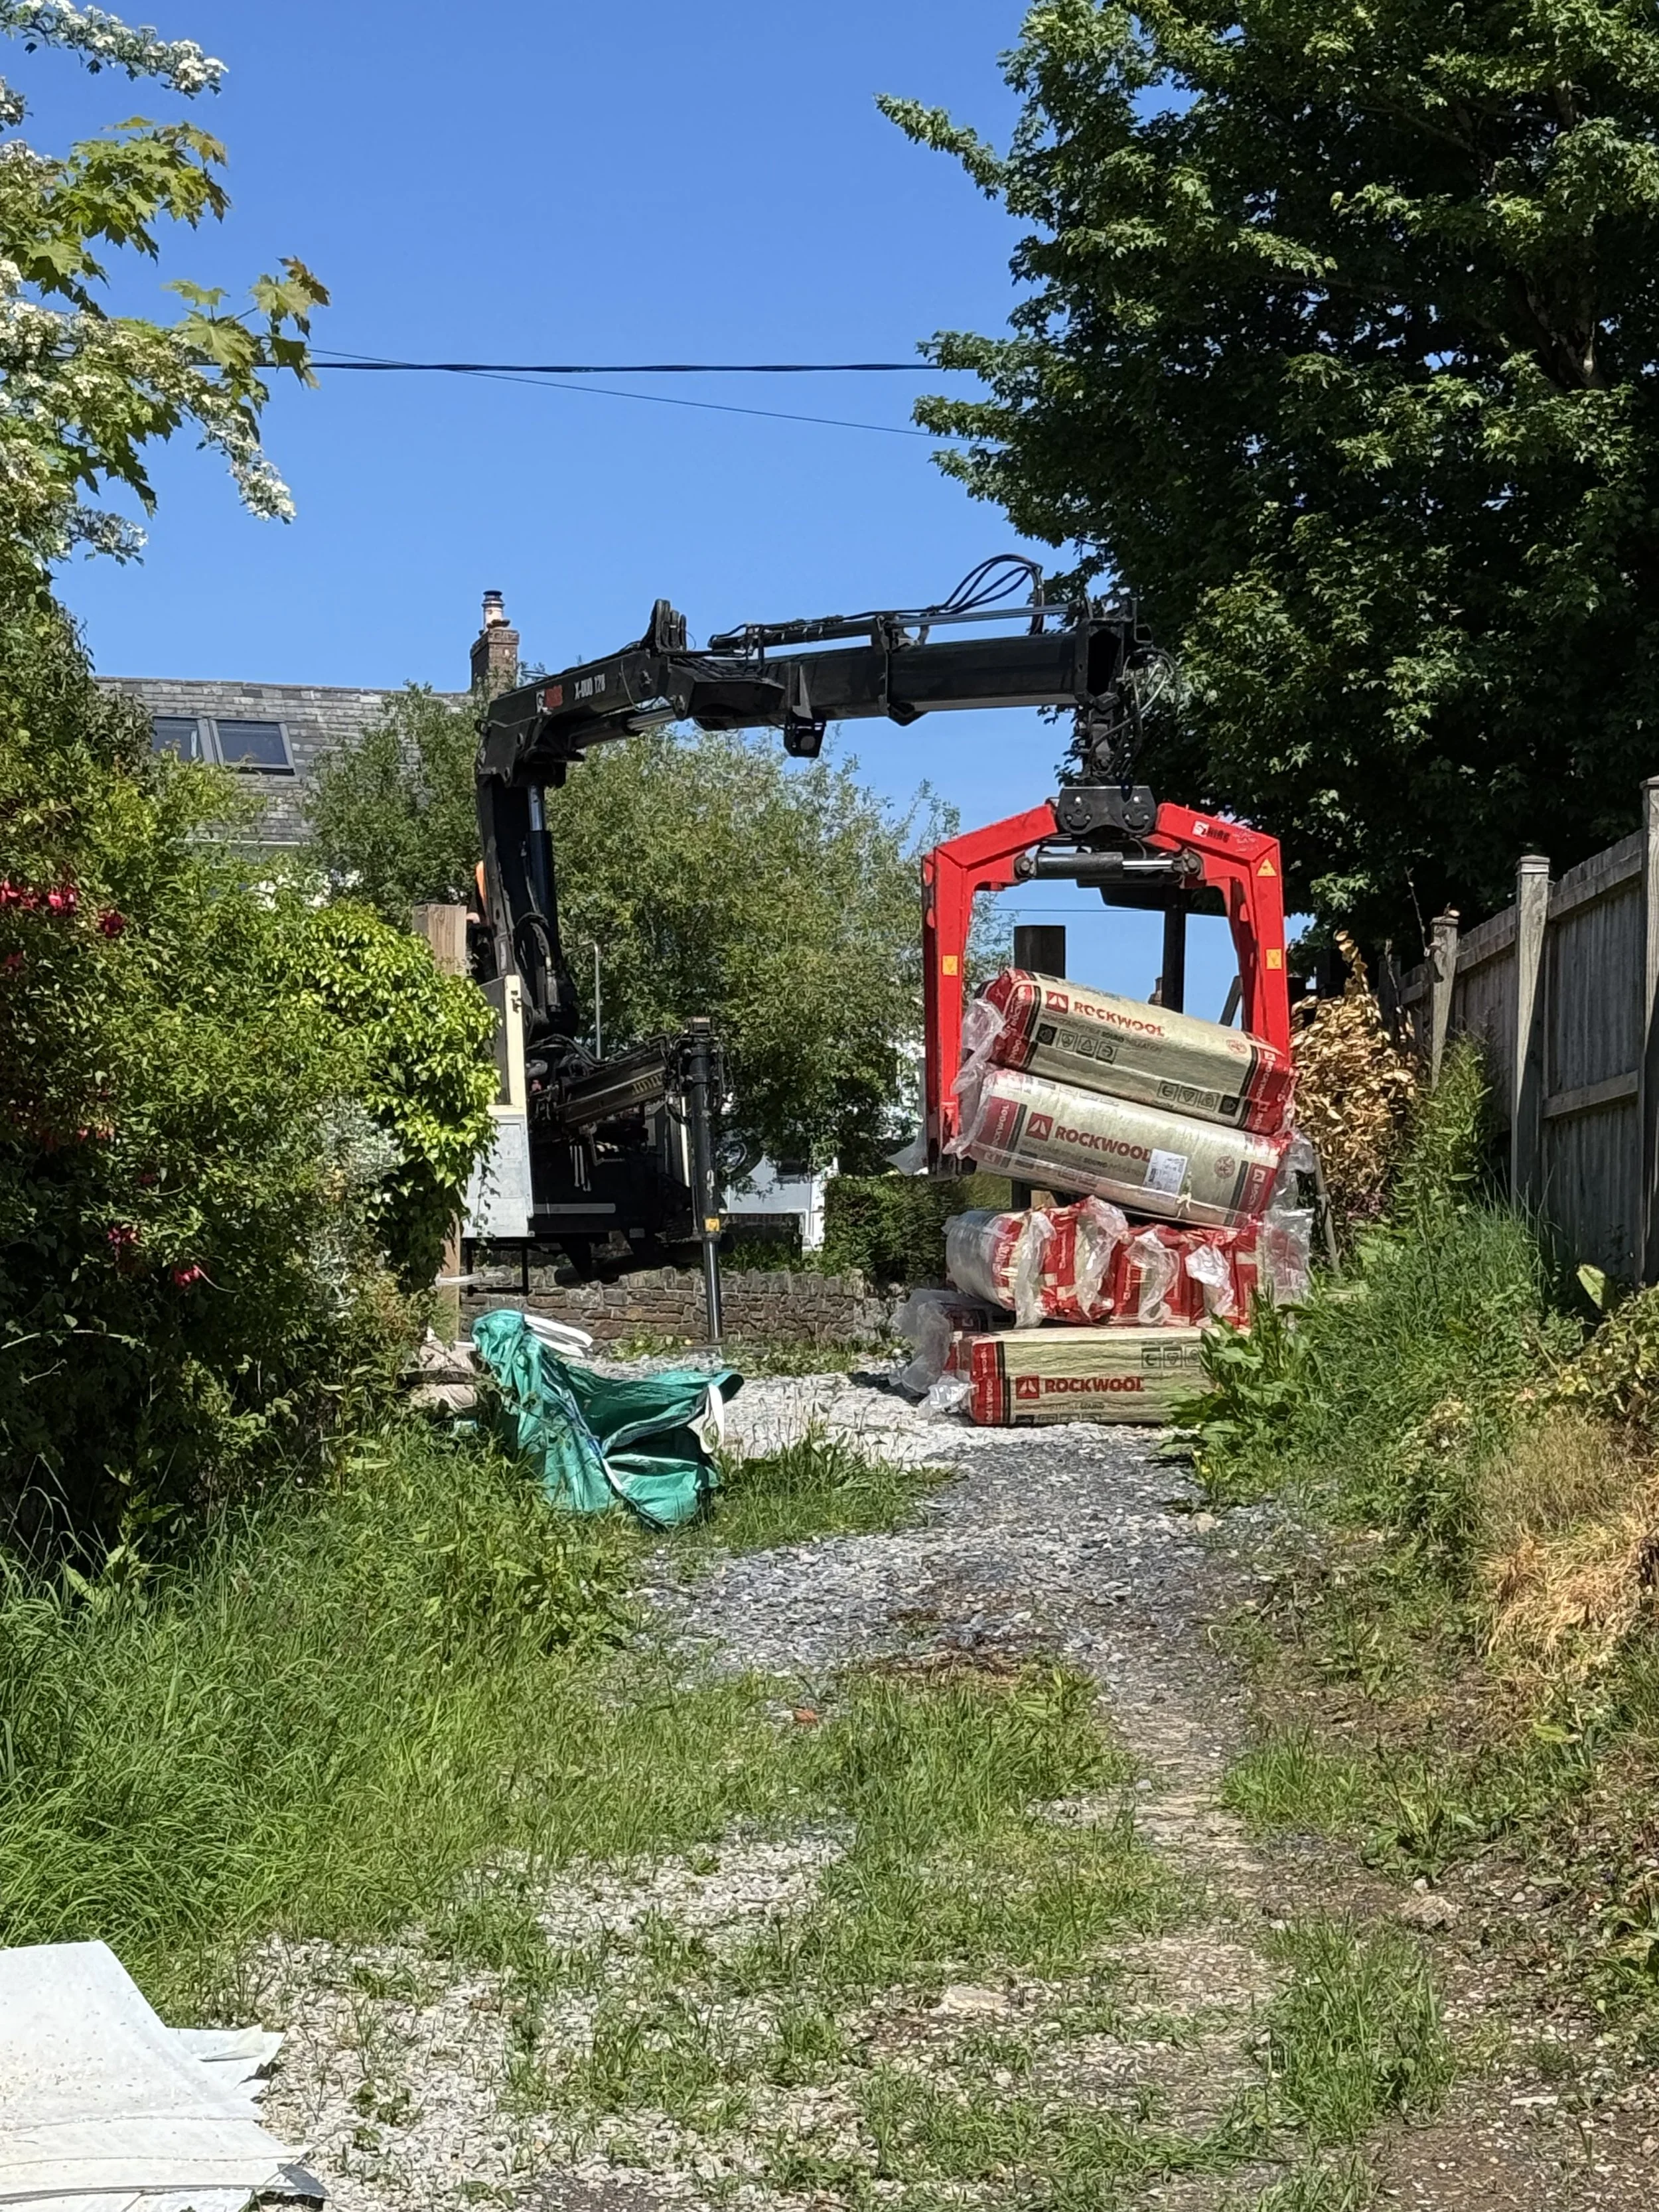
The rockwool arrives….
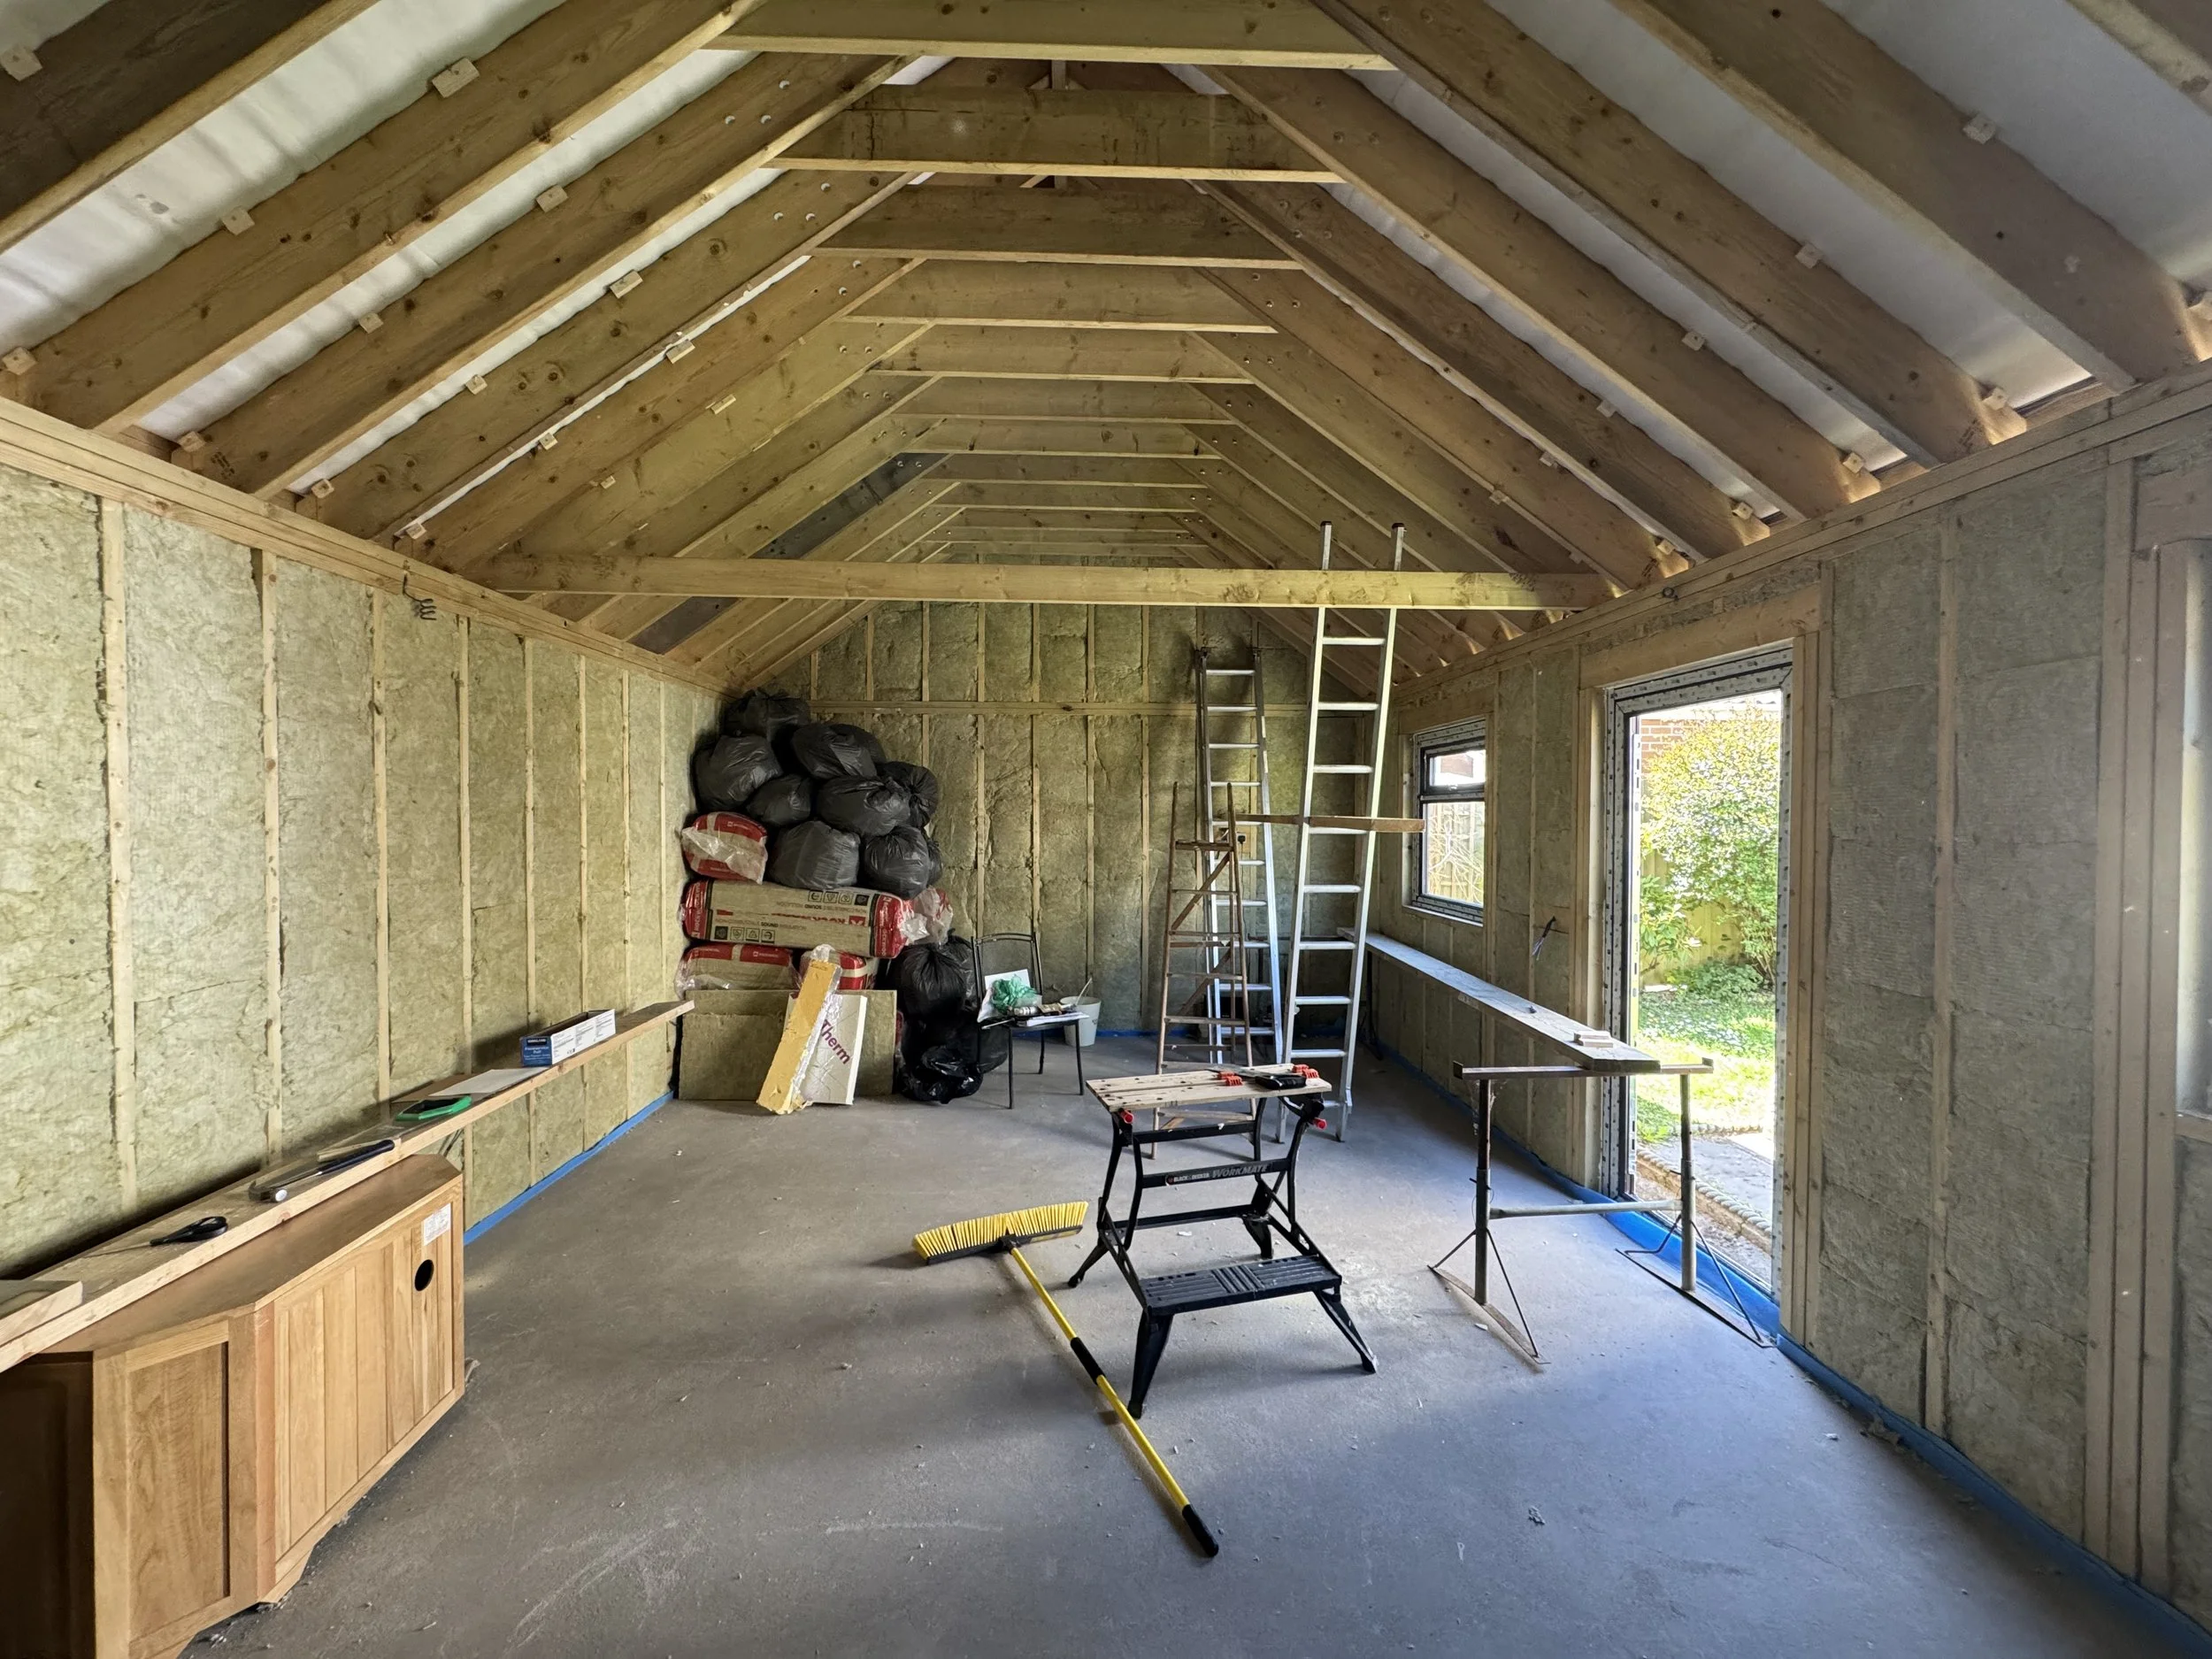
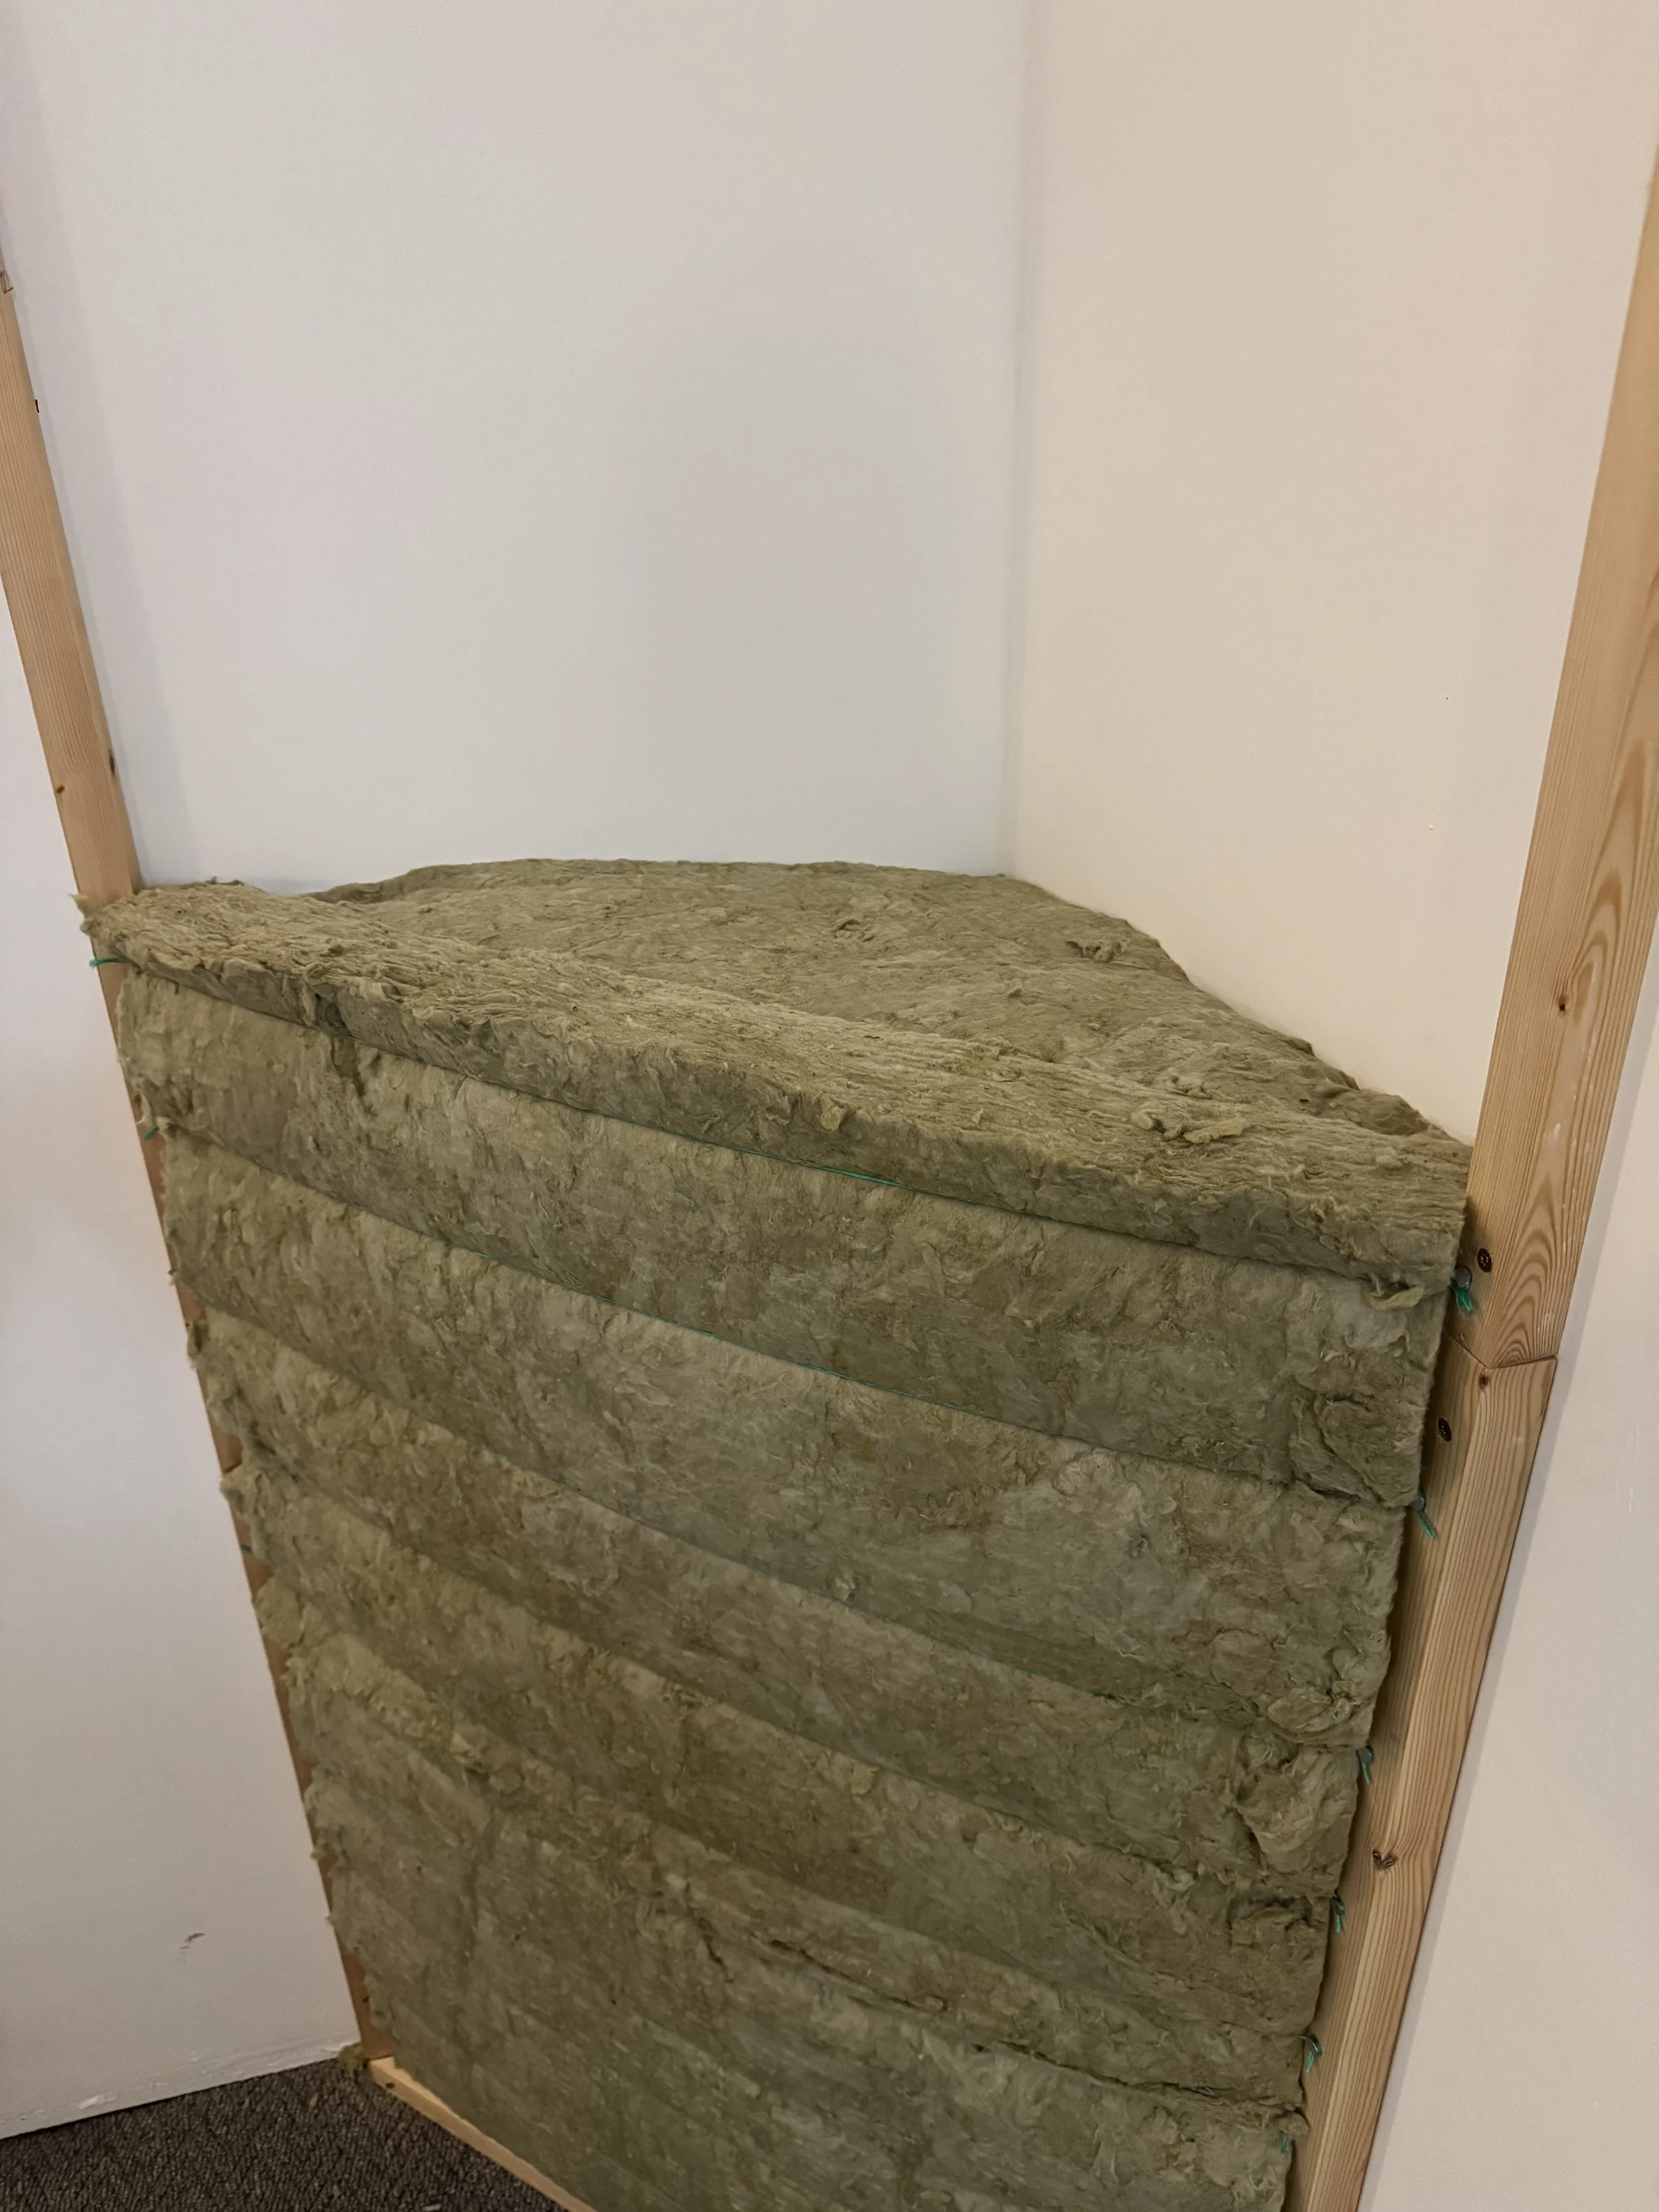
So with my trusty handsaw I cut and fitted slabs of rock-wool to construct a 150mm deep layer between the joists. In this image you can see a mountain of black bags containing off-cuts of this rock-wool material . I would use these left-overs to build bass traps in the final stages of the build which saved a lot of money. Also you might notice the small blocks of wood in the eaves. This helped an amateur like me make sure the foil backed polystyrene sheets (often known as cellotex) fit snuggly against the roof whilst still leaving an air gap to the roof lining.
In July 2025, the final external construction was completed. An ‘off and on’ cladding that would eventually be a theme inside the studio as well.
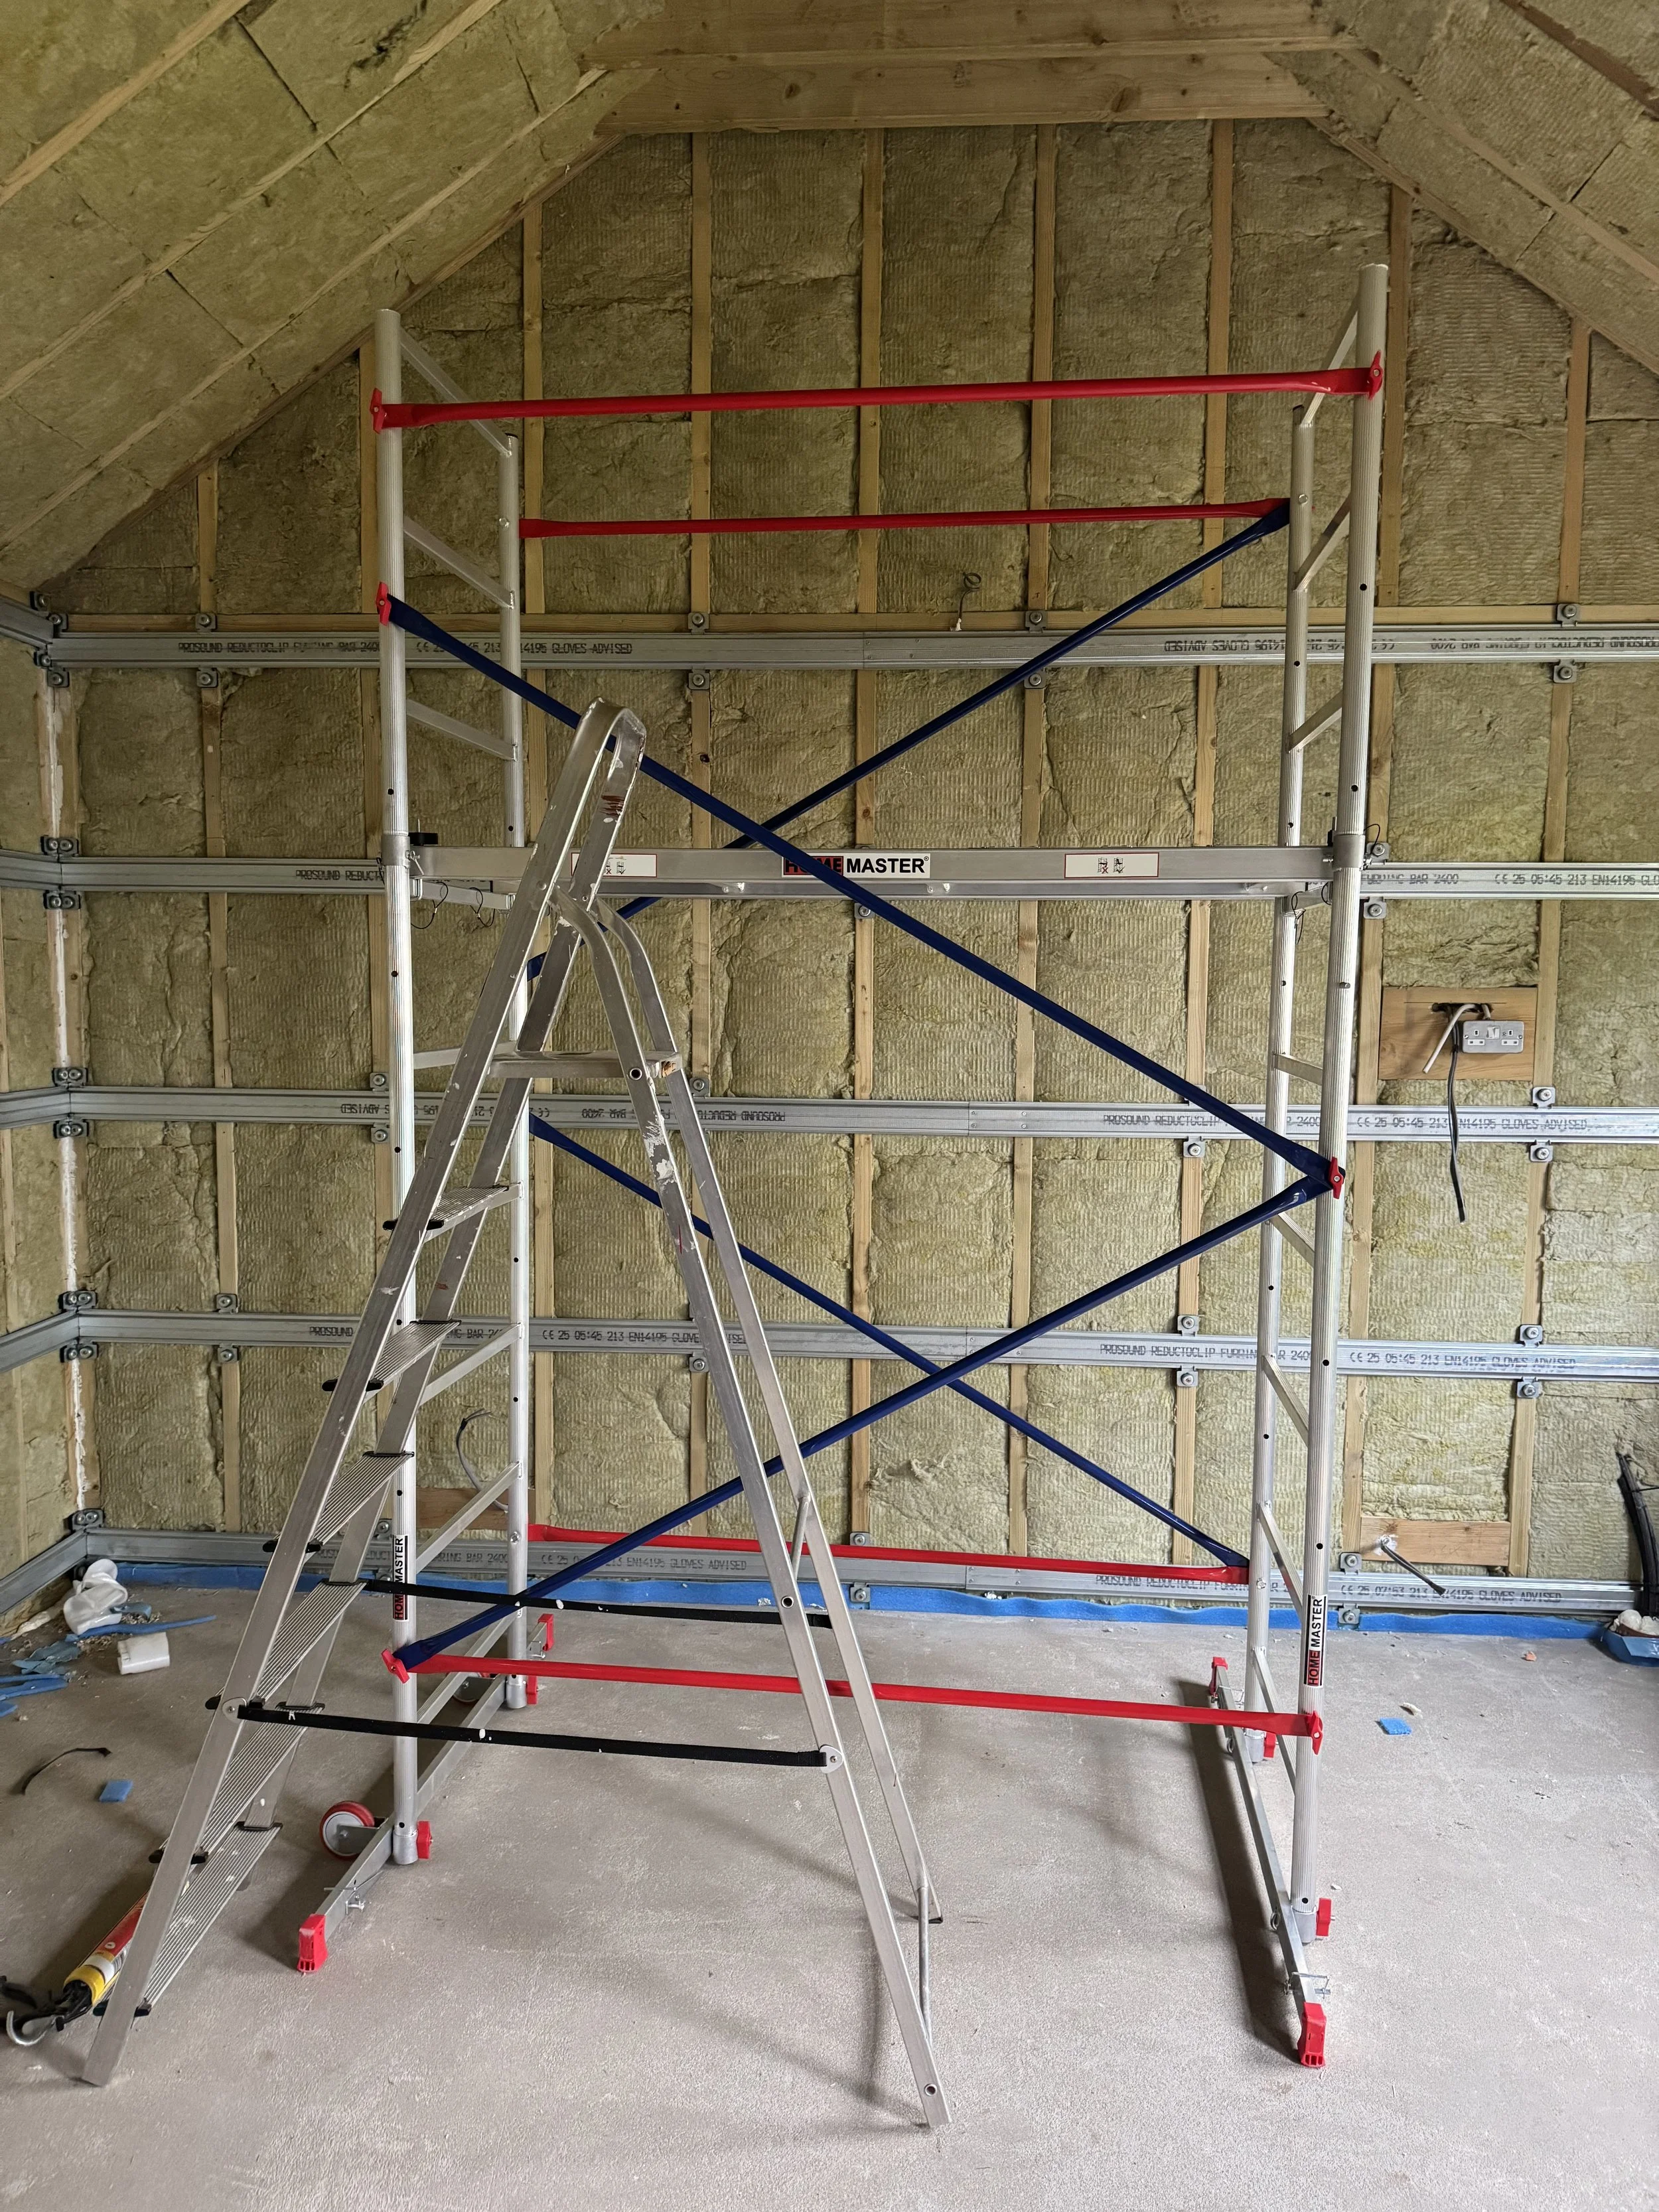
The scaffold tower proved very useful to me and thankfully the builder didn’t need it for a couple of months whilst I carried out the internal fit.

The top layer of the roof void was filled with 50mm foil backed polystyrene panels. These are the best solution for insulation from heat and cold, but are not the best for sound proofing so…
… another 100mm layer of rock-wool slabs were laid underneath
With the insulation complete, the next stage was to put up the drywall / plasterboard.
To contain the sound within the building, I had two options, build a first wall and then another stud frame within that wall, or…… attach drywall to the timber but isolate vibrations from the studs with specialist construction methods. I chose the second option because primarily I wanted to have a larger soundspace and a second floating internal wall/ceiling would have stolen too much floorspace.
And here was the solution. In the above photo you can see clips that act like acoustic ‘buffers’ into which you clip these long, flat bars of aluminium (known as ‘furring bars’). Drywall is then attached to the furring bars, so any sound energy is dampened by the clips. They were remarkably quick to fix, and despite my reservations, they are more than capable of supporting huge loads both on the walls and also from the ceiling.

The first two panels of drywall are attached. This was just the first layer and each plasterboard is a specialist high density acoustic drywall, 15mm thick. Each panel weighs 45kg so when I could get help moving them into place, I did, but in the main I did most of the drywall fit on my own. My back has still not forgiven me.

The next layer is known as ‘mass loaded vinyl’ with adhesive backing. It’s a rubber plastic sheet that is very effective in dampening sound waves. This stuff is a real bugger to attach and I recommend a top quality Stanley knife, plenty of replacement blades, a metal T-Square 1m ruler and if you have the space and manpower to do it, attaching the material to the plasterboard before you mount it, however that will mean a full board will weigh in at 80+kg so I when I was installing it on my own, I had to cut the MLV into manageable sized sheets and accept the inaccuracies of sticking it down.
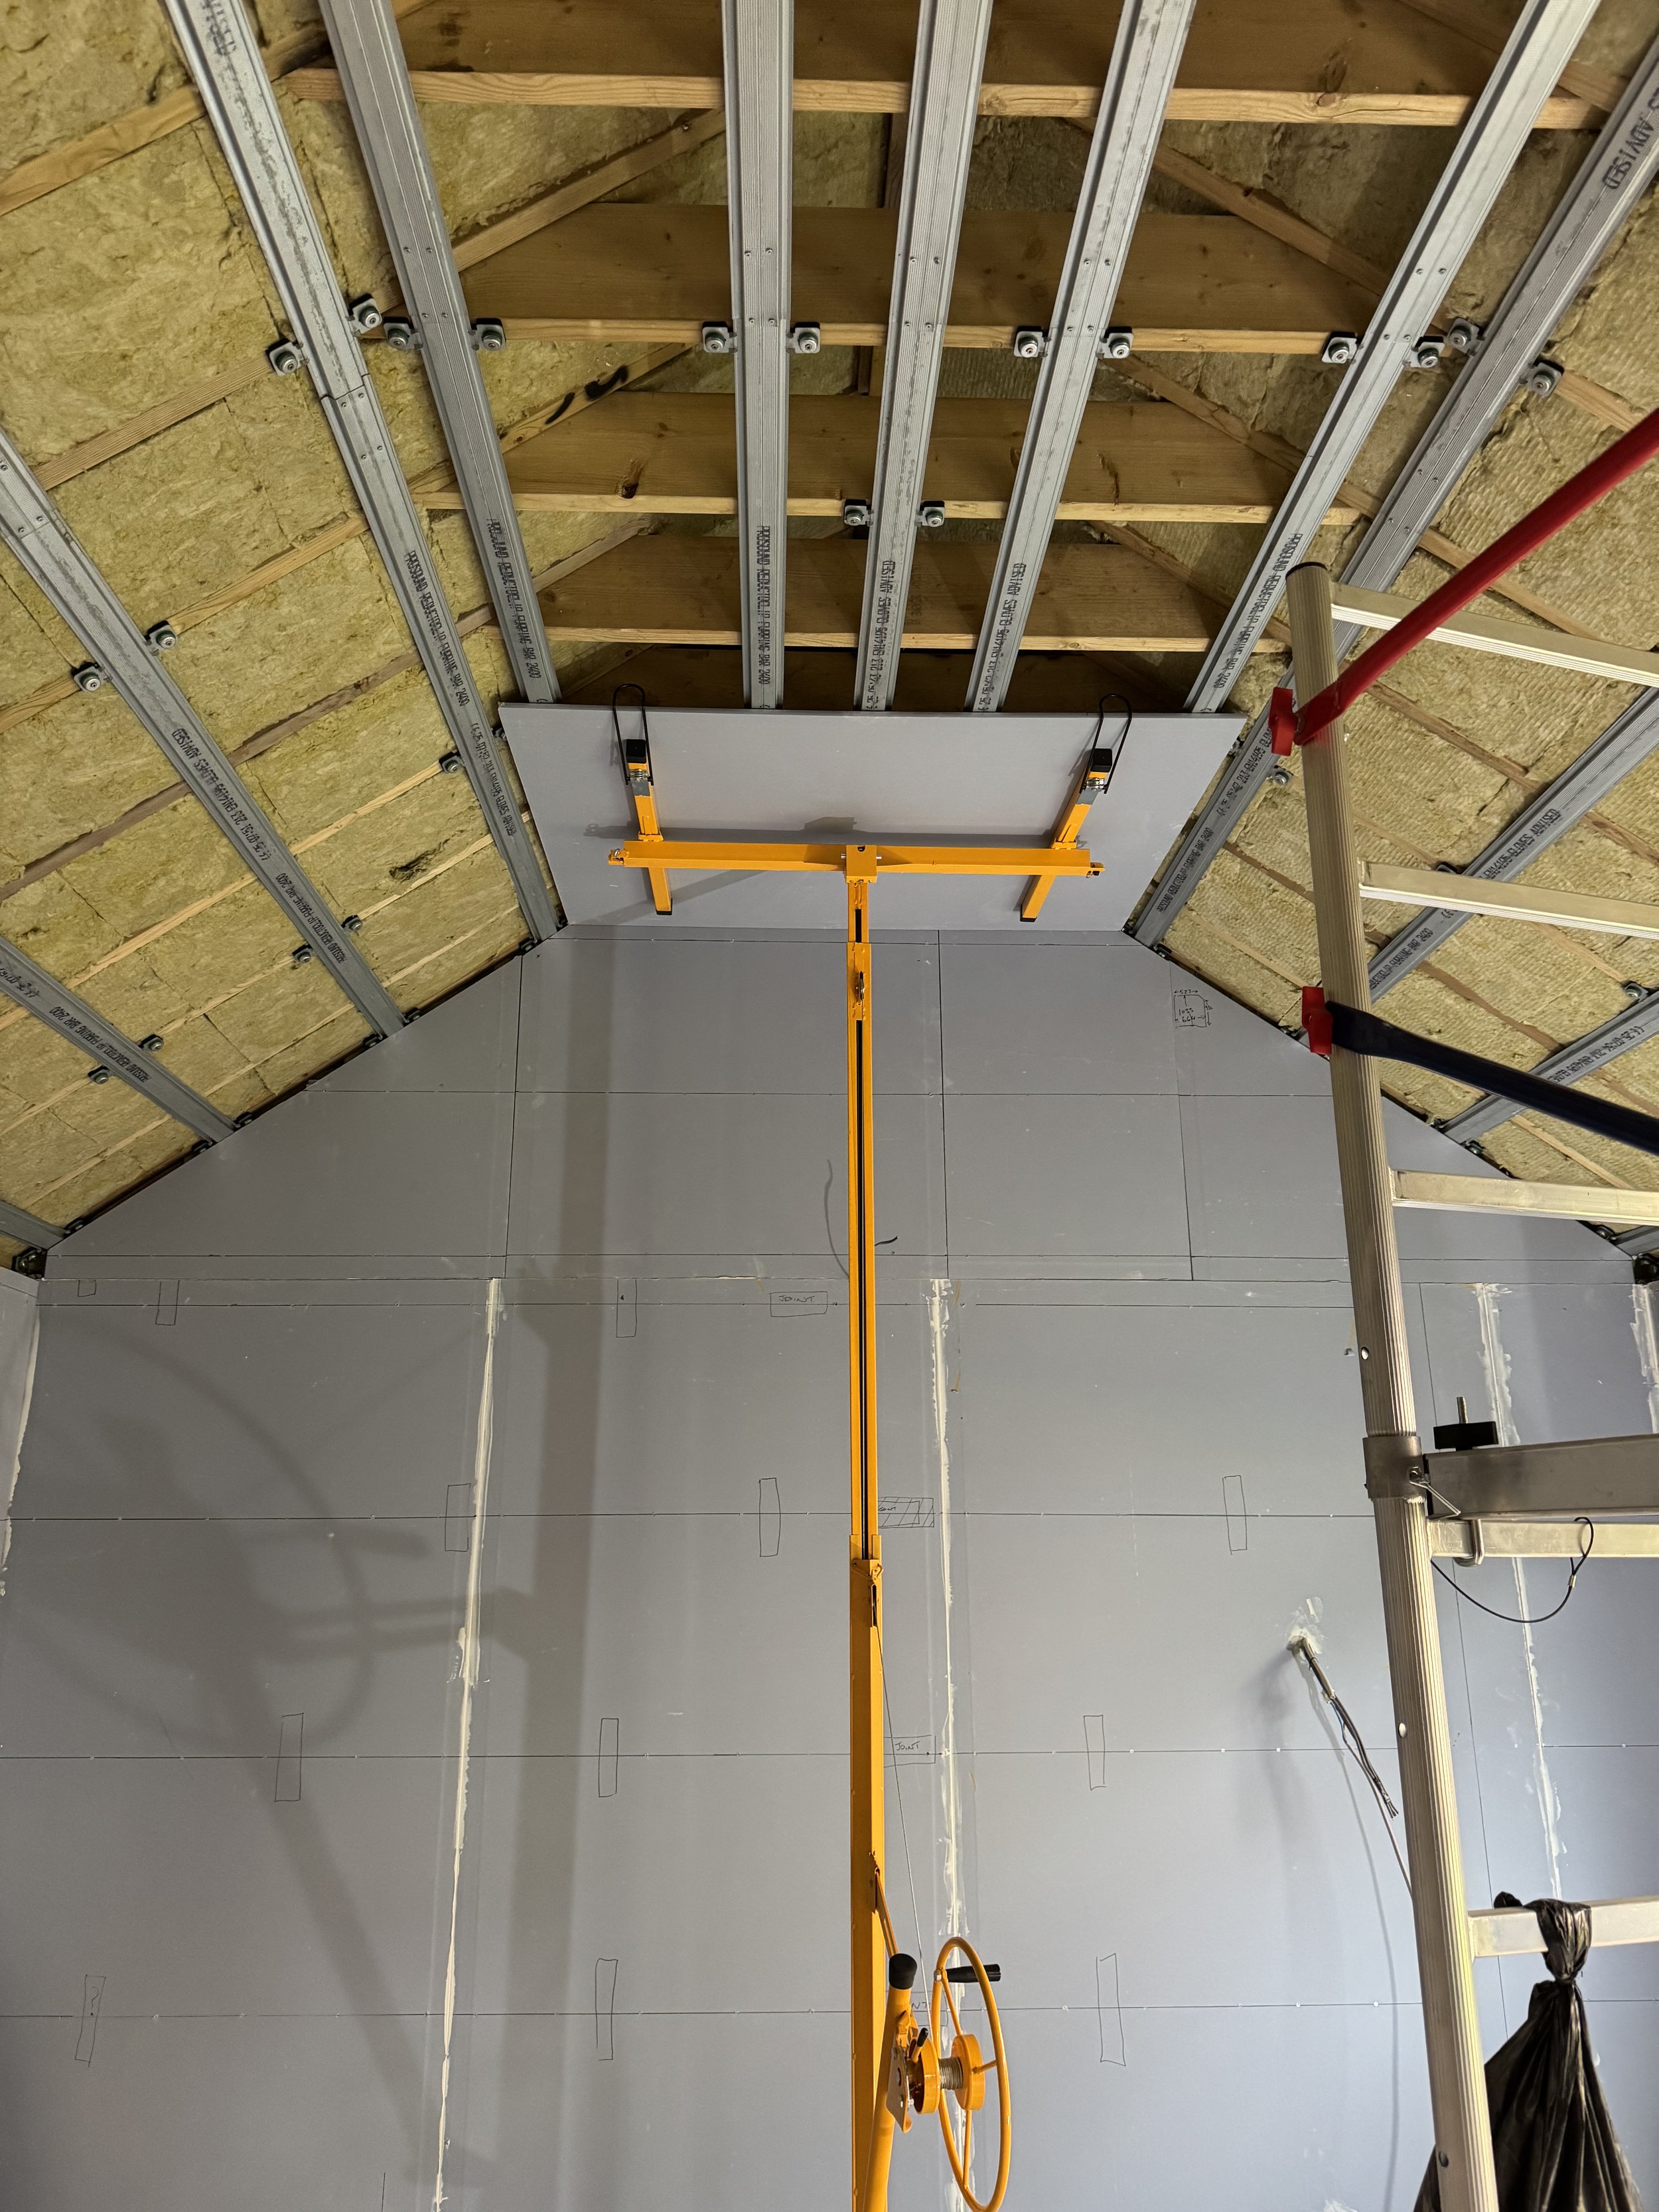
The trickiest part was always going to be the ceiling. To build it I had to purchase a plasterboard hoist. The ones you can rent stretch to just over 3m. My ceiling was higher than that. So I had to buy one that went up to 5m.
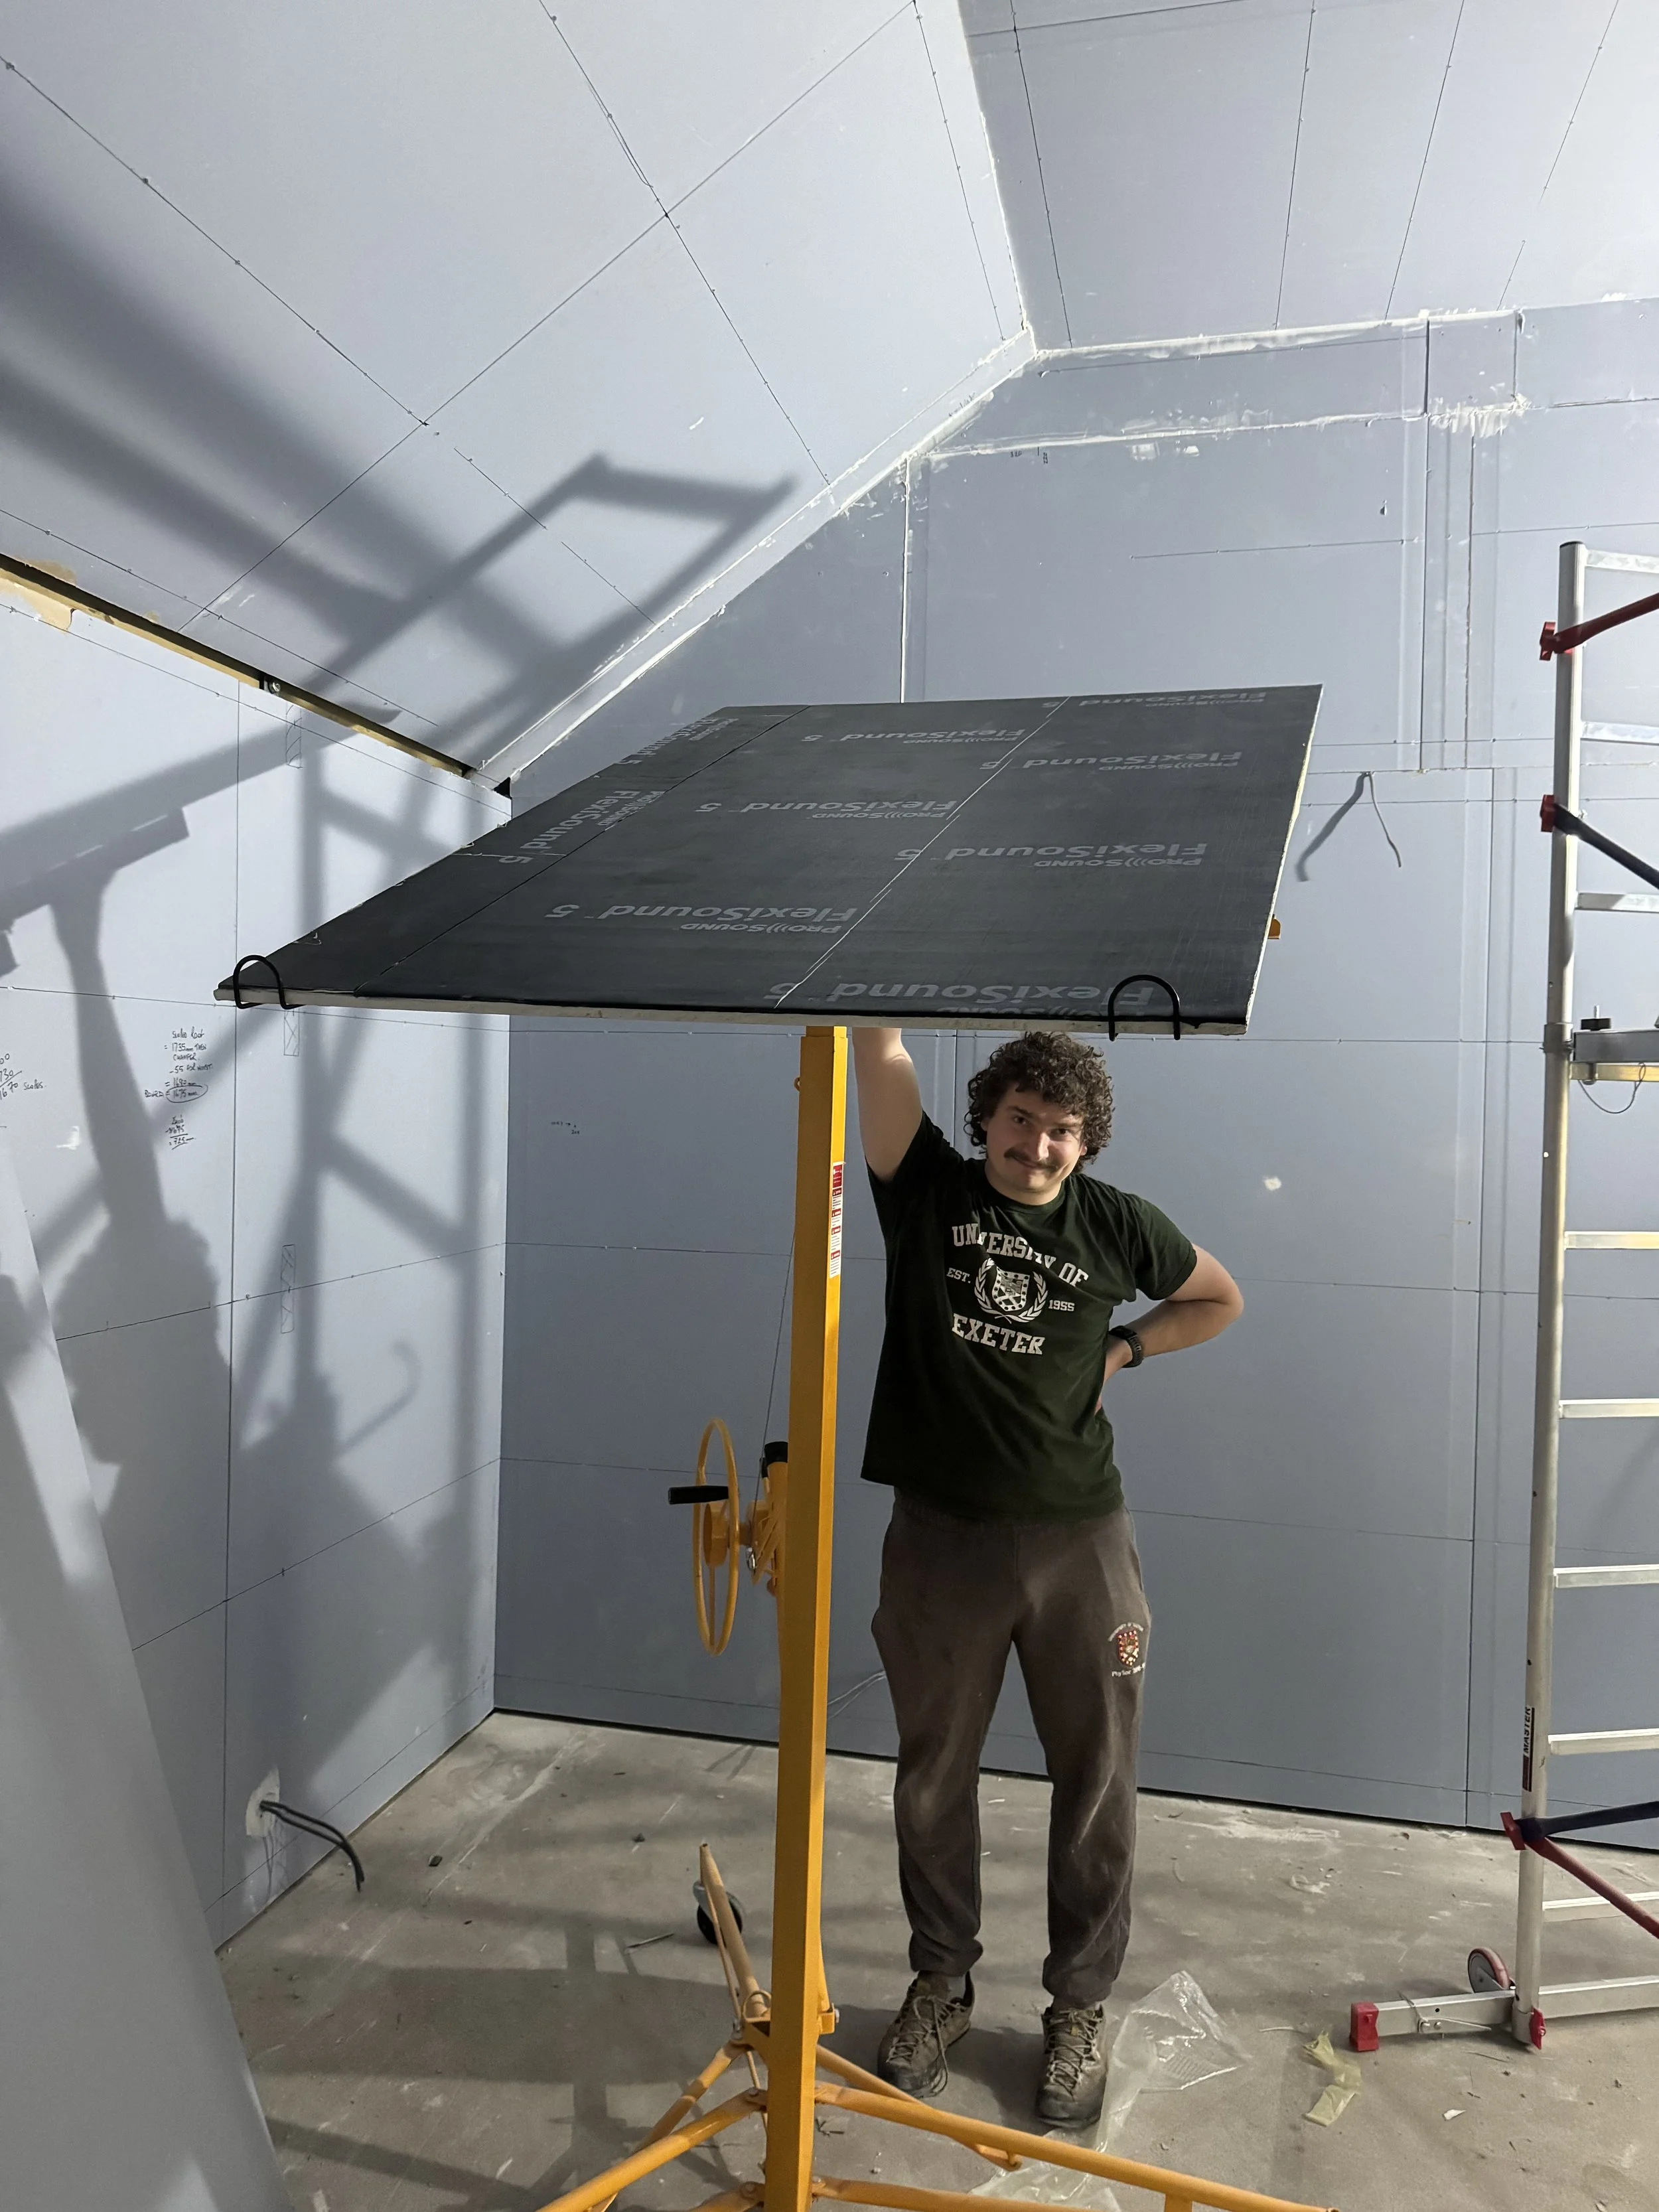
Alfie my son, came for a weekend to help me finish the second layer of drywall (with the Mass Loaded Vinyl already stuck on)
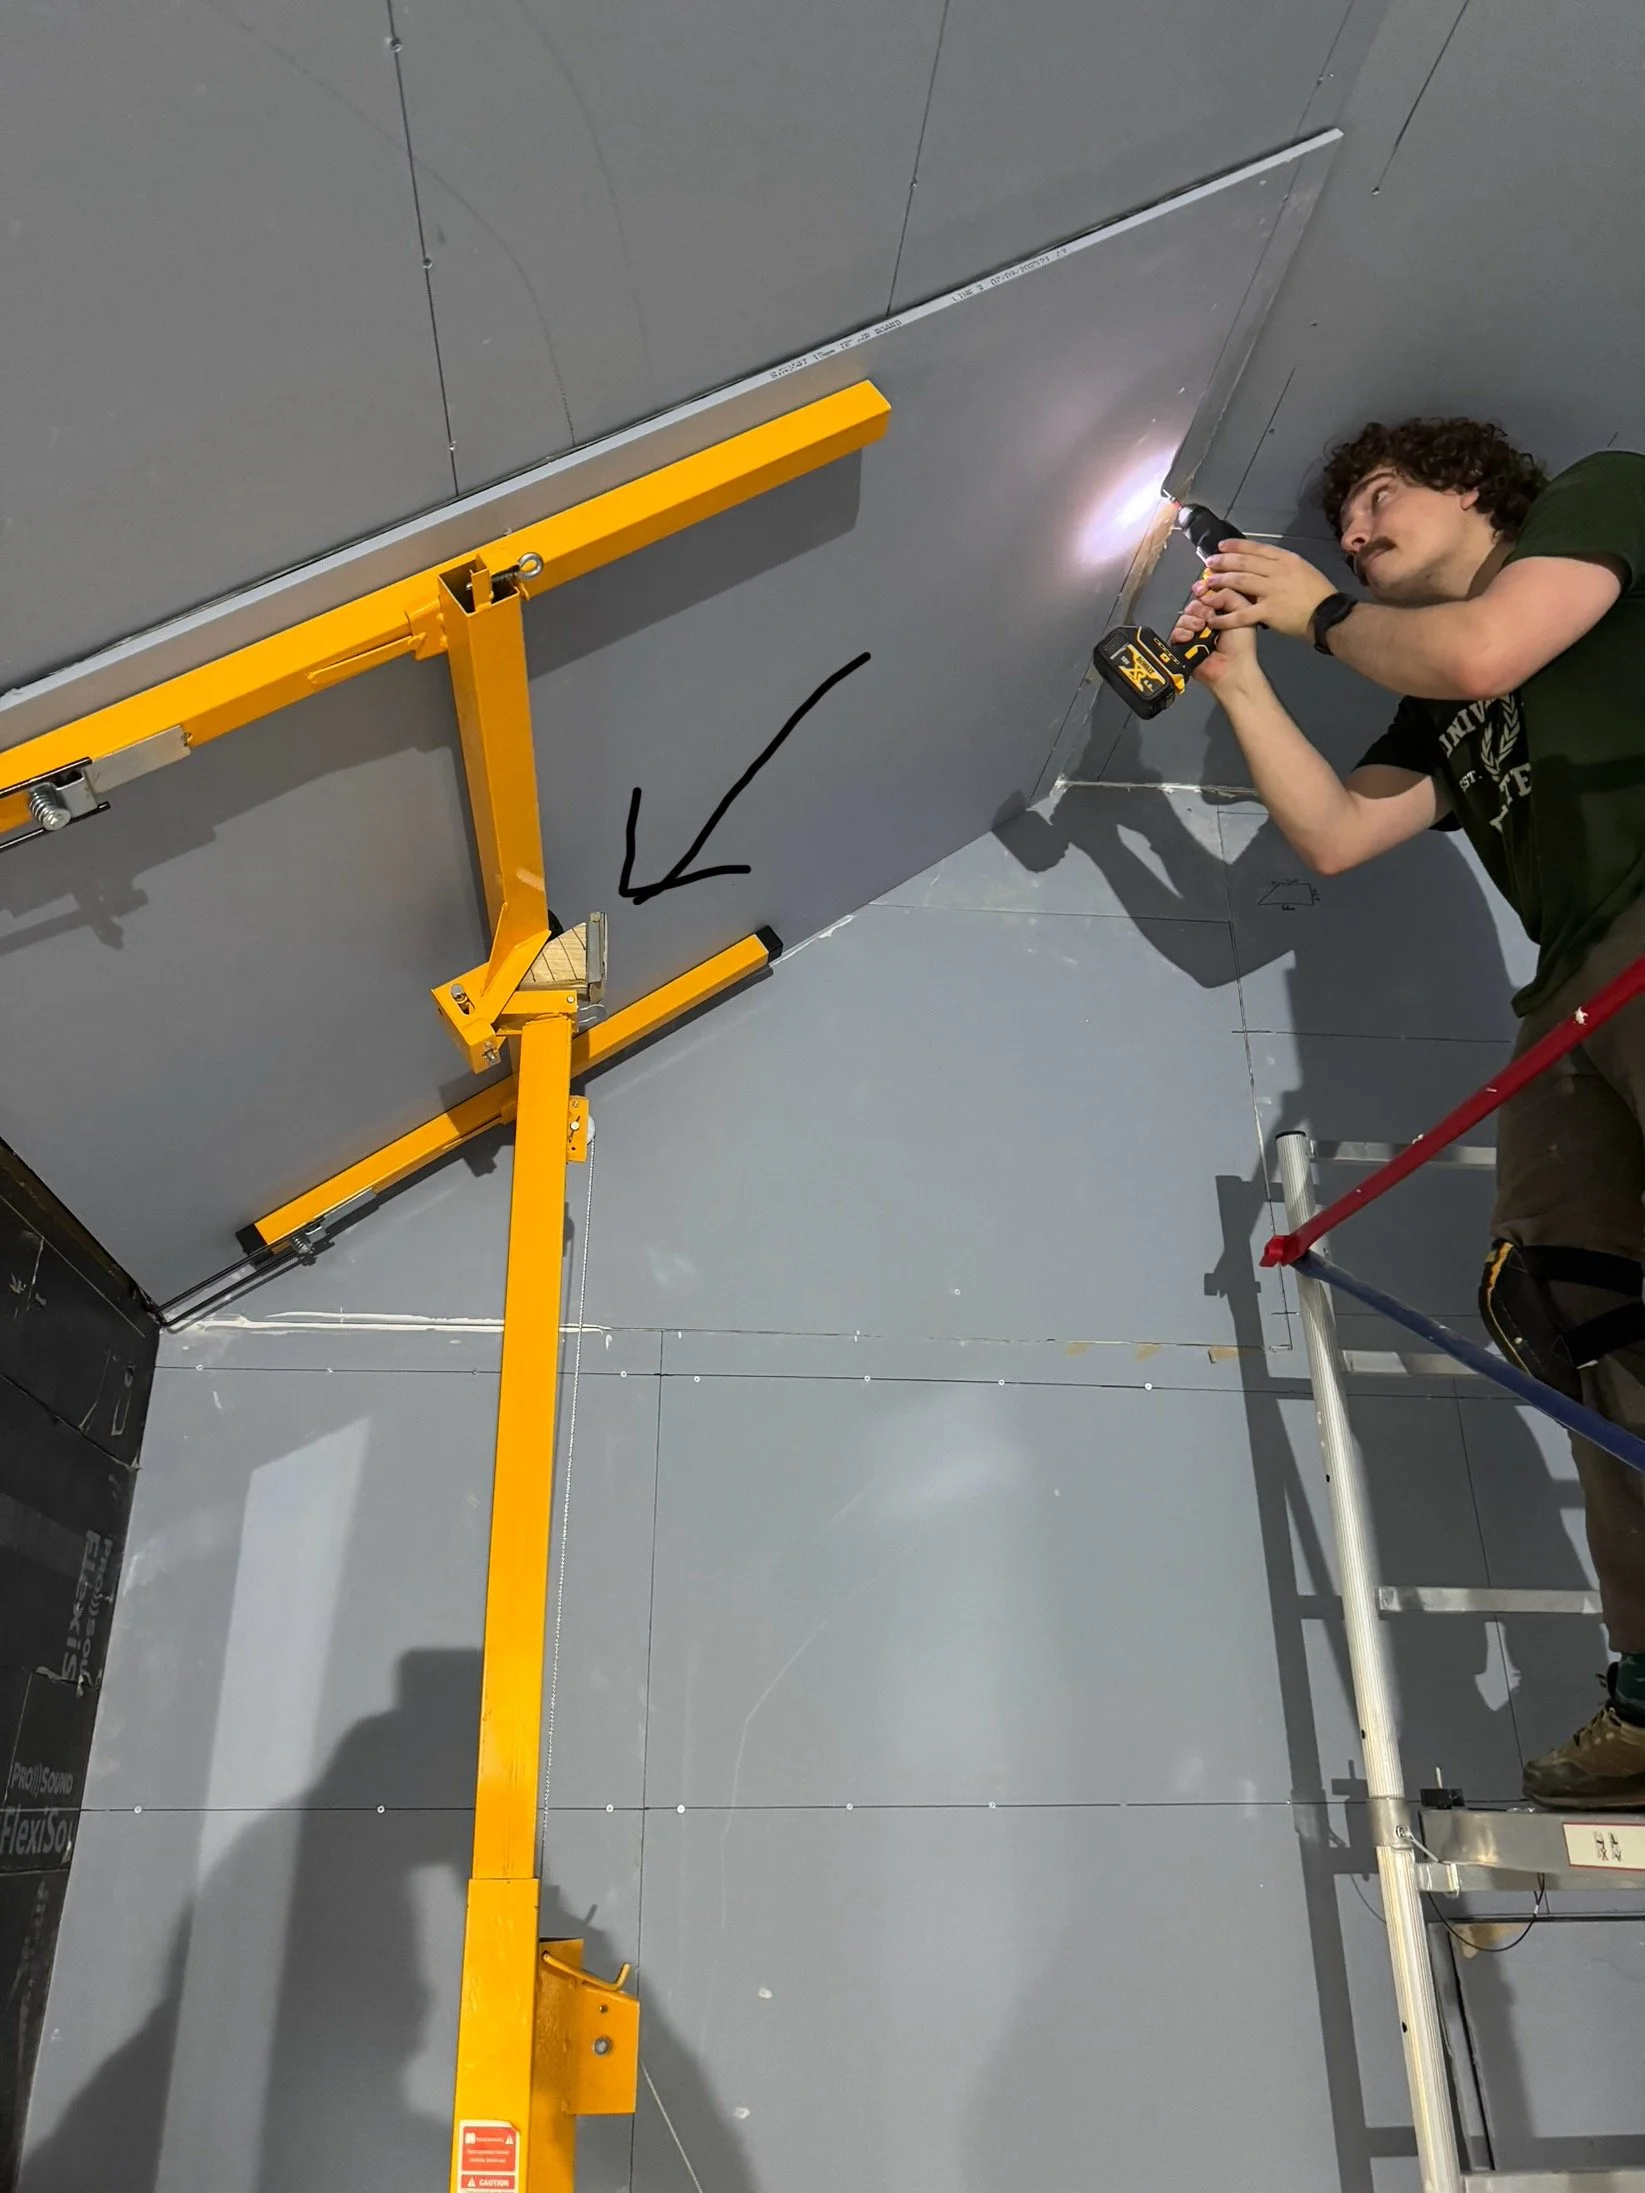
Putting up the drywall on a sloped ceiling required a bit of improvisation. We had to wedge a block of wood in the joint of the mechanism to keep it at an angle before attaching it to the ceiling. It worked despite it being a crude method to achieve it.
So the walls were built. I had also added a double door airlock and put in 2 more windows making the number of glass panes 4. I wanted natural light, but a single unit is probably the weakest point of a soundproofing project. I also had to think about other weak spots. The joint between wall and sloped ceiling was quite problematic….
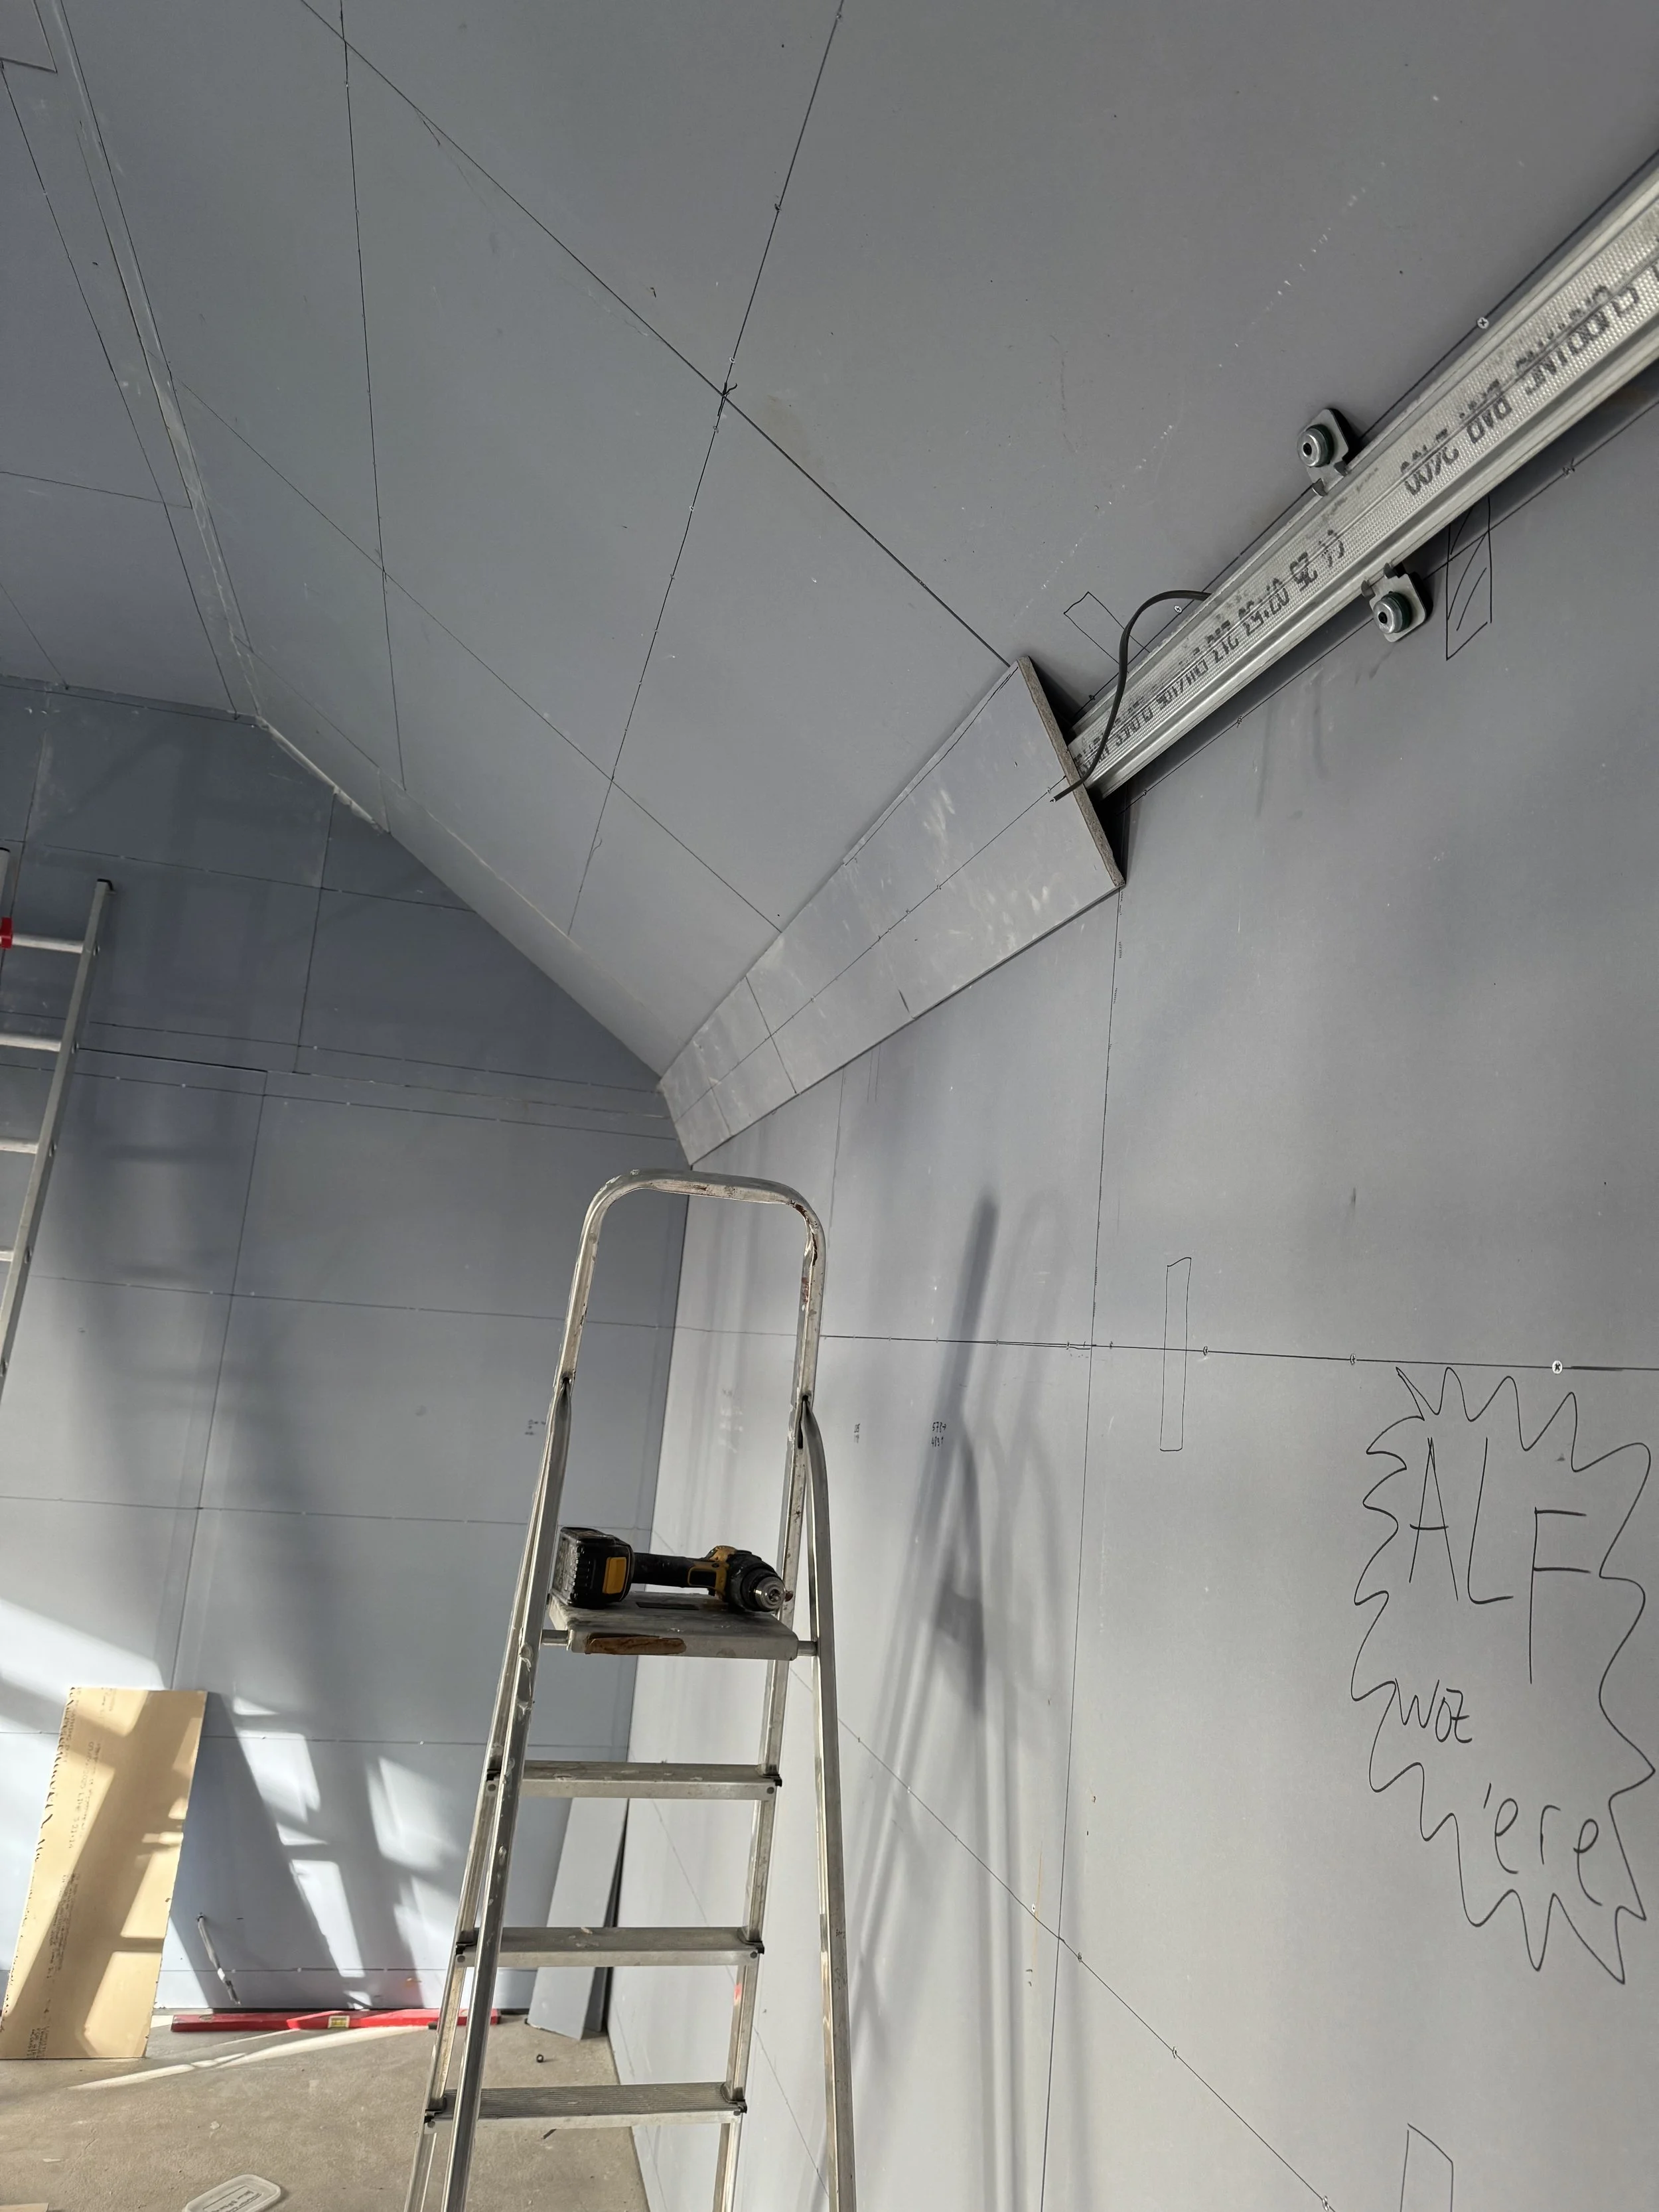
Once again I had to adapt to the dimensions of the building. Plasterboard is cut in 2.4m lengths. The height to the ceiling was 2.50m. In the end this feature of design ended up being something the plasterer adapted to, quite creatively…
He ended up fashioning that corner of the building into a curved design. The only drawback being that the plaster was so deep there, it took a couple of weeks to dry fully.
The first wash of 50% paint/water on the recently dried plaster with a hardworking dehumidifier in the corner.
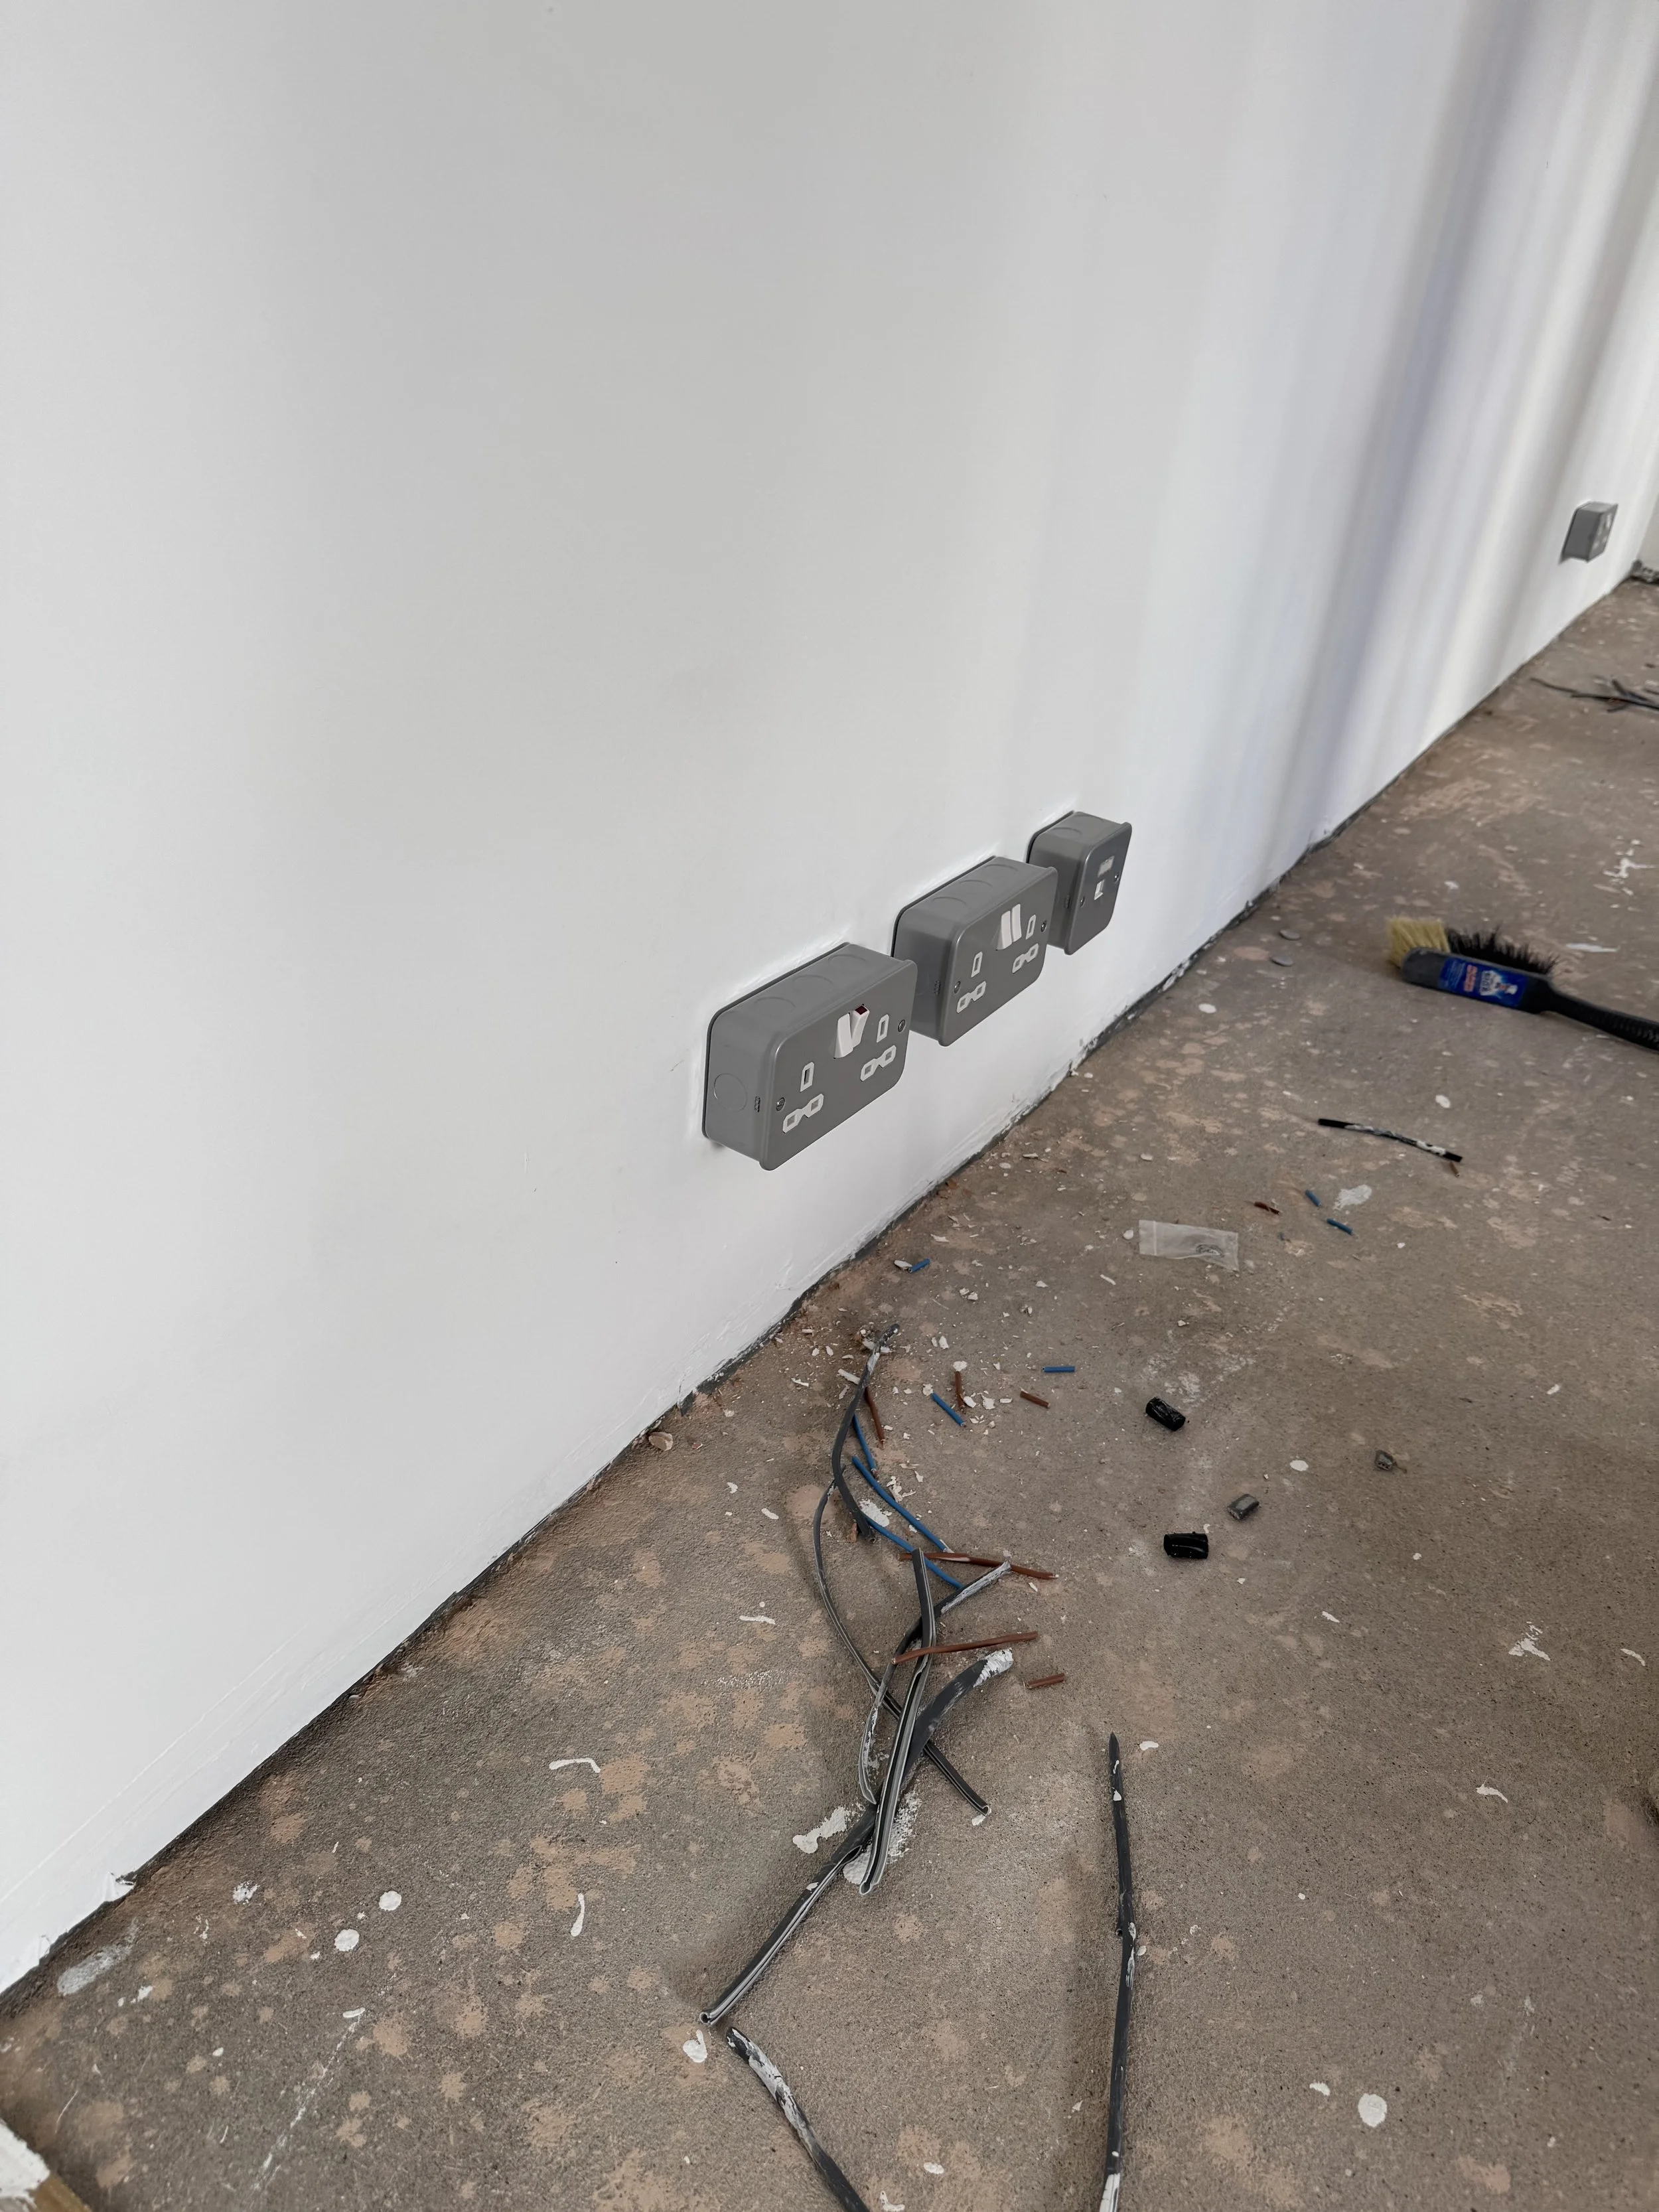
Phil my electrician came back to finish the electrics. As you can see I went for quite a crude way of fitting the plug sockets. I chose to wall mount them purely to keep the means of sound escaping, to a minimum. As soon as you cut into walls to mount plug sockets flush, you undo much of the hard work of the soundproofing.
This, if you’re not a dedicated audiophile, is a half finished bass trap. Basically the corners of buildings tend to be the focal point for sub bass that emanates from the corners. As you can see it looks very much like a pork loin. But instead of pig meat I have used rock wool off cuts from earlier in the project. These ended up being about 50cm deep to the corner and because of the way I used string to secure the rock wool, I packed them very tight. According to my PhD Physicist son, Alfie, this should do a decent job of taming the low frequencies that were going to bounce around the studio.

A hard wearing carpet laid and a couple of bass traps. Things are getting close to finished!
The next part of the job is the acoustic treatment. Up until now, the construction had been about sound-proofing but now my attention turned to making the walls and the ceilings less reflective to sound. I didn’t want to completely deaden the character of the room but I didn’t want a boxy echo to recordings as well.
I came upon these mdf wall art panels online and modified them by stapling coloured felt material to the back.
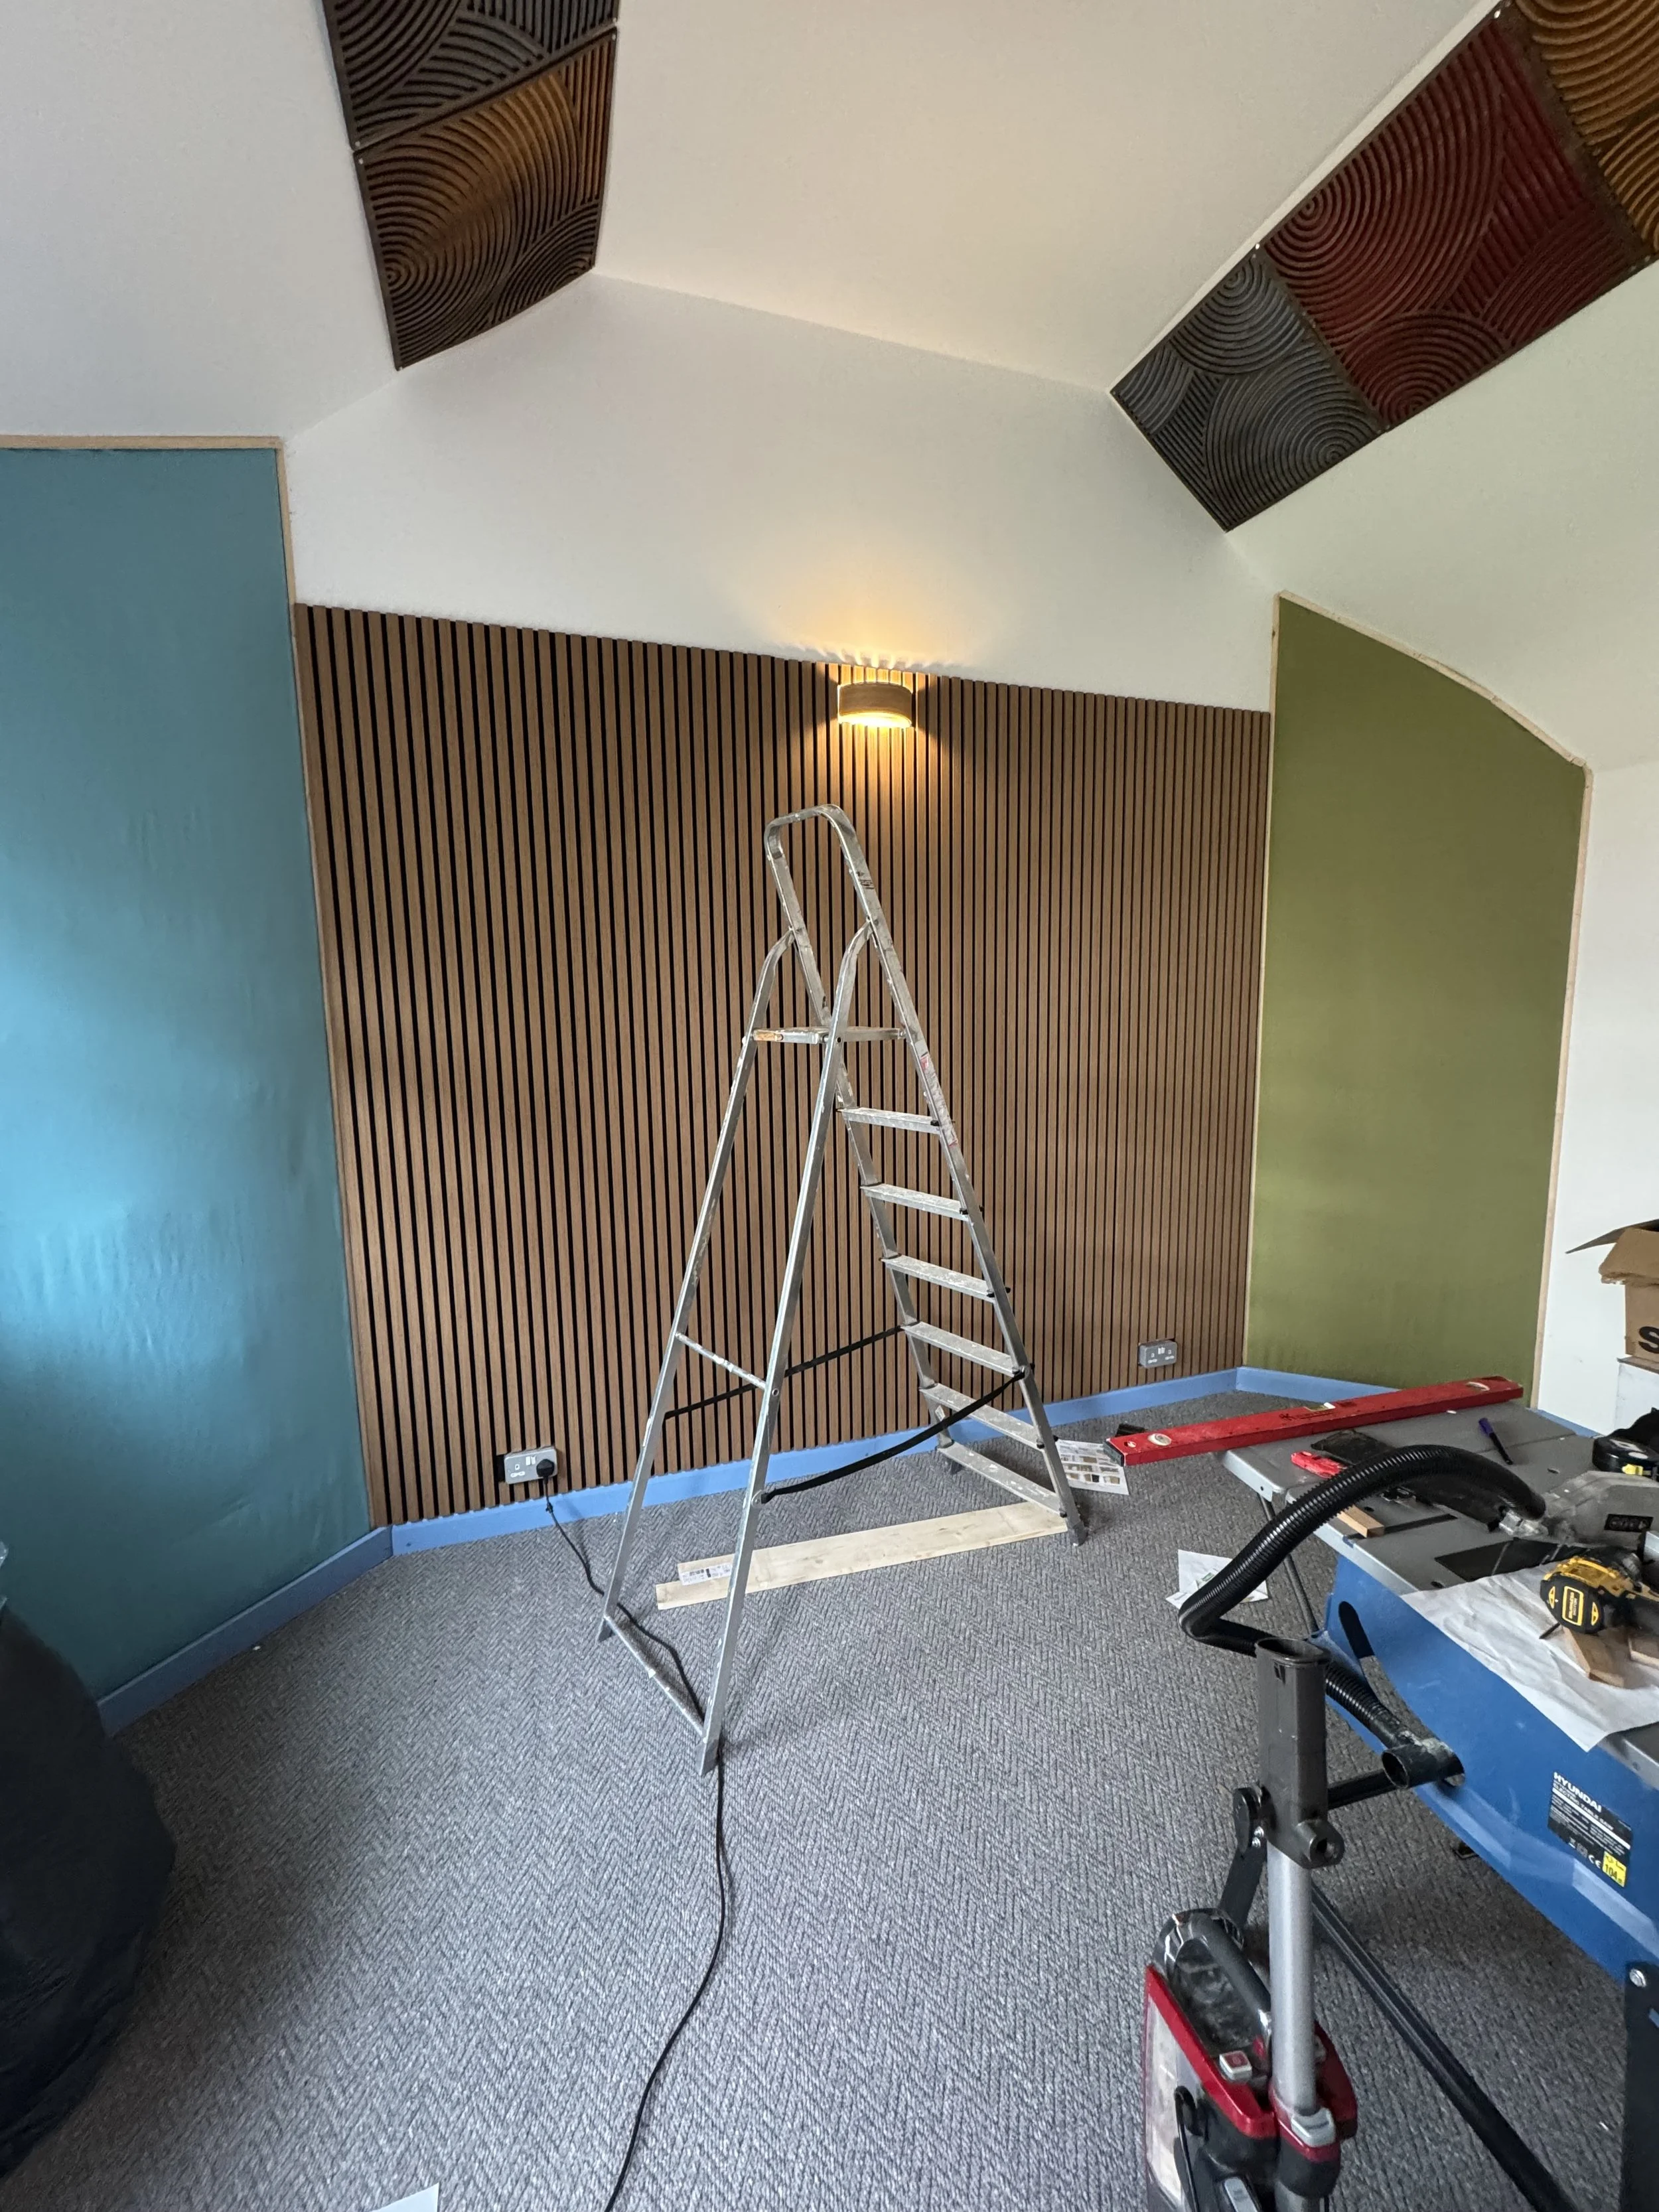
I also mounted these acoustic panels that are sold everywhere online these days. I recommend a good jigsaw if you need to modify them in any way.
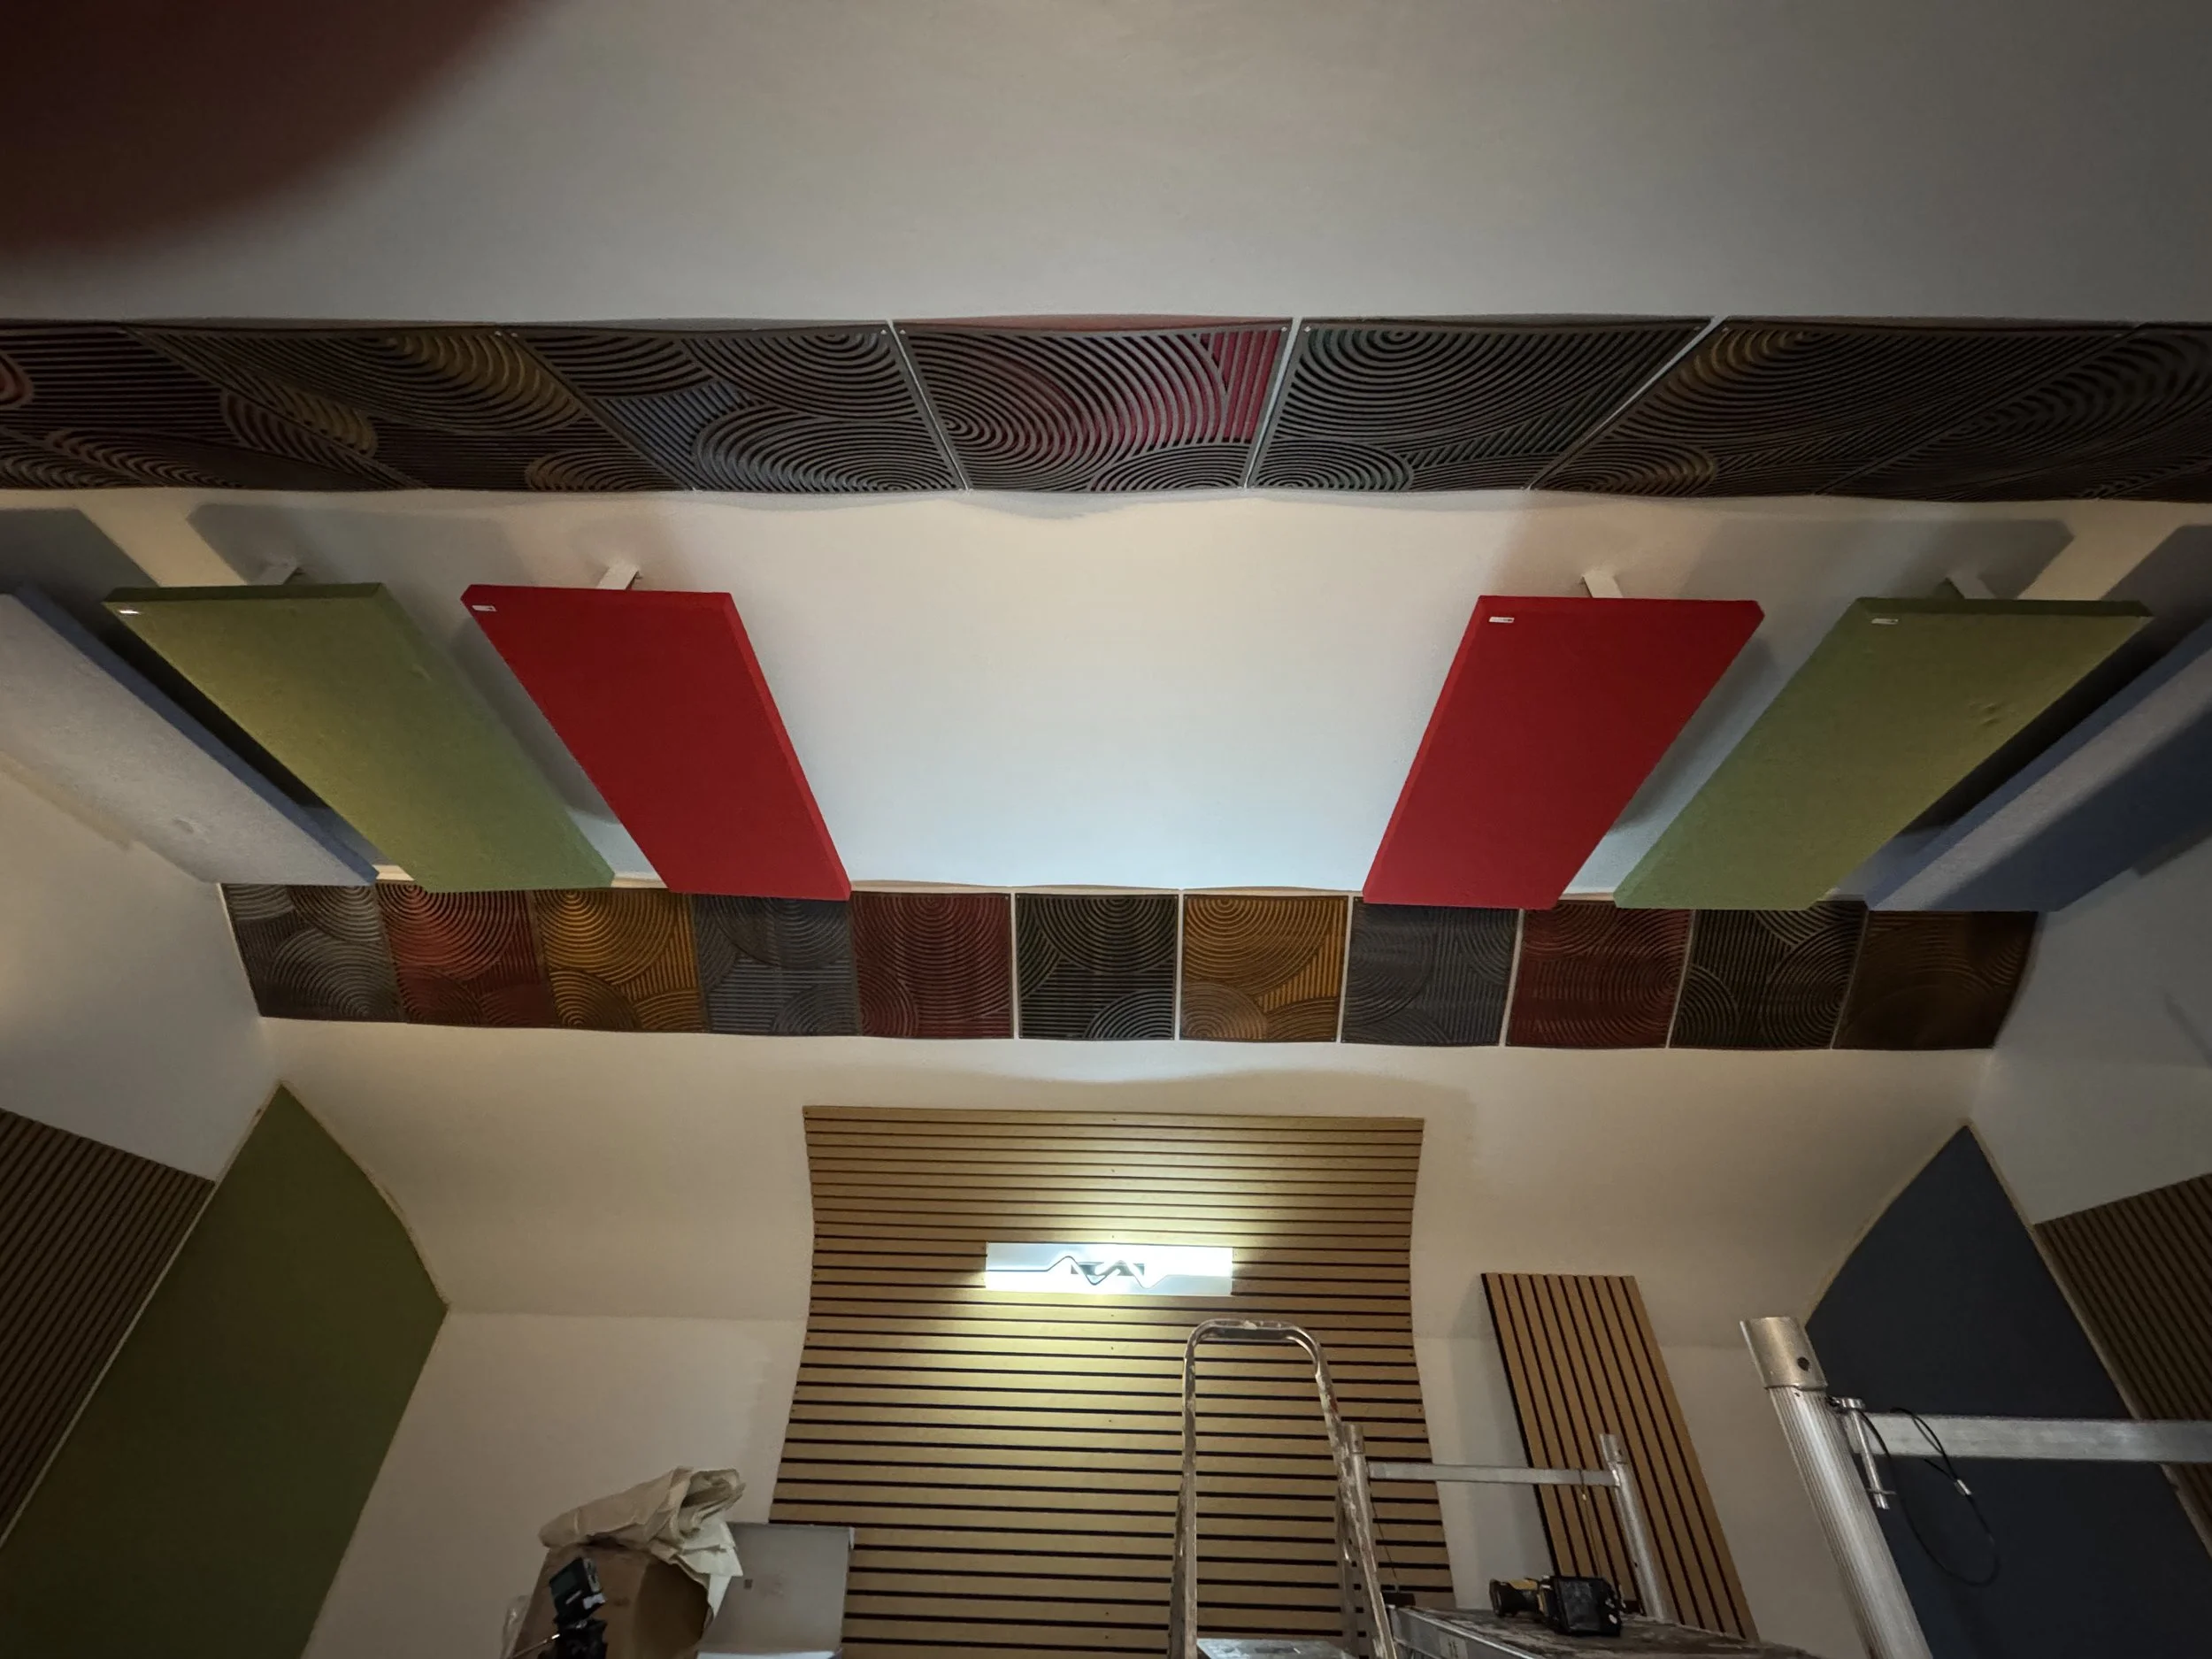
Ceiling reflections were treated by these panels, continuing the colour themes of the bass traps
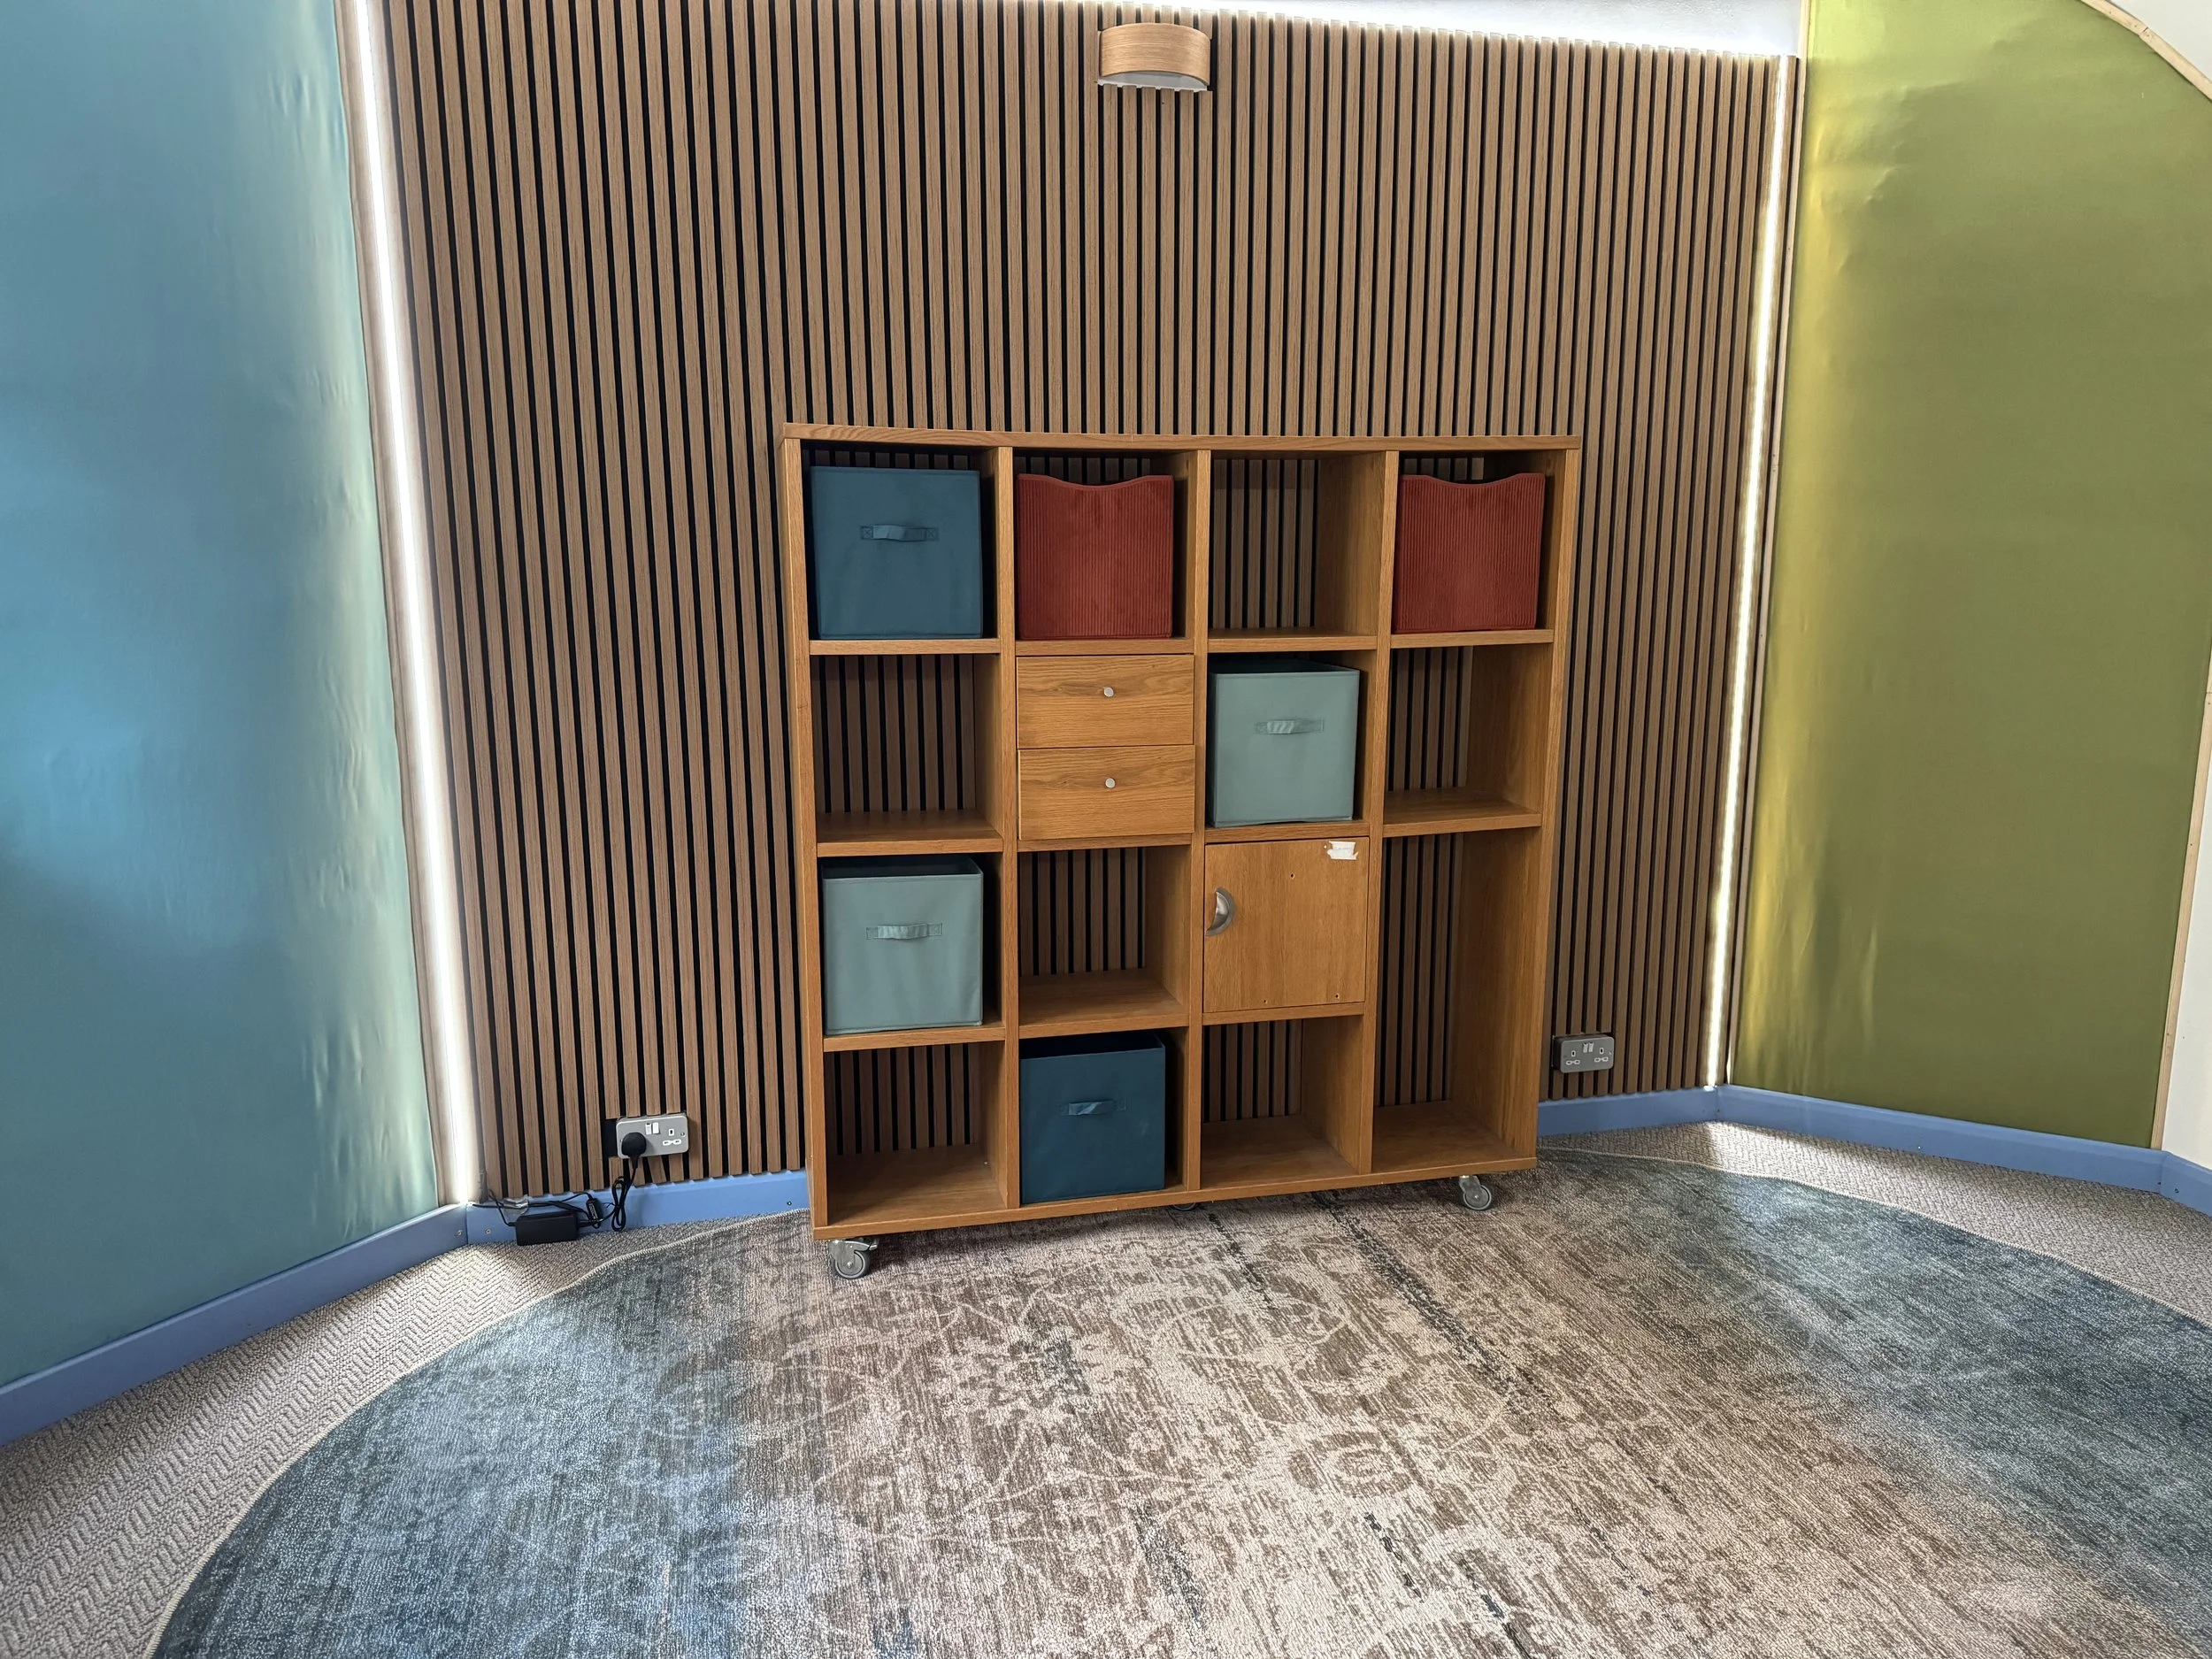
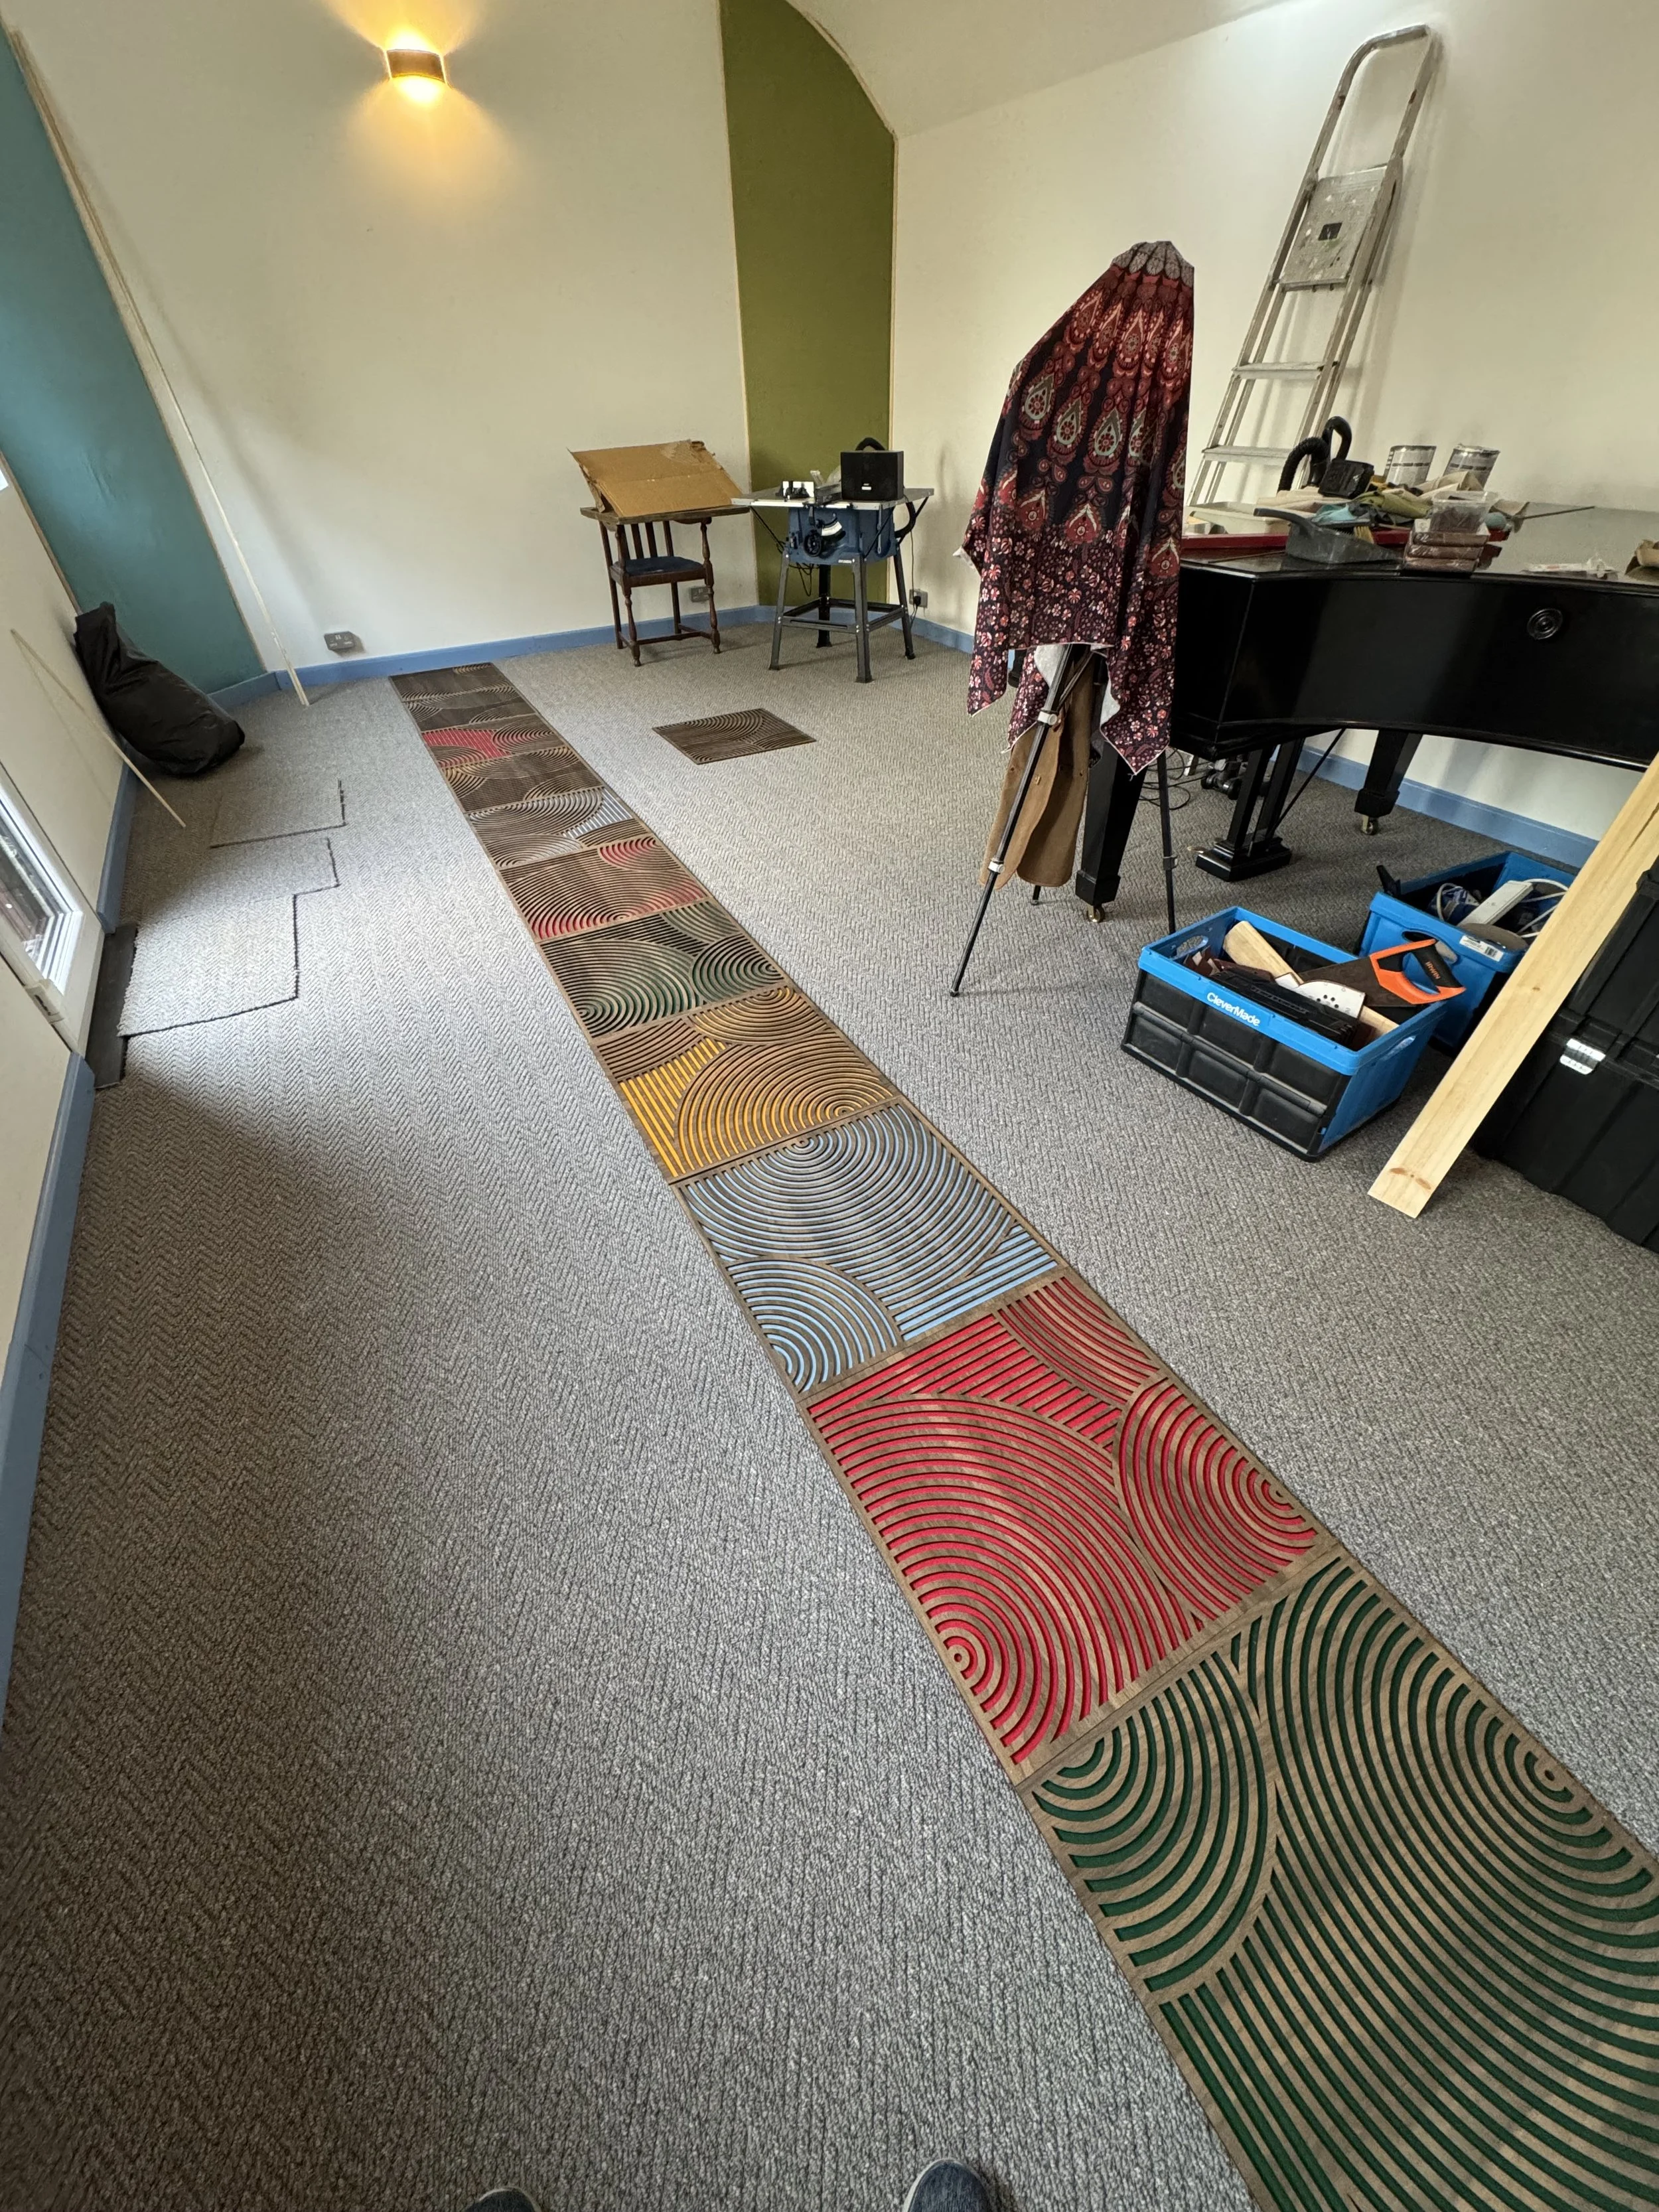
Out came the storage shelves that had sat in the garage for a year. And a rug that seemed to fit the space perfectly. It would never look this tidy again.
The final part of the acoustic treatment chapter was a project I had pondered over for a couple of months. I had seen online some very expensive ceiling/wall panels made by specialist manufacturers, that both diffused sound and also looked very pretty. I couldn’t really afford what they were priced at, so I decided to make one myself. I bought 900 triangular blocks of wood from a dodgy Chinese website and a 1.2m x 1.2m sheet of plywood (9mm thick). I fished out all the half empty cans of paint from the garage and set about making my own.

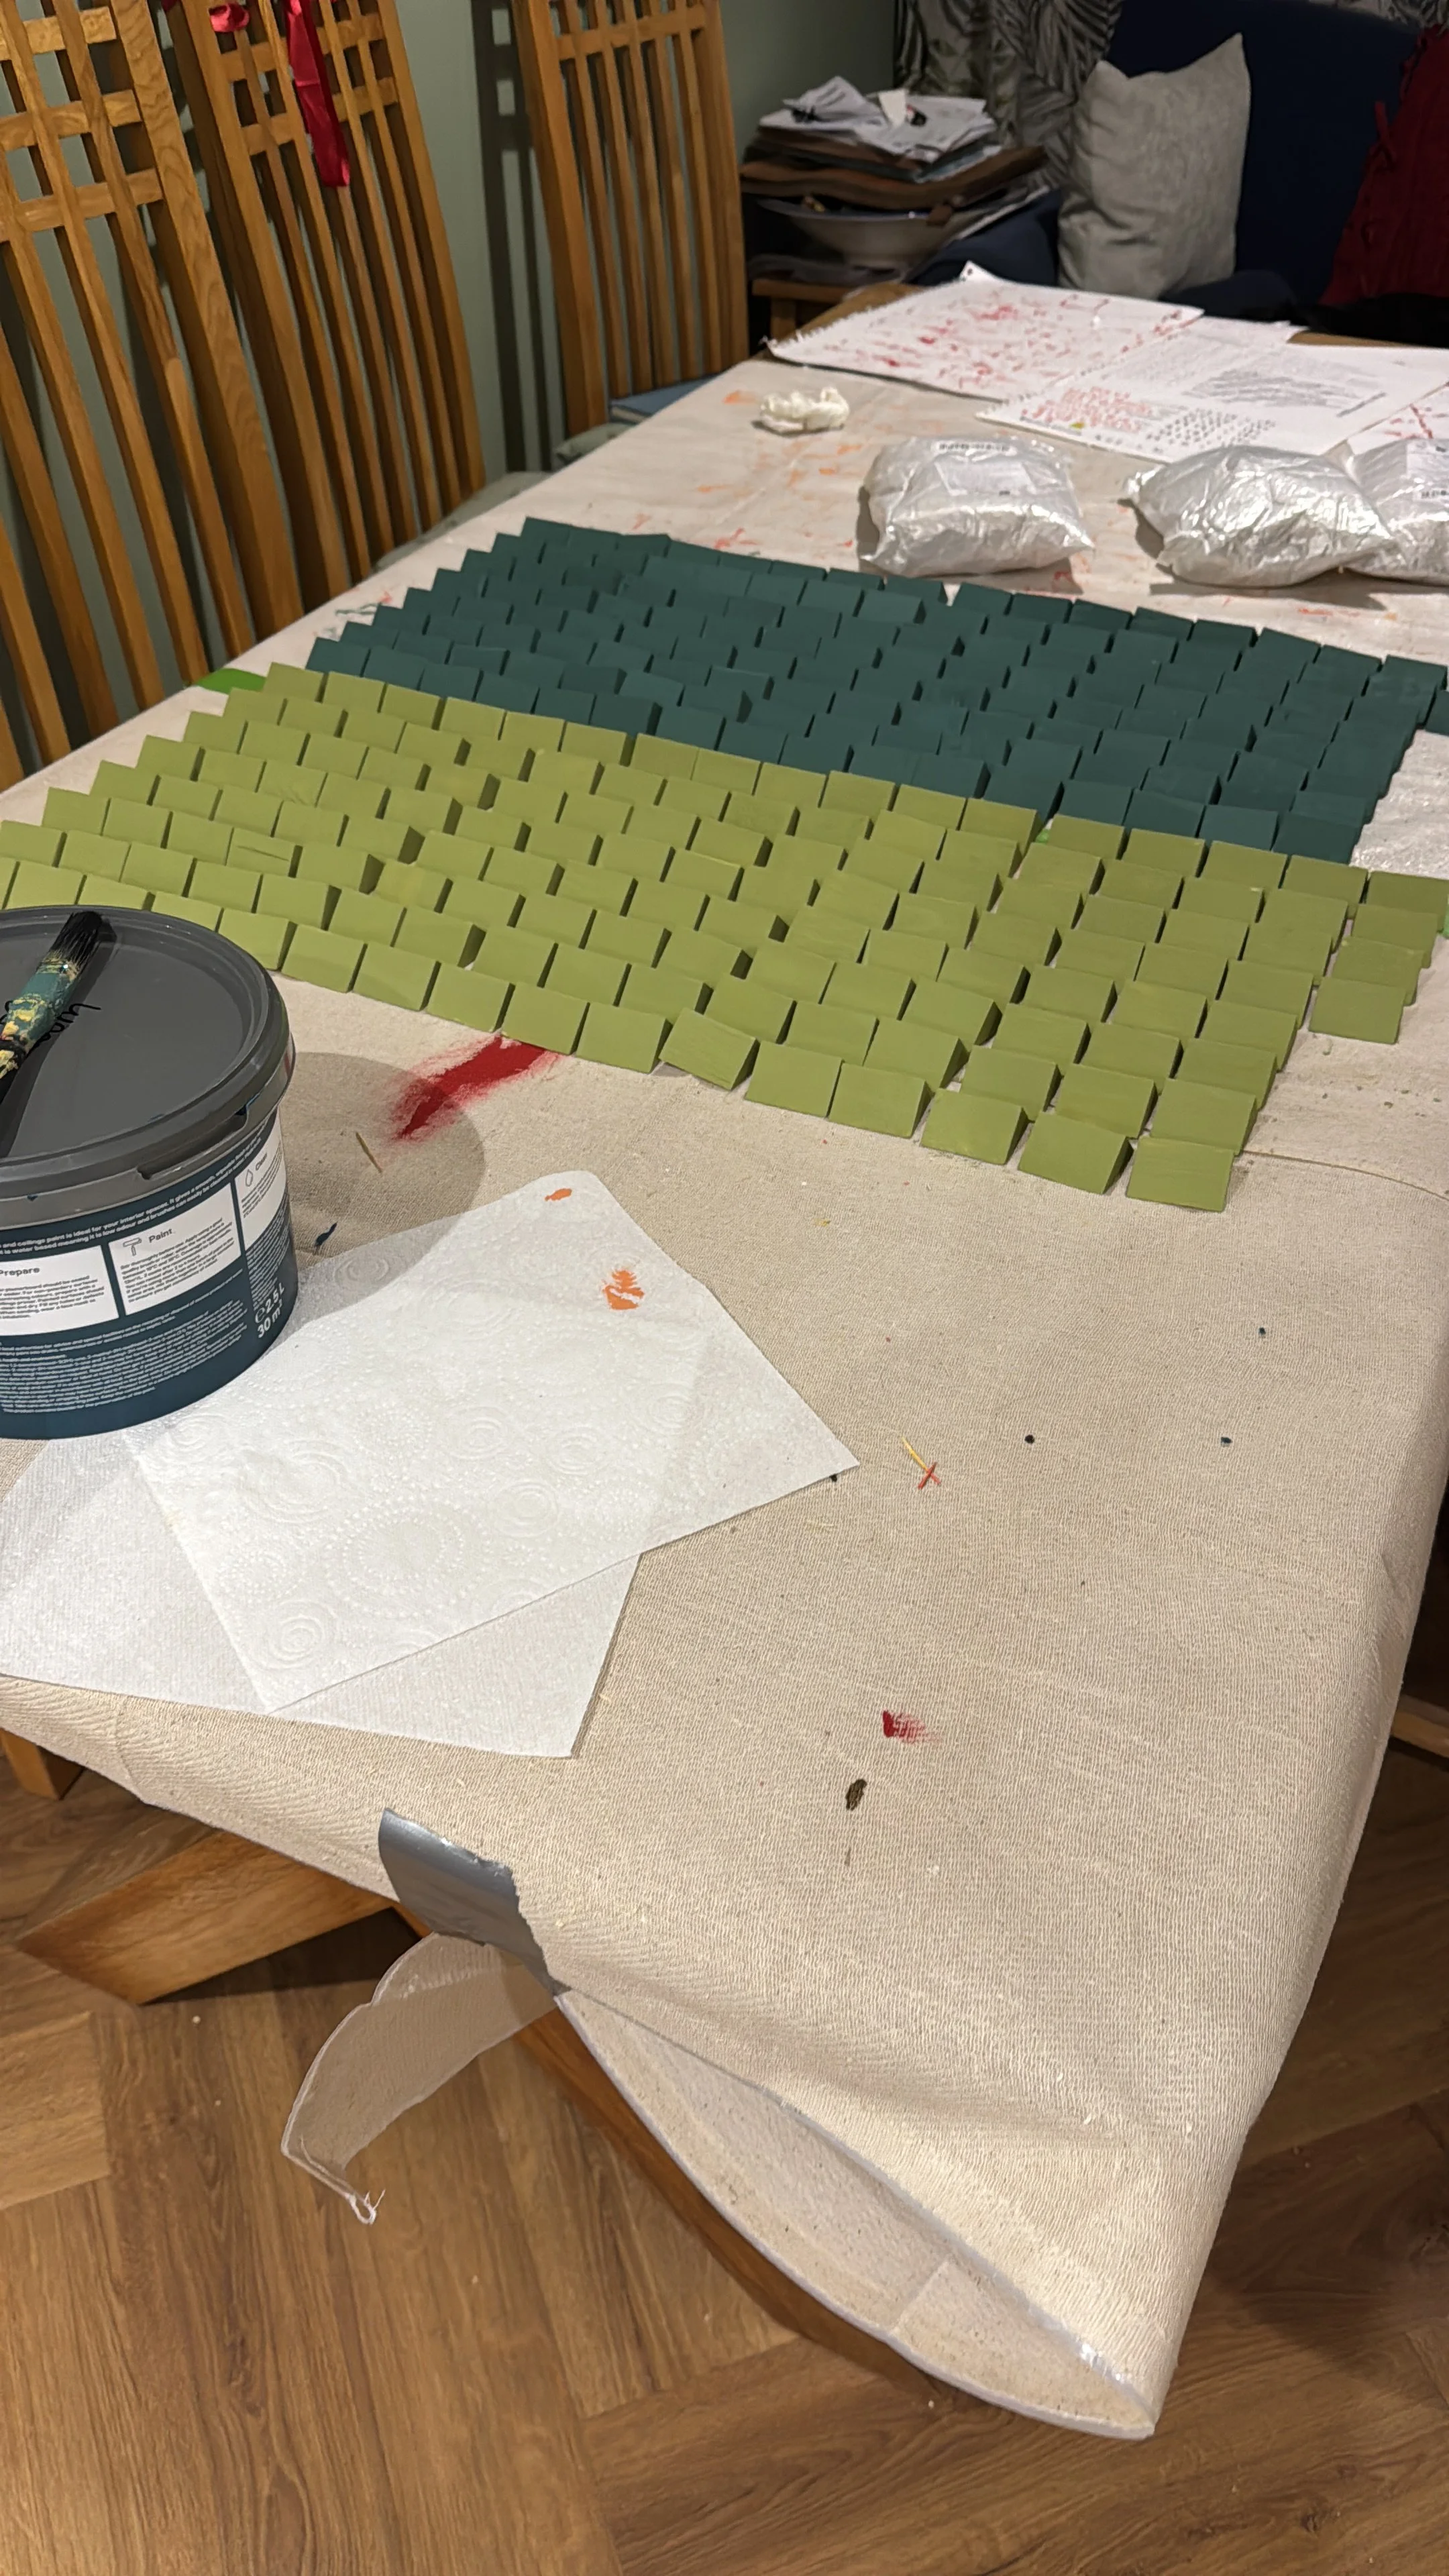
Painting them individually was, to say the least, a boring process. But during that time I listened to every album by Radiohead from Pablo Honey to In Rainbows. I shall pick it up from The King of Limbs later this year I guess.
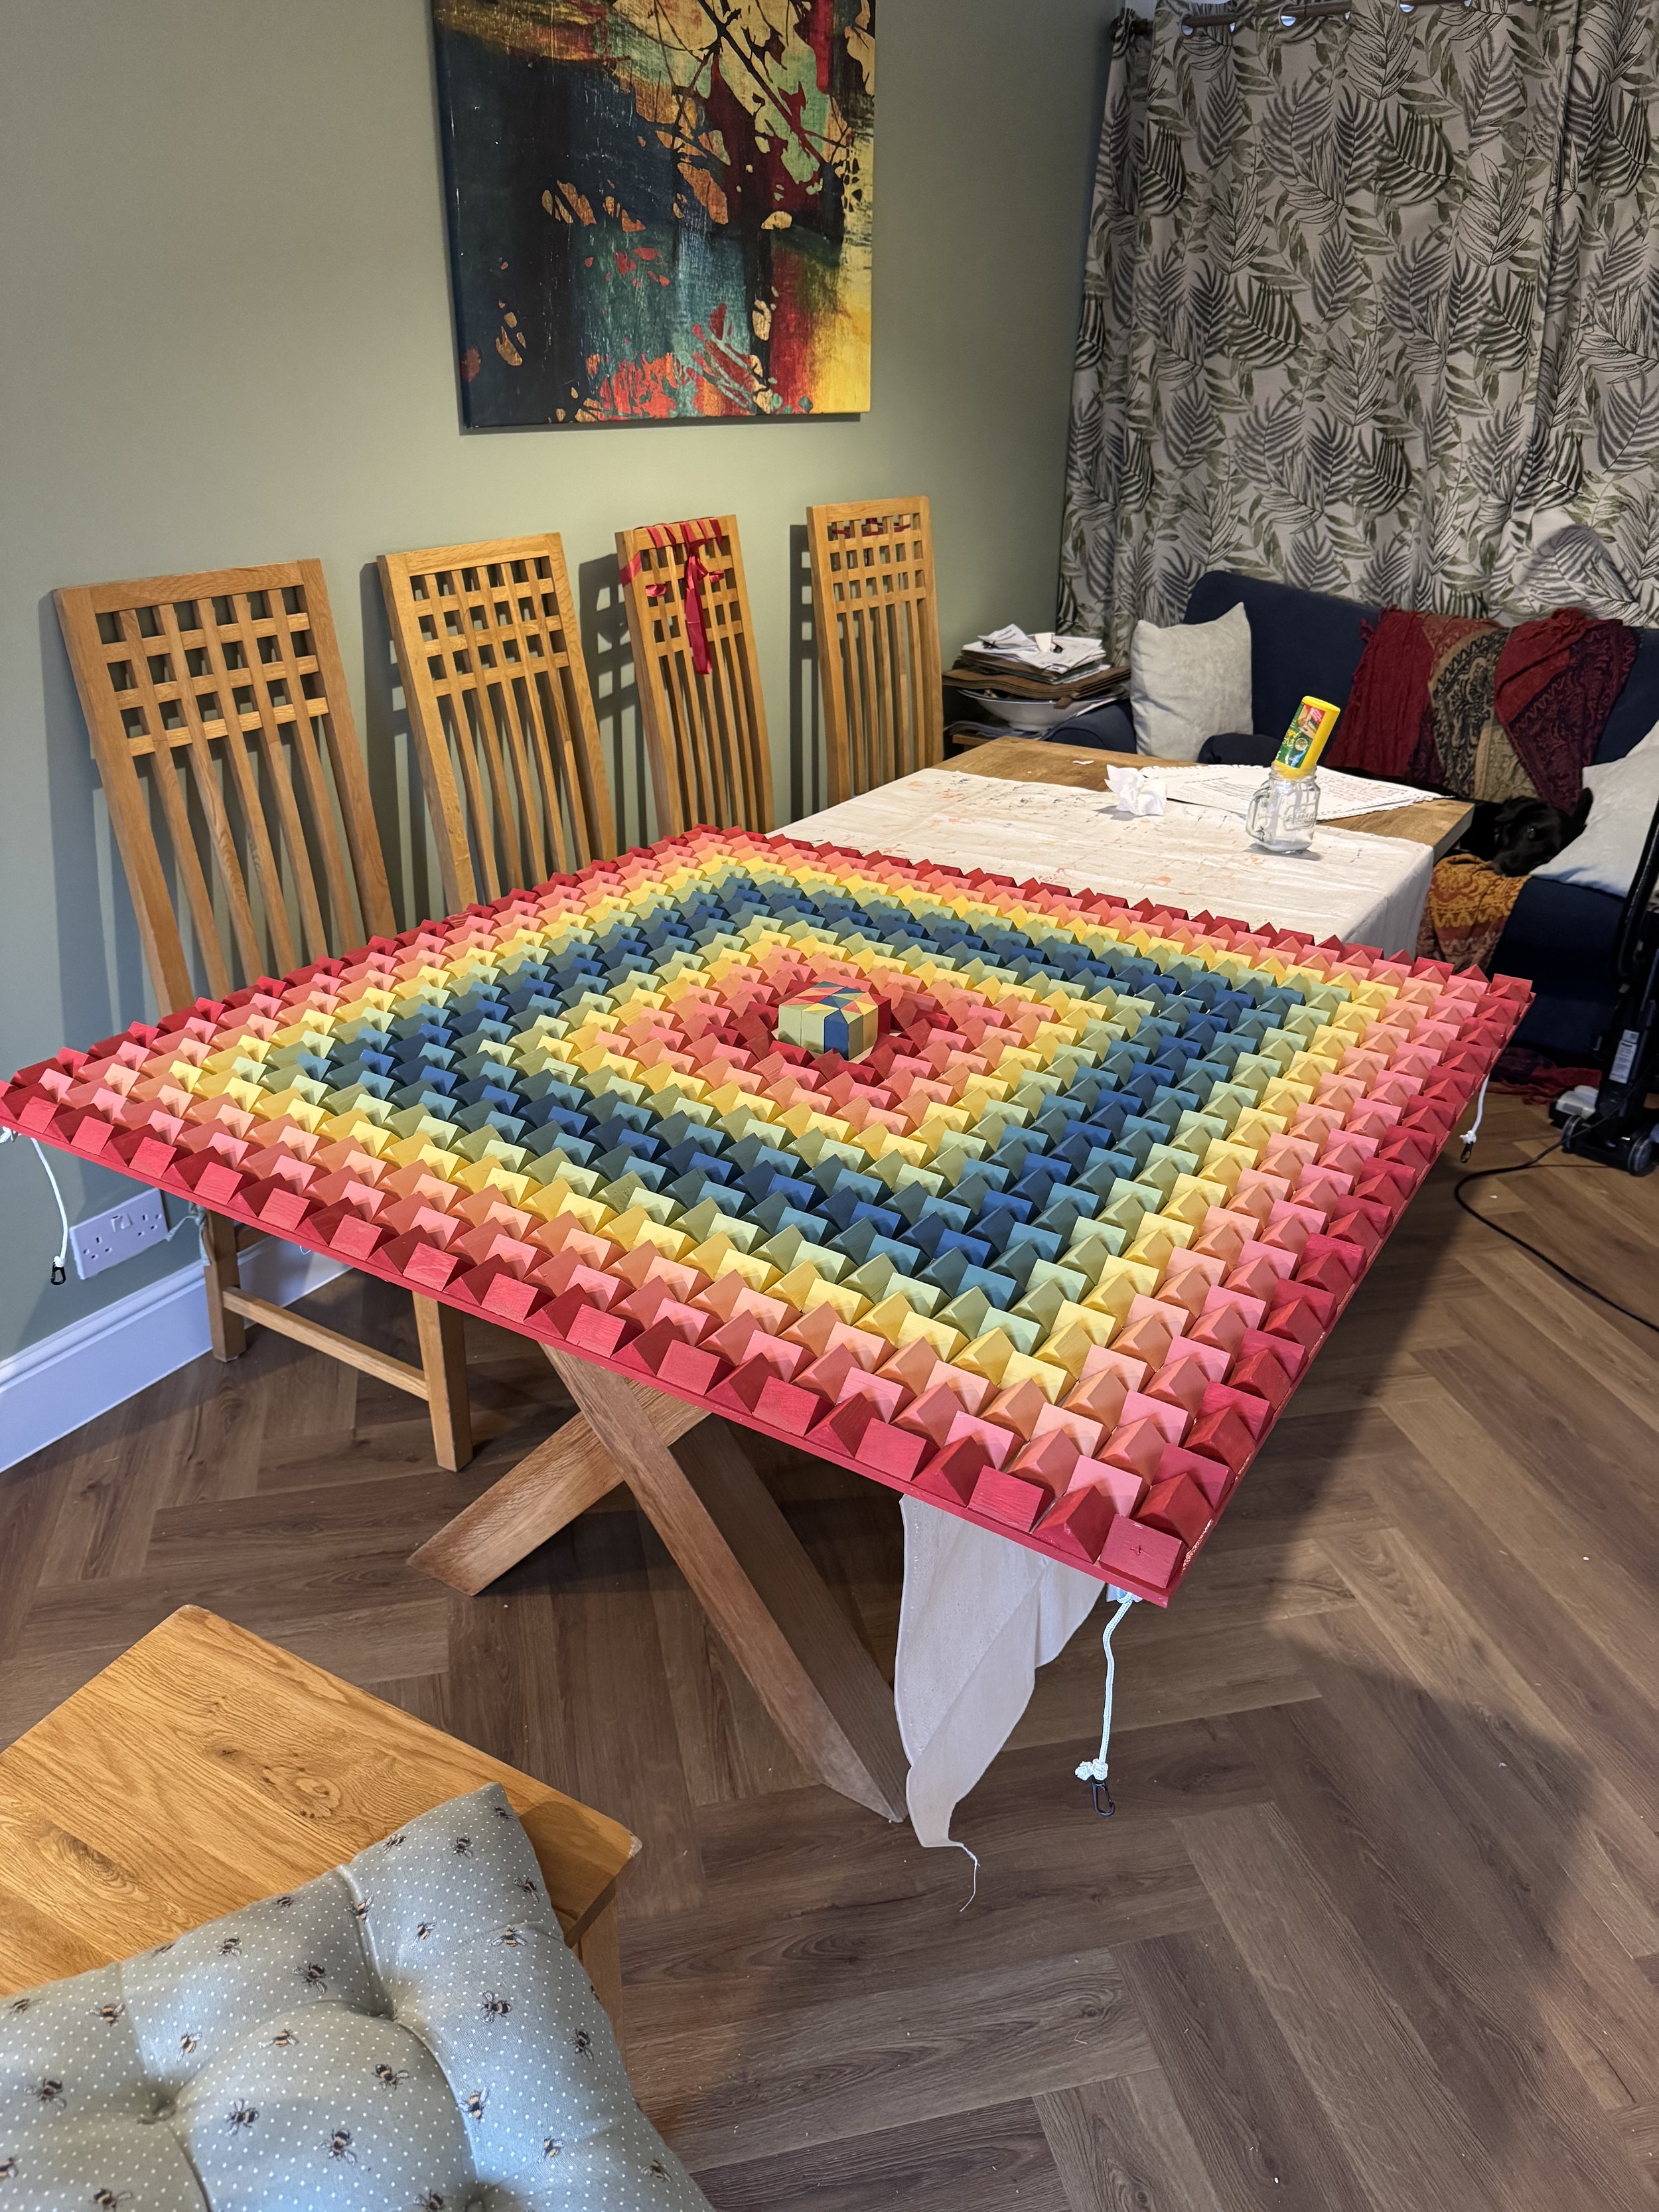
The finished panel was admittedly a little more vibrant than I anticipated but a static picture does not do it justice. As you move around it, its vibrancy changes. But if was to make another I would calm down a little on the colour, for sure.
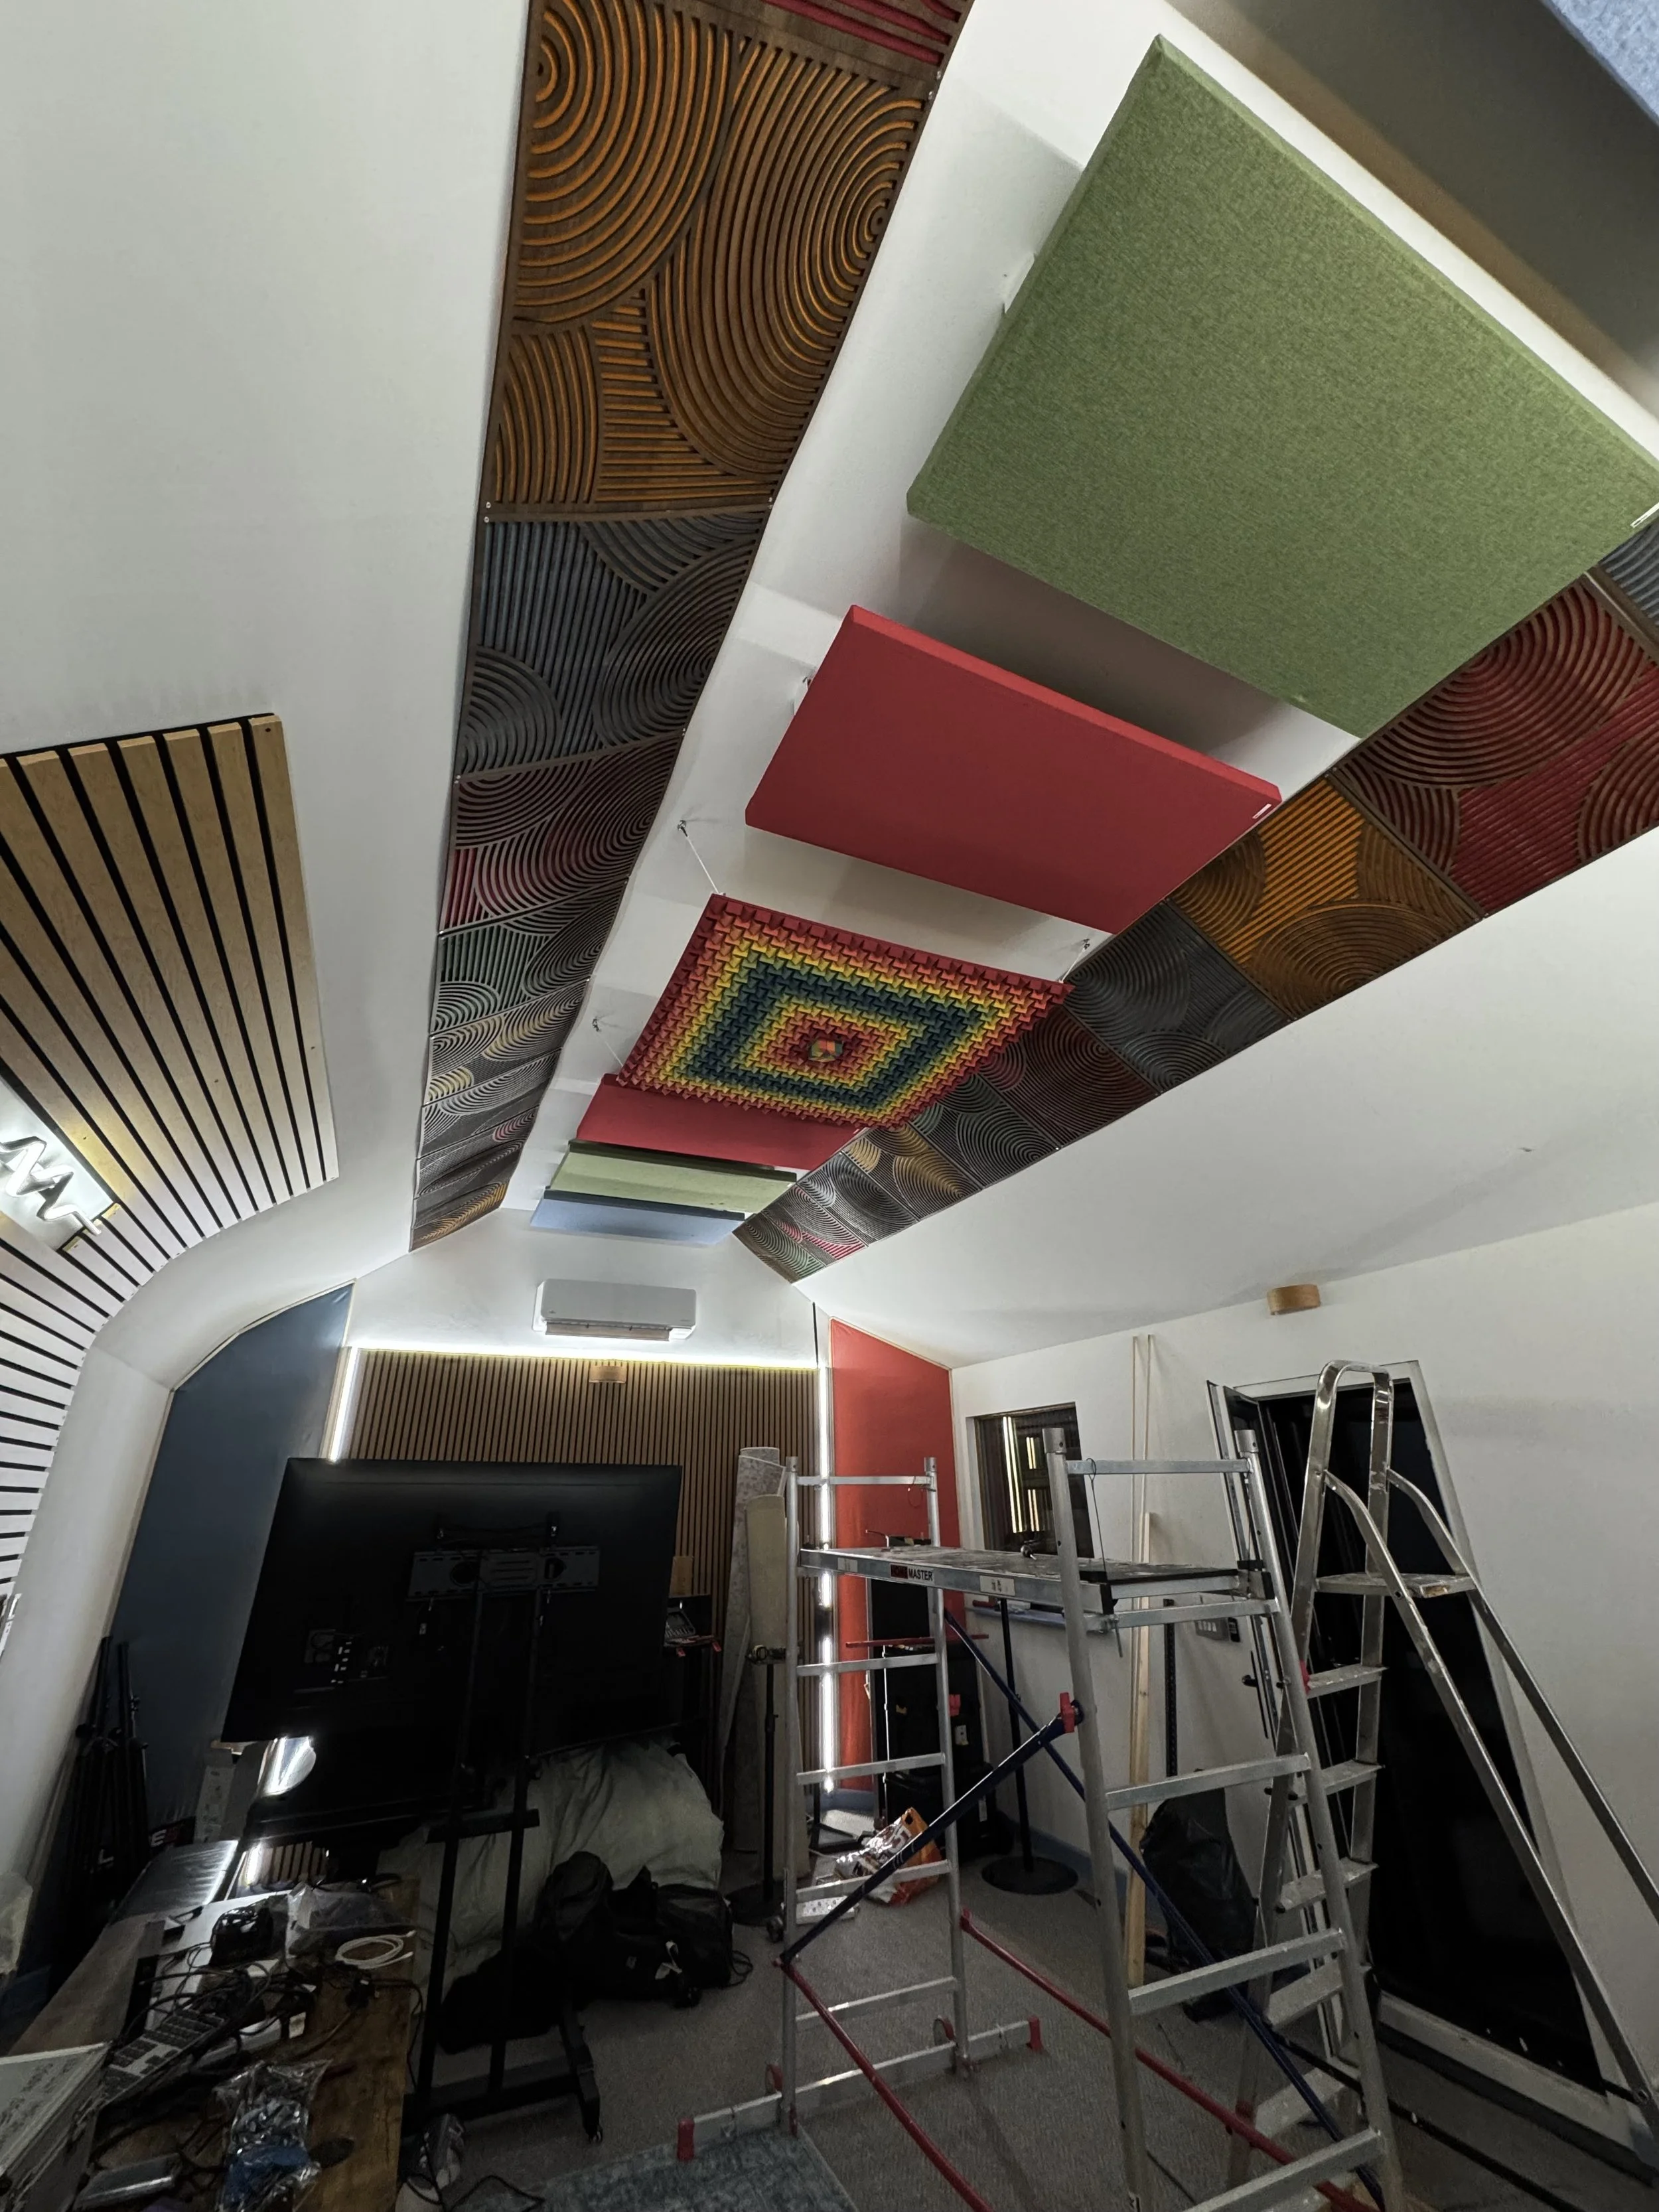
The hooks were screwed deep into the ceiling and through the furring bars that were around 60mm behind the surface. I have learnt to love this artwork that doubles as a scatterer of sound!
So what did I learn from this project?
If I could do anything again it would be to get the air-conditioning unit pipework in place at the same time as the electrician does the initial wiring. The pipes to the outside are the only ‘holes’ for sound to escape through, that exist in the building.
I’d also recommend dimensions of 8m x 5m for a studio that includes a grand piano. My Bechstein uses a lot of floor and along with a drum kit, the remainder of a 5 piece is crammed in a little. But I didn’t have the luxury of being able to build a studio that large unfortunately.
If you want to build a separate control room, maybe even more floor area would be needed. I myself want this to be a live room primarily. The tracking will have to be done with headphones and local knowledge, but again, such luxuries are things I wanted but could not have.
Apart from that, as long as you have time, I would highly recommend doing this type of project yourself and if you need any advice on how to achieve it, I would always be happy to give you my thoughts.
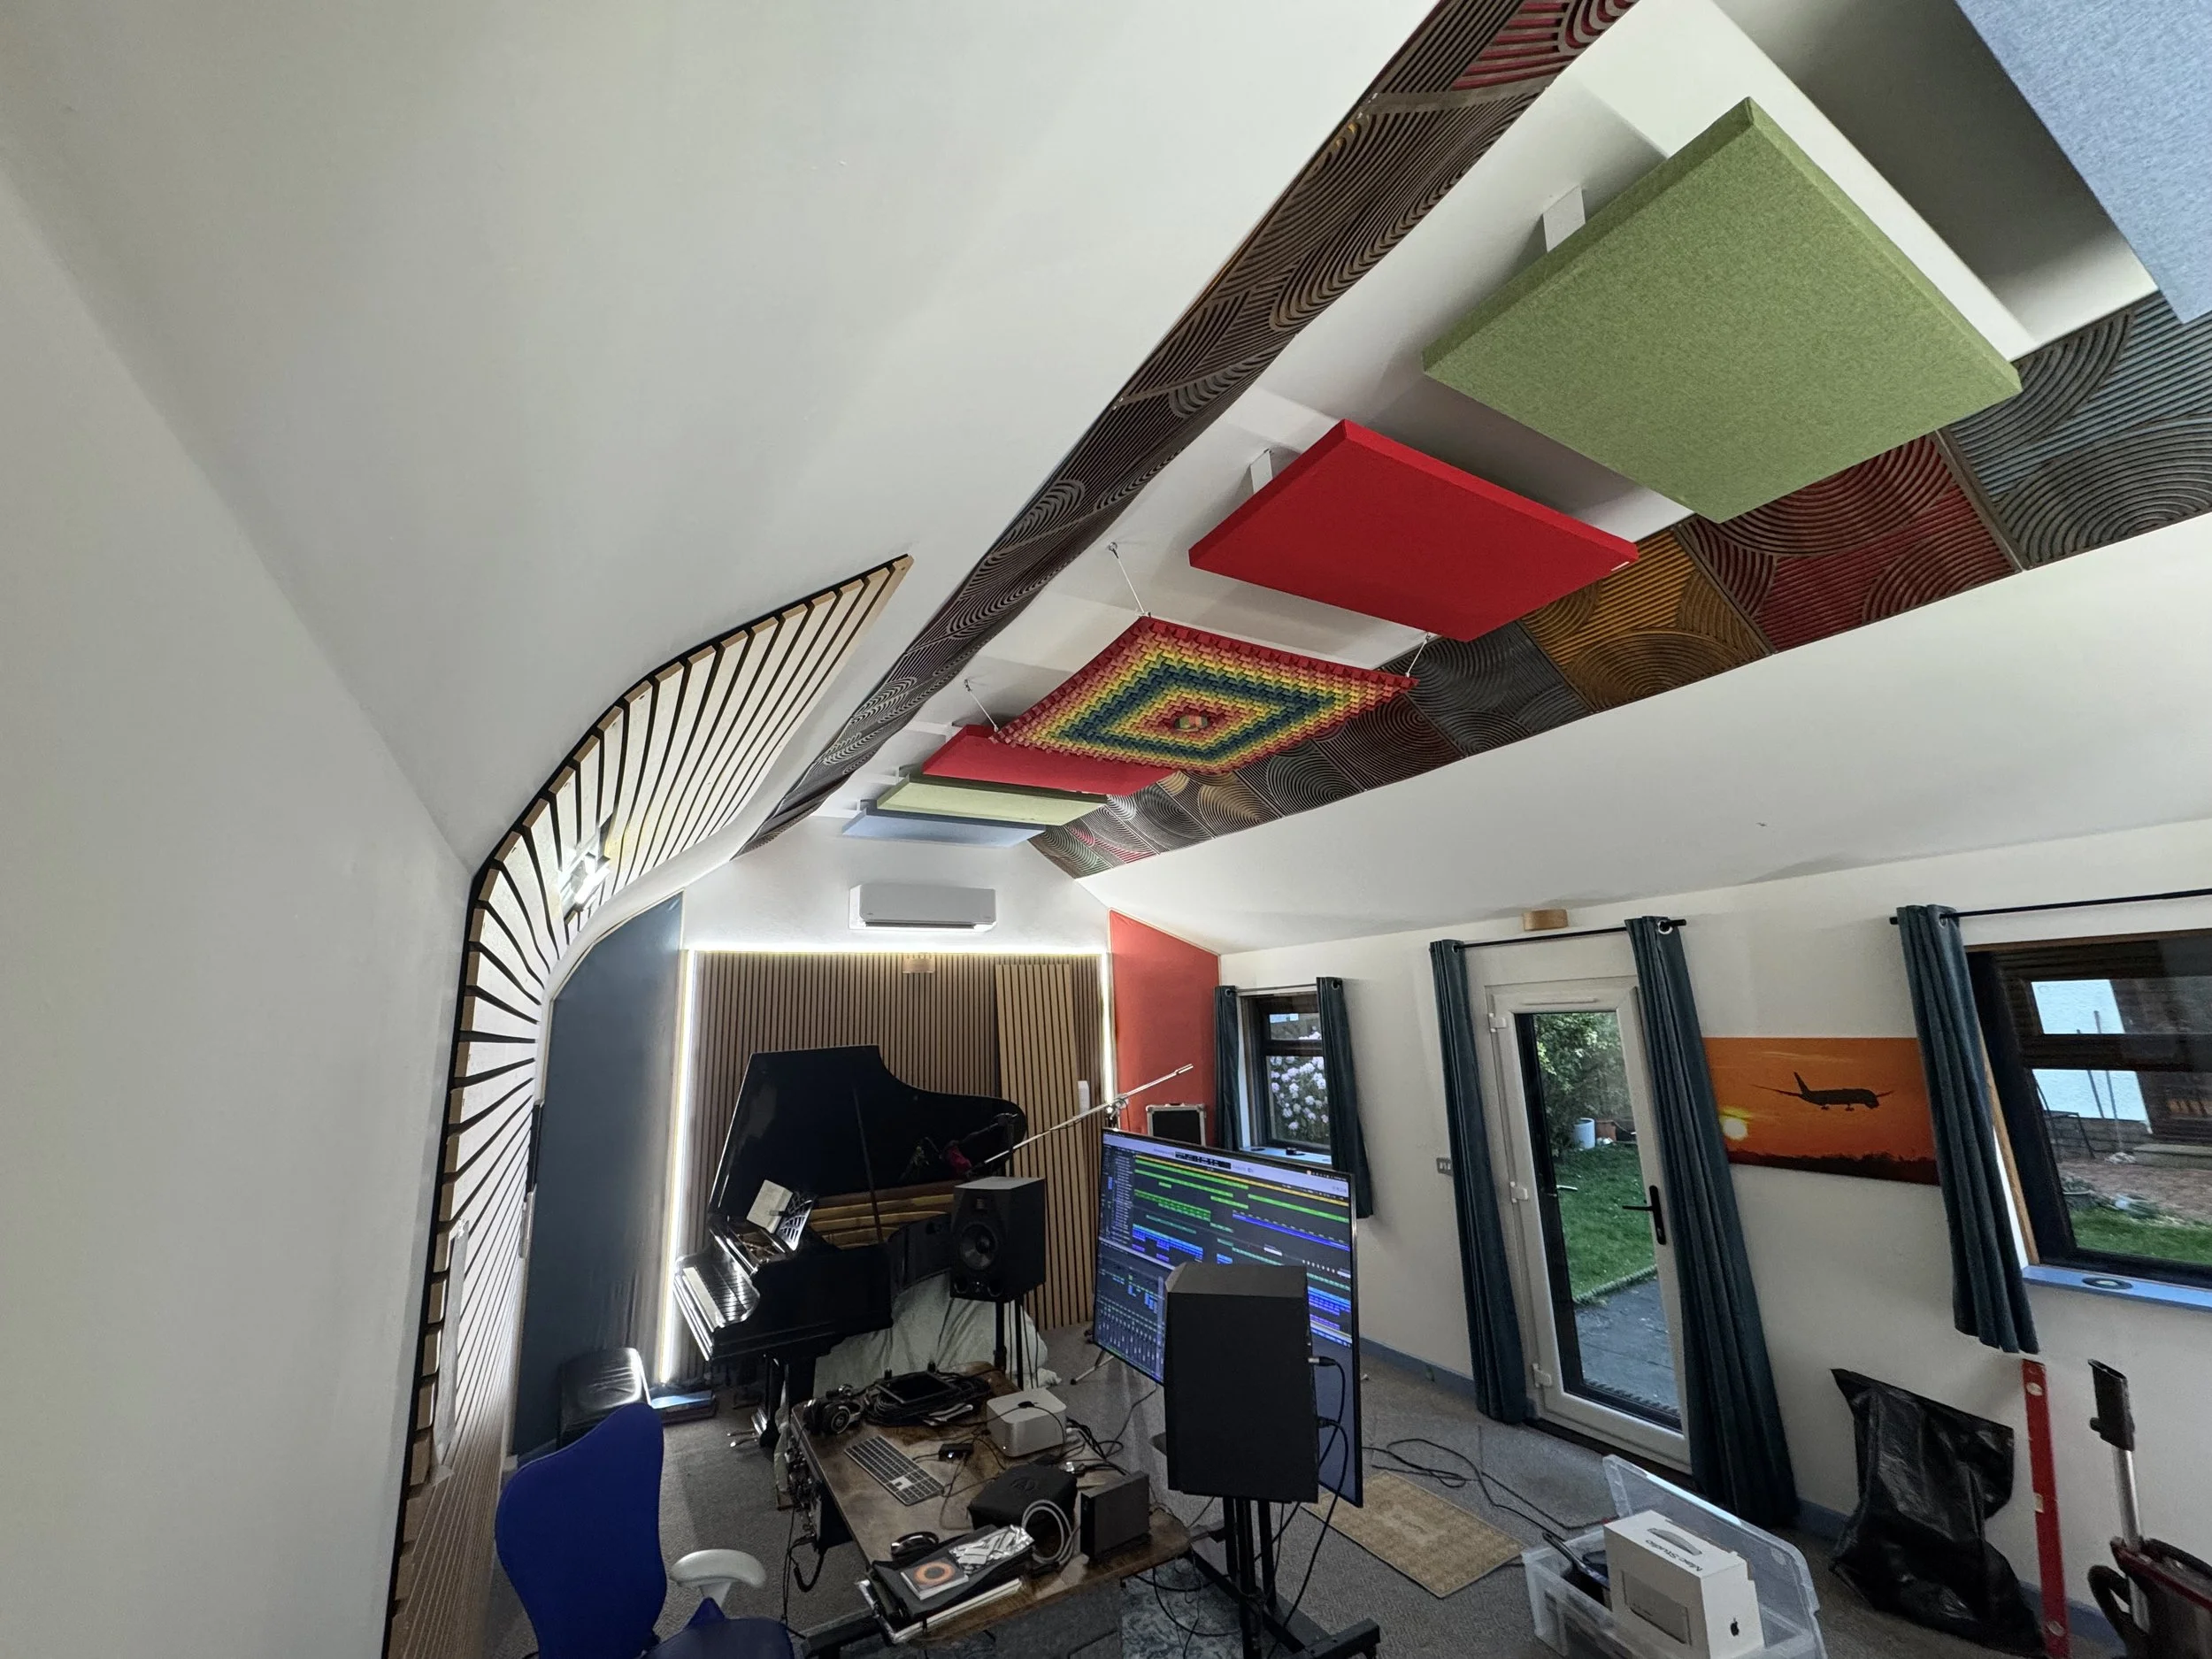
And here is the final image (for now). Taken just moments after I plugged it all in after a year of all my kit sitting in storage. There were gremlins. Yes the screen is enormous. But it was a second hand Samsung 4k TV that I think you’ll agree does wonders for working with a DAW! I don’t intend to do true colour Video so it’s a win.
I hope to have many a joyful moment in this room and building much of it with my own hands has been a brilliant experience for my soul. I am very aware of the privilege I have to be able to afford to do such a thing. I never intend to use this place commercially, but I hope to work more with musicians in the area over the next year or two, now I have place to write, perform and record in. Drum kit coming soon! Thanks for reading to the end.
Joe